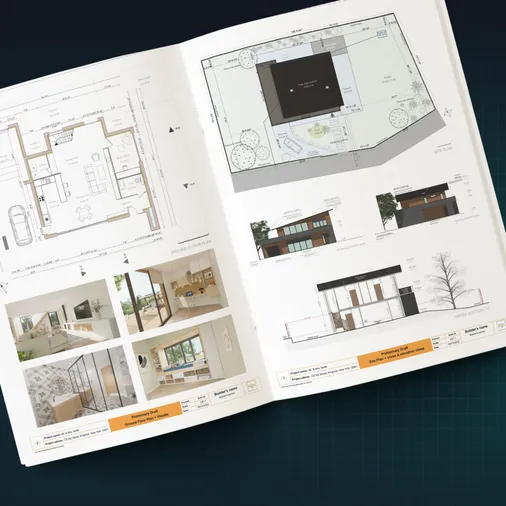
Avoid costly layout mistakes, impress clients with 3D visuals, and design kitchens faster.
Designing a kitchen is one of the most complex challenges in residential design.
Every decision connects to the next, whether you’re handling a new build or planning kitchen remodel.
The kitchen layout shapes the workflow, which affects daily life and determines how happy your clients will be the moment they move in.
For builders, remodelers, and contractors, a poorly planned kitchen is costly to fix and impossible to ignore once it’s built.
Clients struggle to picture a space from flat plans alone, which stalls decisions and drags out timelines.
That’s why knowing how to design a kitchen layout, and having the right tools to present it, makes all the difference.
This guide covers kitchen design fundamentals, the work triangle, all six major layout types, and a step-by-step walkthrough for drawing a complete kitchen floor plan with Cedreo.
Key Takeaways
- The kitchen work triangle (connecting the sink, stove, and refrigerator) is the foundation of efficient kitchen layout design, with each leg between 4 and 9 feet.
- Each of the six main kitchen layout types (one wall, galley, L-shaped, U-shaped, G-shaped, and island) has specific strengths based on room size and client cooking habits.
- Matching a kitchen floor plan to how your client actually uses the space is the best way to prevent expensive remodel mistakes.
- With Cedreo, you can design a complete kitchen floor plan, customize materials and cabinets, and generate photorealistic 3D renderings in hours, not days.
Why trust us? Here at Cedreo, we’ve got 20+ years of experience working with housing pros in the home design space. So we know what it takes for builders and contractors to create kitchen designs that help them land more clients!
See How You Can Create Complete Projects with Cedreo
Plans – Get site plans, 2D floor plans, electrical plans, cross sections and elevation views — with all the technical details you need for a comprehensive project overview.
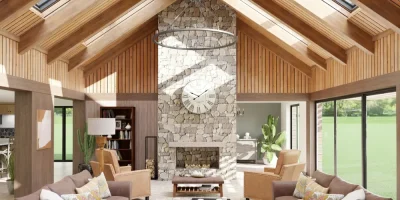
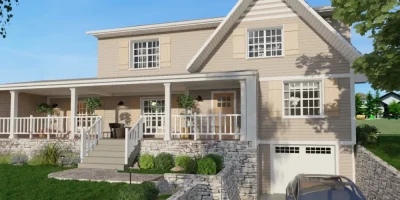
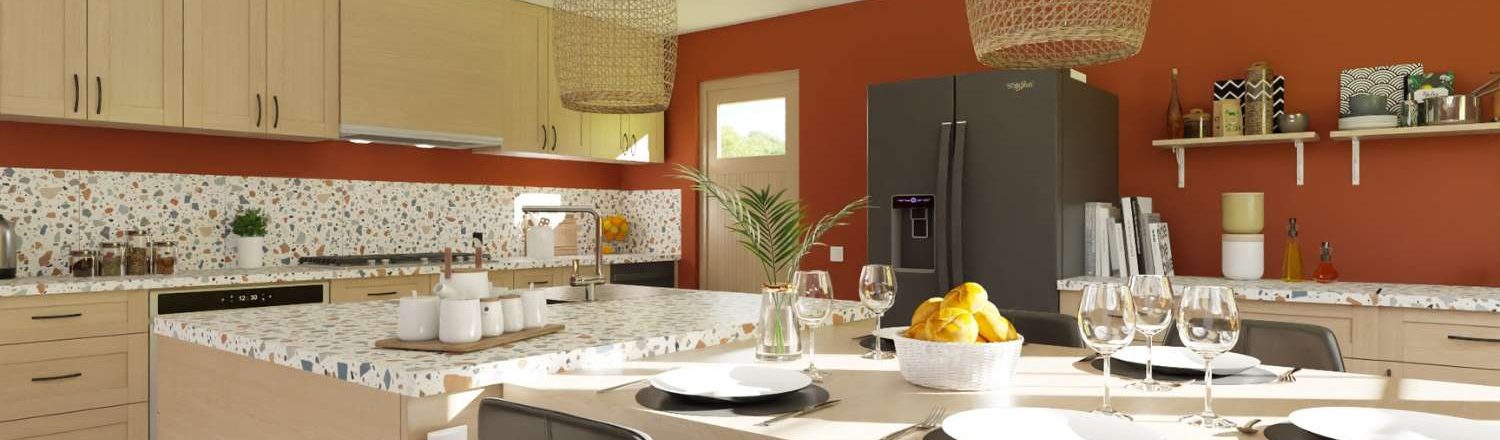
3D Visualizations – Use interior and exterior 3D renderings as well as 3D floor plans to help clients understand the finished project.
Documentation – Manage all your visual documents in one place, so it’s easier to present and sell your projects.
No credit card required, no commitment
What Makes a Good Kitchen Layout – Expert Tips
A kitchen is different from every other room in the house.
It’s a working system, and the sink, stove, refrigerator, cabinets, counter space, and pathways all have to function together.
Get it wrong and you end up with a kitchen that feels cramped and frustrating to use every day.
That’s why good kitchen layout design starts with two fundamentals:
- Workflow efficiency
- Traffic management.
Workflow efficiency is about how easily someone moves between tasks during food prep and cooking.
For example, if the sink and stove sit on opposite sides of the room with no kitchen counter between them, the layout fights the cook every time.
Pathways between work areas should be at least 42 inches wide for single-cook kitchens and 48 inches where multiple cooks share the space.
So before planning any kitchen floor plan, gather these inputs from your client:
- Room dimensions and the locations of fixed elements (windows, doors, plumbing, and electrical)
- The client’s cooking habits: do they cook daily or entertain large groups?
- Storage priorities: everyday dishes, pantry items, and large appliances, something else?
- Whether the kitchen connects to a dining area or open living space
Window placement also affects planning decisions.
Windows determine where natural light enters and which walls have room for upper cabinets.
Skipping this conversation is one of the most common planning mistakes pros make.
PRO TIP! Always confirm the ceiling height early in the kitchen planning process. Tall cabinets and tall units that reach the ceiling maximize storage space, but only when there’s enough clearance.
The Kitchen Work Triangle (and When to Use Zones)
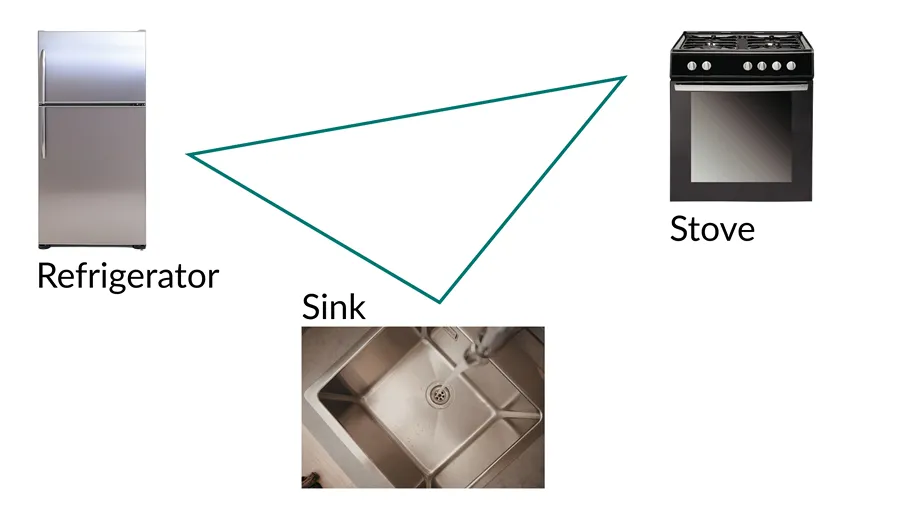
The work triangle connects the three primary work centers, the sink, the stove, and the refrigerator, in a configuration that keeps movement short and efficient.
The Rules of the Work Triangle
For a functional kitchen work triangle, follow these core guidelines:
- Each leg of the triangle should be between 4 and 9 feet long.
- The total perimeter should fall between 13 and 26 feet.
- No leg should be interrupted by a major traffic path or obstruction.
IMPORTANT! Always check the door swing radius of each appliance during the planning stage (catching this on paper costs nothing).
For example…placing the refrigerator and dishwasher too close together.
When both doors swing open at the same time, they create a collision that disrupts the kitchen workflow.
When to Use Zones Instead
The work triangle works well in smaller kitchens with one cook.
In larger or open-concept kitchens, the triangle distances can become impractically large.
That’s where a zone-based approach makes more sense.
The 5-zone method divides the kitchen into five functional areas:
1. Consumables zone: refrigerator, pantry, and food storage
2. Non-consumables zone: everyday dishes, pots, and cooking tools
3. Cleaning zone: sink, dishwasher, and trash access
4. Prep zone: counter space, cutting boards, and additional prep area
5. Cooking zone: range, wall oven, and stove
Zones are especially useful in kitchens that accommodate multiple cooks.
Each person can work within their own zone without creating traffic conflicts.
For larger kitchens or open layouts (especially those with a large island) zones often give clients better daily functionality than a strict triangle approach.
6 Main Kitchen Layout Types: Which Is Best for Your Clients?
Choosing the right kitchen layout depends on room size, shape, and how the client uses the space.
Here’s a quick reference before we dig into each type:
| Layout | Min. Room Size | Storage | Multi-Cook | Open Concept | Best For |
| One-wall | Very small | Low | Poor | Excellent | Studios, apartments |
| Galley | 7×10 ft | Medium | Fair | Poor | Narrow rooms, efficiency |
| L-shape | 10×10 ft | Medium-High | Good | Excellent | Most homes, open plans |
| U-shape | 10×13 ft | High | Good | Poor | Serious cooks, max storage |
| G-shape | 12×12 ft | Very High | Excellent | Fair | Large homes, entertaining |
| Island | 12×14 ft | High | Excellent | Good | Large kitchens, social |
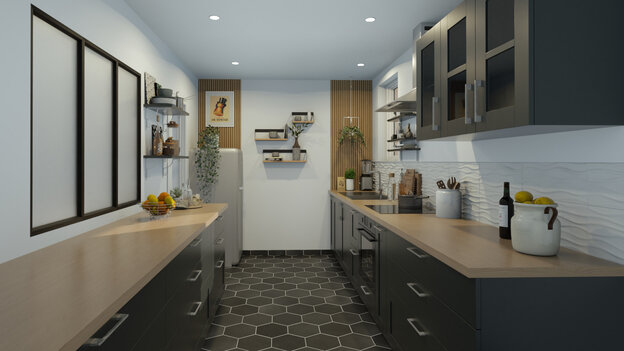
One Wall Kitchen
A single wall kitchen places all elements such as cabinets, appliances, and counter space, along one wall.
The main benefit of a single wall kitchen is that everything stays in one linear run, which maximizes space and plumbing efficiency in very small rooms.
Works well when:
- The kitchen is in a studio or very small footprint where space is extremely limited
- The client doesn’t cook frequently or need significant storage space on multiple walls
Doesn’t work as well when:
- Multiple cooks share the kitchen, since a single wall limits workspace and creates traffic issues
- The client needs substantial storage or wants a defined kitchen work triangle
*Get more tips for small spaces with this article on small kitchen design.
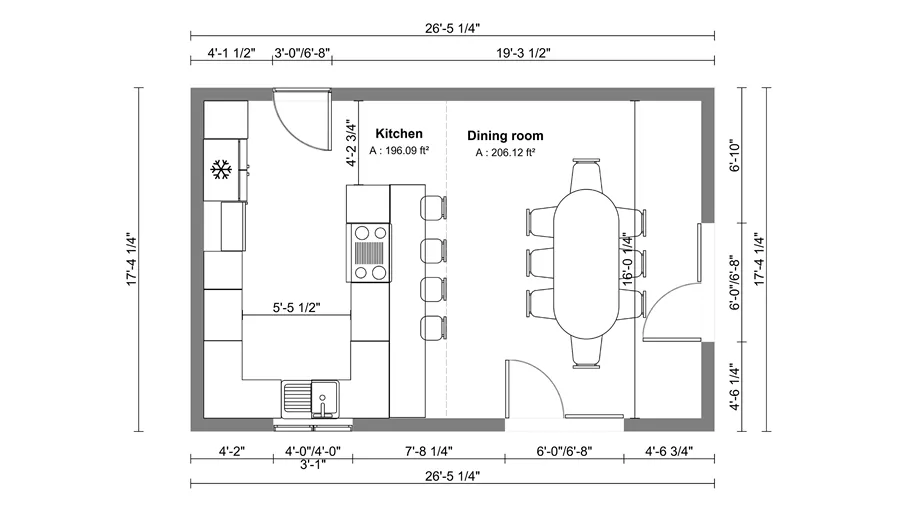
Galley Kitchen
Galley kitchens run along two parallel walls, creating a corridor between them.
Galley kitchens are compact and efficient by design.
The galley kitchen layout puts all work centers within a tight zone along two parallel walls, minimizing movement between the sink, stove, and refrigerator.
Works well when:
- The room is long and narrow and one primary cook uses the kitchen
- Efficiency is the top priority and social open space is not a requirement
Doesn’t work as well when:
- Multiple cooks need to use the space without crossing paths
- The client wants an open layout that flows into a dining area or living room
L-Shaped Kitchen
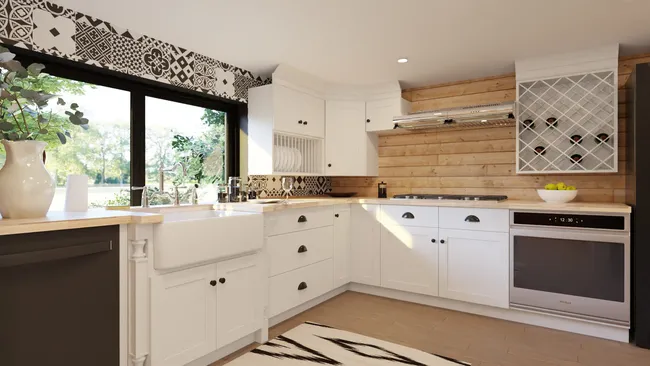
L-shaped kitchens use two adjoining walls in an L configuration, freeing up floor space in the center of the room.
The L shaped kitchen layout works in both smaller and larger rooms and can accommodate a breakfast nook or dining area in the open corner.
Works well when:
- The client wants an open layout connecting to a living or dining space
- There’s potential to add a kitchen island later for extra space and more counter space
Doesn’t work as well when:
- Corner space isn’t planned carefully since deep corner cabinets can be difficult to access without the right storage options
- The room is too small for the L corner to function without cramping the workspace
U-Shaped Kitchen

The U-shaped kitchen wraps cabinetry and appliances around three walls in a U shape, delivering more counter space, storage, and a natural work triangle all within easy reach.
Works well when:
- The client cooks frequently and needs a continuous, large workspace
- Multiple cooks need to share the kitchen without crossing each other’s paths
Doesn’t work as well when:
- The room is too small, since a U shape in a tight space quickly feels boxed in
- The client wants an open layout or regular foot traffic passes through the kitchen
G-Shaped Kitchen
The G-shaped kitchen is a variation of the U shape with an added peninsula on one of the adjoining walls.
G shaped kitchens maximize storage and prep space, and combine upper cabinets, standard cabinets, and tall cabinets in one cohesive design.
Works well when:
- The client needs maximum storage and workspace, and frequently cooks or prepares elaborate meals
- A built-in breakfast nook or seating can integrate naturally with the peninsula
Doesn’t work as well when:
- The room isn’t large enough, since the G shape needs significant square footage to avoid feeling cramped
- Natural light is limited, since the configuration encloses more of the room
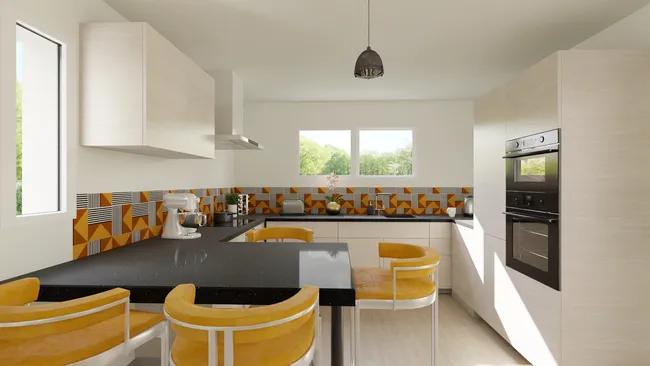
Island Kitchen
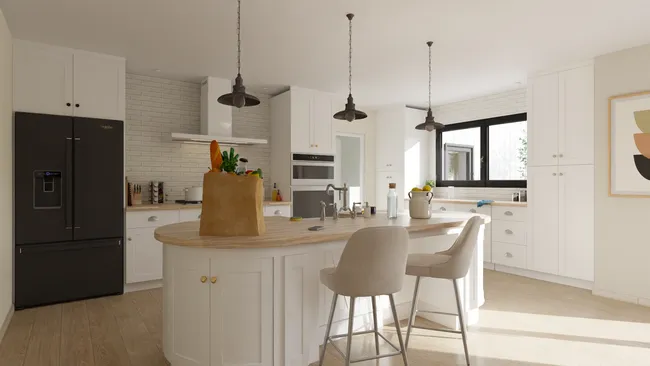
An island kitchen adds a freestanding kitchen island in the center of the space, serving as an additional prep area, casual dining counter, or social hub.
A large island works best in open-plan kitchens with 42 to 48 inches of clearance on all sides.
Works well when:
- The room is large enough to maintain comfortable clearance around the kitchen island on all sides
- The client entertains frequently and wants the kitchen to connect to living areas with more counter space
Doesn’t work as well when:
- The footprint is too small for comfortable circulation and the island becomes an obstacle, not an asset
- The island disrupts the existing work triangle rather than enhancing kitchen workflow
How to Draw a Kitchen Floor Plan: Step-by-Step with Cedreo Home Design Software
Creating a kitchen layout with a kitchen planner like Cedreo is a breeze.
Sign up now for the free version so you can follow along with these steps.
1. Create Your Floor Plan
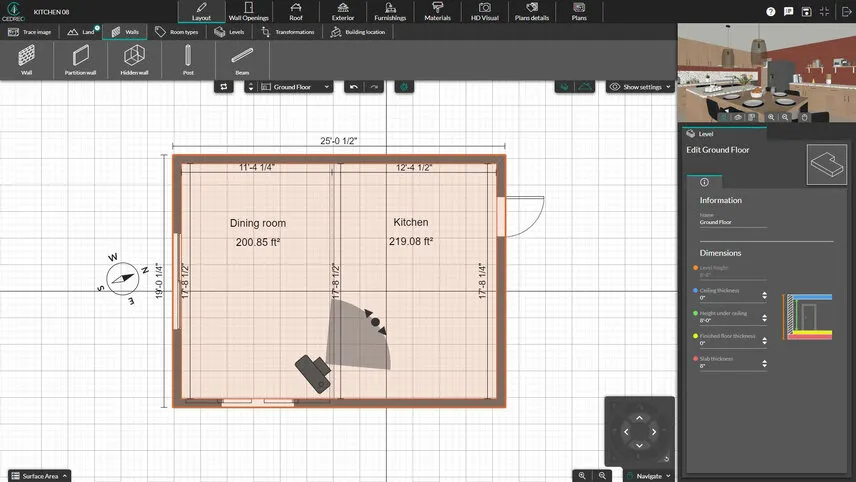
Start by creating your kitchen layout design using Cedreo’s intuitive interface.
Whether starting from scratch or working from an existing space, the drag-and-drop tools make it easy to add walls, doors, and windows.
Detailed Steps:
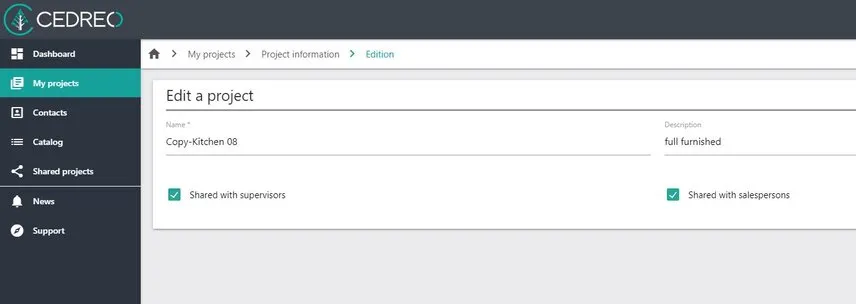
1. Open a new project in Cedreo.
2. On the Project Information page, click the Draw button.
3. In the Layout tab, draw your walls (measurements update in real time so you can be precise)
4. For open concept layouts, use the Hidden Wall tool to draw invisible walls that divide the dining space from the kitchen.
5. Go to the Wall Openings tab to drag and drop doors and windows into place.
2. Add Dimensions
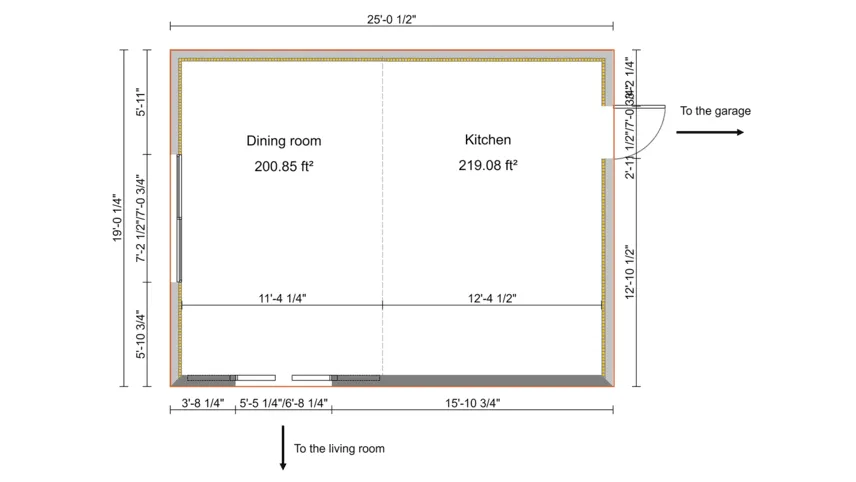
Cedreo automatically adds most dimensions to the floor plan.
With a few clicks, you can also add precise custom measurements to walls, doors, windows, and other kitchen design components.
Detailed Steps:
1. Go to the Plan details tab.
2. Select the floor plan.
3. Select the Dimension tool.
4. Click at the start of the measured area and again at the end.
3. Add Symbols to Your 2D Plan

Enhance your floor plan by adding 2D symbols for appliances, cabinets, islands, electrical outlets, and other kitchen elements.
Cedreo’s comprehensive symbol library makes it easy to show multiple design options to your client in one session.
Plus, when you place 3D objects, Cedreo automatically adds the appropriate 2D symbol to the floor plan.
Detailed Steps:
1. Go to the Plan Details tab.
2. Open the design catalog.
3. Drag and drop the desired elements onto the floor plan.4. Customize the colors and dimensions as needed.
4. Customize Colors and Materials
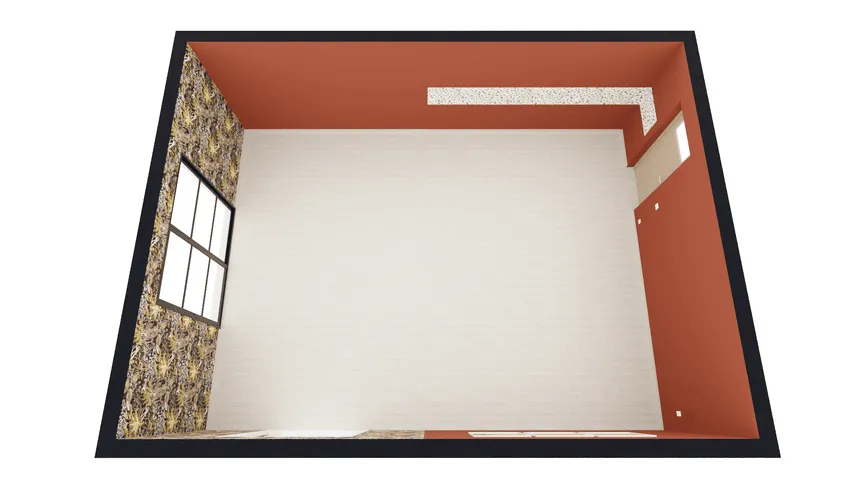
Experiment with different finishes, countertops, and flooring options to create a personalized kitchen design for your clients.
Detailed Steps:
1. Go to the Materials tab.
2. Open the design catalog.
3. Select the desired texture, material, or color.4. Click on the surface where you want to apply it.
5. Add Appliances, Cabinets, Islands, Home Decor, and More
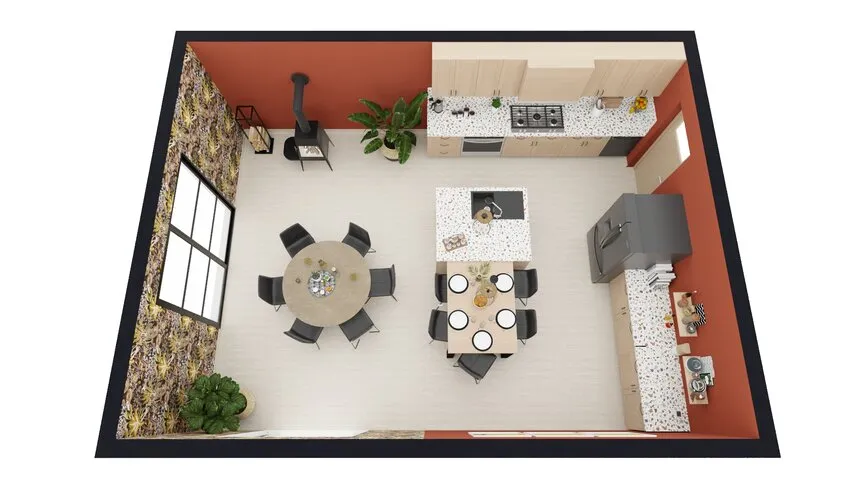
Take your kitchen design further by adding appliances, cabinets, kitchen islands, and home decor elements.
Cedreo’s library of 10,000+ 3D objects includes everything you need to furnish and accessorize a complete kitchen.
Detailed Steps:
1. Go to the Furnishings tab.
2. Open the design catalog.
3. Choose the desired object (appliances, furniture, decor, and more).
4. Drag and drop it into place and customize as needed.
6. Share & Make Changes On The Go
Cedreo makes sharing easy so you can collaborate with clients and colleagues without complicated file exports.
Sharing with your team:
- Use Cedreo’s team features to give project access to colleagues who need to review or update the kitchen layout.
Sharing with clients:
- Go to the Plans tab and select one of the 2D plans.
- Click Download Plan to get an easily shareable image of the kitchen floor plan.
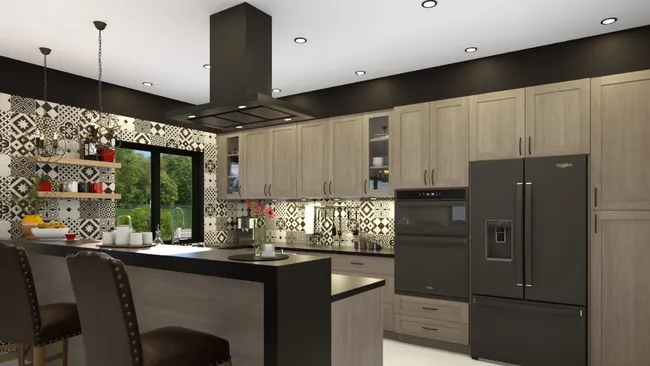
7. Generate Stunning Photorealistic 3D Renderings
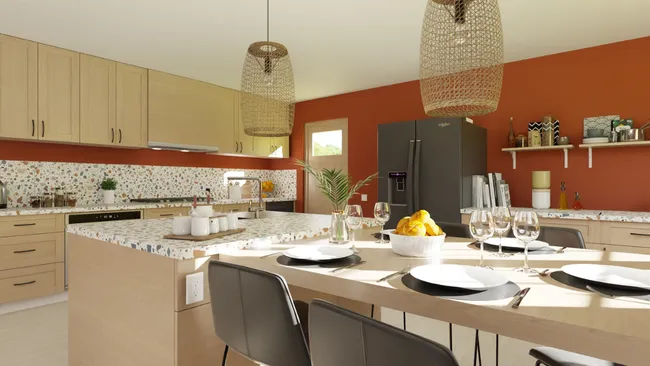
Impress your clients with photorealistic 3D renderings of their future kitchen.
Cedreo’s 3D rendering capabilities bring a virtual kitchen to life and help clients make confident decisions before construction begins.
Detailed Steps:
1. Once your design is complete, go to the HD Visual tab.
2. Select the environment and sun configuration to get accurate natural lighting effects.
3. Click Ask for a Rendering.
4. In 5 minutes or less, your rendering is ready to download in an easy-to-share format.
8. Create Project Presentations
The final step is compiling your design into a professional presentation document.
Cedreo lets you build a complete project presentation that includes your 2D kitchen floor plans, 3D renderings, surface area tables, and room details, all in one organized document.
Detailed Steps:
1. Go to the Documents tab in your project.
2. Select Create Presentation to start building your project document.
3. Choose the plans and 3D renderings you want to include.
4. Add your company branding for a professional finish.
5. Export as a PDF and share it directly with your client.
PRO TIP! Clients who see a combined 2D floor plan and photorealistic 3D rendering in a single presentation document are far more likely to approve a design on the first review. Use Cedreo’s presentation feature to cut revision cycles and close kitchen projects faster.
How to Design a Kitchen Remodel and What’s Different from New Construction
Kitchen remodeling and new construction share the same planning fundamentals, but the constraints are very different.
Understanding where the two project types diverge helps you serve each client better.
Kitchen Remodel Projects
Remodeling a current kitchen means working within existing walls, plumbing, and electrical layouts.
Key considerations:
- Work within existing plumbing and electrical rough-ins where possible to control costs (moving plumbing and electric gets expensive, fast!)
- Use before-and-after renderings to help clients visualize the transformation
- Discuss storage options early, since most remodels aim to improve functionality without expanding the room footprint
New Construction Kitchens
A new construction kitchen starts with a blank floor plan.
That means more freedom, but more planning decisions to get right.
Key considerations:
- Establish the layout type first, then plan the work triangle or zone approach before placing a single appliance or cabinet run.
- Position the kitchen relative to the home’s traffic flow and consider how it connects to dining and living spaces.
- Window placement is an early planning decision since windows affect which walls have room for cabinetry.
- Leverage ceiling height to maximize storage with tall cabinets and upper cabinets that reach the ceiling.
Use the Right Tool to Design Better Kitchens and Win More Projects.
The kitchen is the most complex room in any home.
It takes careful planning, the right layout decisions, and clear client communication to get it right.
But with the right process and tools, you can design a kitchen floor plan that works and present it in a way that makes it easier for clients to say YES.
Cedreo helps you do it all in one place:
- Draw accurate 2D floor plans with drag-and-drop simplicity
- Visualize designs with photorealistic 3D renderings so clients see exactly what they’re getting
- Customize materials, cabinets, appliances, and decor from a library of 10,000+ 3D objects
- Generate complete project presentations to close deals faster
Ready to start designing your next kitchen?
Try Cedreo free today…no credit card required.
Kitchen Design FAQs
What are the most important things to consider when designing a kitchen?
The most important factors are layout efficiency, storage planning, and work triangle placement.
A well-designed kitchen floor plan keeps the sink, stove, and refrigerator within easy reach and provides enough counter space for prep and cooking.
What is the first step in designing a kitchen?
Start by measuring the space and understanding the client’s cooking habits and storage needs, and then choose the right kitchen layout type before placing any cabinets or appliances.
Use home design software like Cedreo to draw the new kitchen layout in just a few minutes.
How do I draw a kitchen layout to scale?
Use professional home design software like Cedreo to draw an accurate kitchen floor plan.
You can input exact wall dimensions, add doors and windows, place cabinets, and then download plans to scale…no CAD background required.
What is the best software to draw a kitchen layout?
Cedreo is one of the best software options for drawing a kitchen layout.
It lets you create a complete kitchen floor plan, customize materials, and generate photorealistic 3D renderings in just 2 hours in an all-in-one platform designed for builders, remodelers, and designers.
What is the difference between the kitchen work triangle and kitchen zones?
The work triangle connects the sink, stove, and refrigerator to minimize movement during cooking.
The zone approach divides the kitchen into five functional areas and works better in larger kitchens where the work triangle distances would become impractically large.
Where do you start when designing a kitchen remodel?
Begin by measuring the current kitchen and documenting the locations of existing plumbing, electrical, and structural elements.
Then determine with the client what stays and what changes before designing the updated layout around those constraints.
What are the most common kitchen layout mistakes?
The most common kitchen design mistakes include placing the sink and stove too far apart, ignoring appliance door swing radii, underestimating storage needs, and failing to account for traffic flow.
Planning the full kitchen layout in 3D design software like Cedreo is one of the best ways to catch these issues early before they become costly change orders.