Stop outsourcing site plans to a drafter. Here’s how to make a site plan so you can save money & shorten the time to proposal.
Wondering how to make a site plan that helps you win a client proposal?
For most contractors and builders this one document carries more weight than any other.
Outsourcing it adds cost and days of turnaround you don’t always have.
That delay can stall a deal before it even starts.
Drawing a site plan used to mean graph paper, a calculator, and a lot of erasing.
Or it meant shelling out for a drafting service that took a week to send back what you could’ve sketched yourself in a couple of hours.
Not anymore.
This guide walks through the complete process of how to create a site plan yourself, from importing your property document to exporting a customer-ready plan, all inside Cedreo.
Key Takeaways
- A complete site plan covers your property boundaries, building placement, terrain, driveways, trees, and other elements that affect how the project sits on the lot.
- Contractors building multiple projects benefit most when they draw site plans in-house, because it reduces per-plan costs, and turnaround drops to hours instead of days.
- Cedreo lets contractors and builders create a site plan in a few hours without CAD experience, with terrain modeling, lot lines, and presentation documents in one tool.
Why trust us? Here at Cedreo, we’ve got 20+ years of experience working with housing pros in the home design space. So we know what it takes for contractors and builders to create site plans that help them land more clients!
See How You Can Create Complete Projects with Cedreo
Plans – Get site plans, 2D floor plans, electrical plans, cross sections and elevation views — with all the technical details you need for a comprehensive project overview.
3D Visualizations – Use interior and exterior 3D renderings as well as 3D floor plans to help clients understand the finished project.
Documentation – Manage all your visual documents in one place, so it’s easier to present and sell your projects.
No credit card required, no commitment
What is a Site Plan?
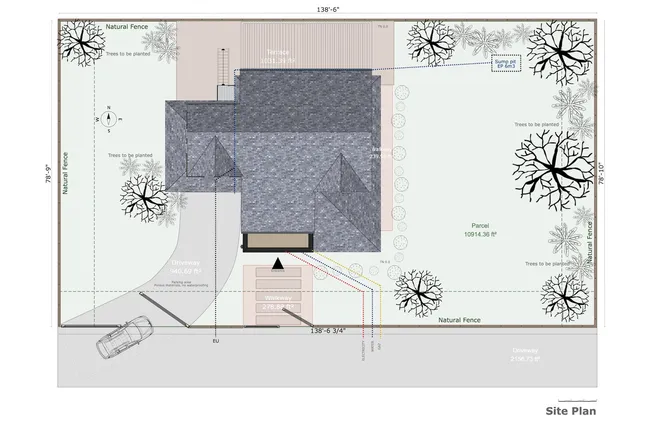
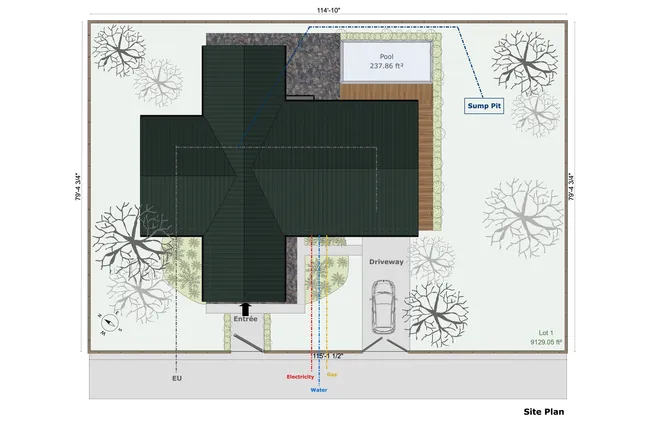
A site plan is a scaled, top-down map of your entire property that shows existing and proposed structures (buildings, driveways, decks), property boundaries, terrain, existing trees, and utility services.
Unlike a floor plan that shows the inside of one building, a site plan is the bird’s-eye view of the entire property, showing the location of every structure, tree, and feature on the page.
For contractors, the two main uses are permit submission and client proposals, where the visual sells the project before construction even starts.
For a deeper definition and breakdown, see our guide on what a site plan is in construction.
What You Need Before You Start Drawing
Before you open a site plan creator and start drawing, prepare these four things.
It saves hours of stop-and-start later.
- Your property document in PDF, DXF, DWG, or JPEG format, pulled from county records, your closing docs, or surveyor services.
- Property dimensions and building setbacks from your local permitting office (these vary by city, and you don’t want to redraw because of a missed setback).
- The scale and minimum sheet size your county requires for permit submission (some accept 1″ = 20′, others want 1″ = 10′).
- Whether you need a licensed surveyor’s stamp for your project type. New construction usually requires one. A minor backyard renovation often doesn’t.
Note: You’ll also want to prepare a quick check on any HOA requirements before you start, since those can drive everything from fence height to driveway materials to where any new trees can be planted.
Our guide on site planning walks you through all the things you need to consider when planning a site..
If you don’t have your property document at all, see our walkthrough on how to obtain a site plan of the property.
The Cedreo advantage: Cedreo accepts PDF, JPEG, PNG, DWG, and DXF, so whatever format your county or surveyor provides, you can import it directly into the software.
Three Ways to Create a Site Plan (And Why Software Wins for Contractors)
For residential contractors and home builders, drawing a site plan in-house instead of outsourcing to a drafting service is becoming the standard approach.
It’s faster to iterate, there’s no per-plan cost, and most municipalities accept these plans for standard residential permits.
Here are three ways you can create one in-house. :
- By hand on graph paper. Imprecise, time-consuming to draw, and a pain to update when something changes mid-project. Graph paper also makes it nearly impossible to share a clean copy with city development reviewers or owners of adjacent properties.
- Desktop CAD. Accurate, but the learning curve runs months and the licenses are expensive.
- Online site plan software. Faster than CAD, increasingly accepted for residential permits, and built for the way contractors actually work.
The third option has matured fast over the last decade, which is why we’re seeing more residential builders skip the graph paper and the heavy desktop tools entirely.
Compare your options in our best site plan software guide.
How to Create a Site Plan – Step by Step Guide
Now let’s get to the actual drawing workflow.
Each step below opens with a quick “why this matters” note, followed by instructions for getting it done in Cedreo.
Step 1: Import Your Property Document
Why this matters: Without an accurate base layer, your property lines, setbacks, and structure placements are guesswork that won’t hold up in a permit review.
Most property documents already show existing structures, trees, and easements you can trace directly onto the page, which gives you a head start.
In Cedreo, here’s how:
- Go to the Layout tab and switch to the Terrain level.
- In the right panel, open the Trace image tab.
- Click “Import your Trace image” and upload your property document in PDF, JPEG, PNG, DWG, or DXF format.
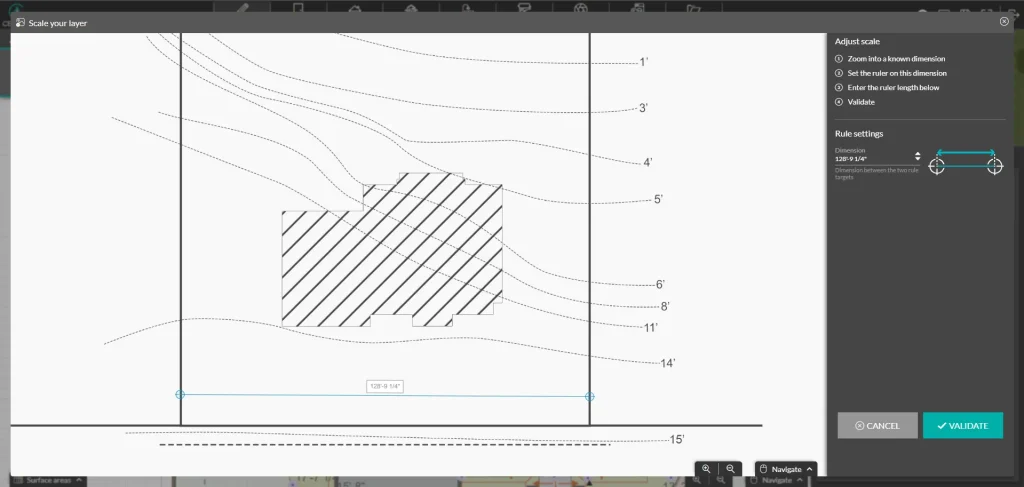
- Drag the blue ruler across a known dimension on the document, then enter that real-world value in the field to set scale. Then click “Validate”.
- Back in the layout window, adjust opacity if you want the layer dimmer while you trace.
- Lock in the orientation and position now, since this becomes your final site plan orientation.
This becomes your locked reference layer for everything that follows.PRO TIP! Place your ruler on the longest known dimension when calibrating. Short measurements amplify any pixel-level error across the entire property.
Step 2: Draw Property Lines and Setbacks
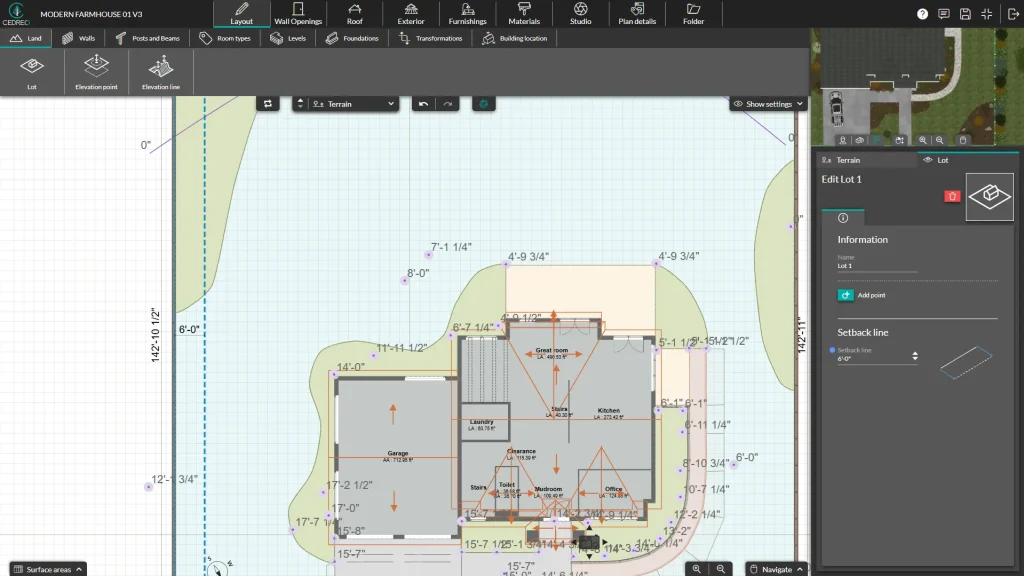
Why this matters: Lot lines and building setbacks define what you can build and where, so the rest of the plan depends on getting them right.
In Cedreo:
- Stay in the Layout tab and open the Land sub-menu.
- Click the Lot tool, then trace your lot using the 1-click = 1-turn method, double-clicking on the last point to validate.
- Click any individual property line and enter the exact dimension in the side pane to lock it.
- Click the edge of the lot and enter your required setback value (for example, 10 ft) in the Setback line field.
- Repeat for each boundary that has a different setback rule.
- Go to the Wall tool and trace the exterior walls of any buildings on the site.
The setback lines now show as a continuous offset boundary across your entire lot, which is exactly what a permit reviewer wants to see when comparing the location of every proposed structure to the property edge.
If you imported a DWG or DXF file, magnetism makes tracing the property lines more precise. Check the magnetism option when you’re selecting layers from your DWG.
Step 3: Design the Terrain and Exterior Features
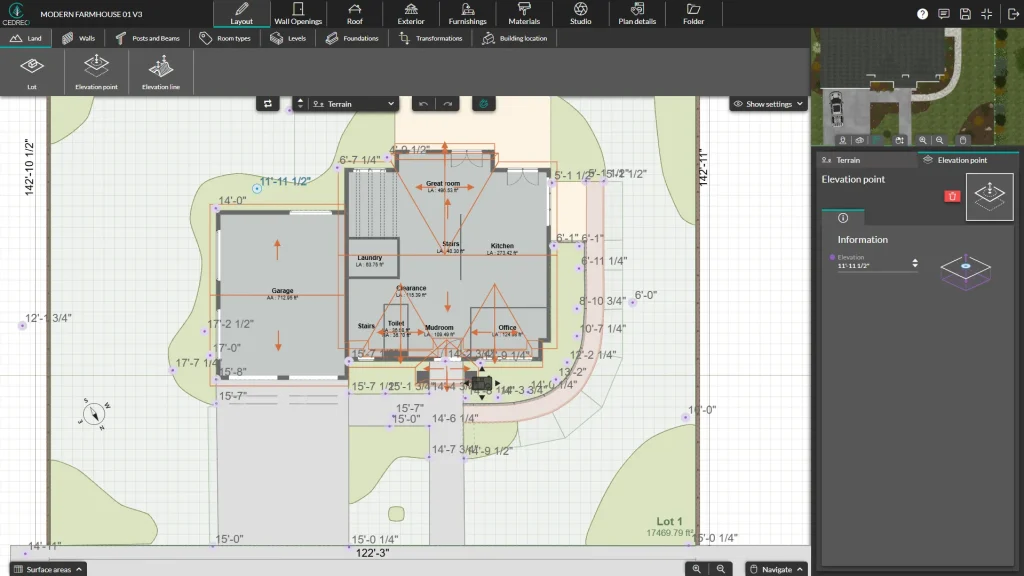
Why this matters: Grading errors caught at the drawing stage cost nothing to fix, while the same errors found during construction can mean demolition and rebuild.
In Cedreo:
- Still in the Layout tab, open the Land menu and select the Elevation point tool.
- Set your default elevation (start with 0′ for the flat ground where the main house sits).
- Place elevation points around the lot, using negative values for downward slopes and positive values for upslopes.
- Use the Repeat Action option to drop multiple points at the same elevation along a parallel line, which keeps grades smooth.
- Switch to the Elevation line tool to draw a curve where the ground changes more dramatically.
For steep slopes that need engineered solutions, head to the Exterior step.
Cedreo has dedicated drawing tools for retaining walls and embankments.PRO TIP! Add elevation points slightly outside your lot lines too. This creates a smoother transition into adjacent properties and prevents an artificial flat-line cliff at the edge of the ground.
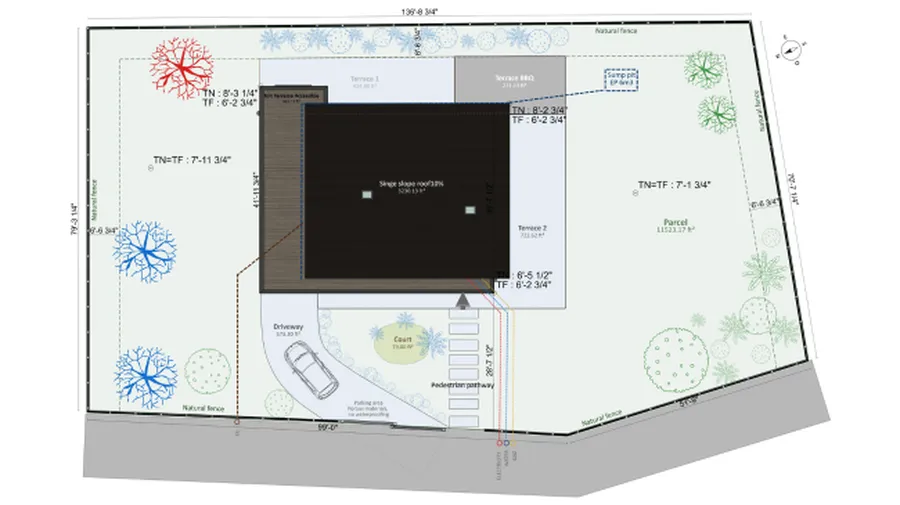
Step 4: Add Dimensions, North Arrow, and Annotations

Why this matters: Reviewers and clients need to see distances, lot dimensions, and setback values at a glance.
In Cedreo:
- Go to the Folder tab and click the site plan thumbnail.
- Select the Dimensions tool.
- Use Manual drawing dimension to add custom measurements anywhere on the plan, like the distance from the house to the nearest tree or property boundary.
- Drag the Land elevation dimension onto the plan to drop numerical markers that show the finished grade elevations.
- Toggle the Setback line and Compass rose checkboxes in the right panel so they appear on the final document.
The compass rose adds the north arrow your reviewer expects.
Cedreo’s annotation tools make it easy to label all the details from utility services to tree trunk locations to the distance between the house and the easement.
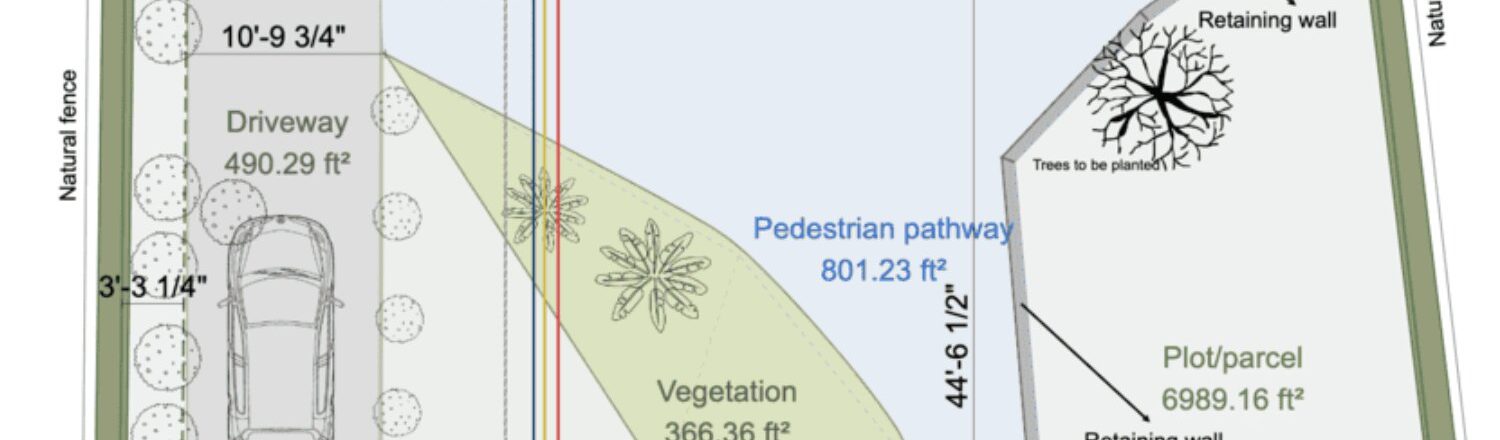
Step 5: Add Hardscapes, Driveways, and Outdoor Zones
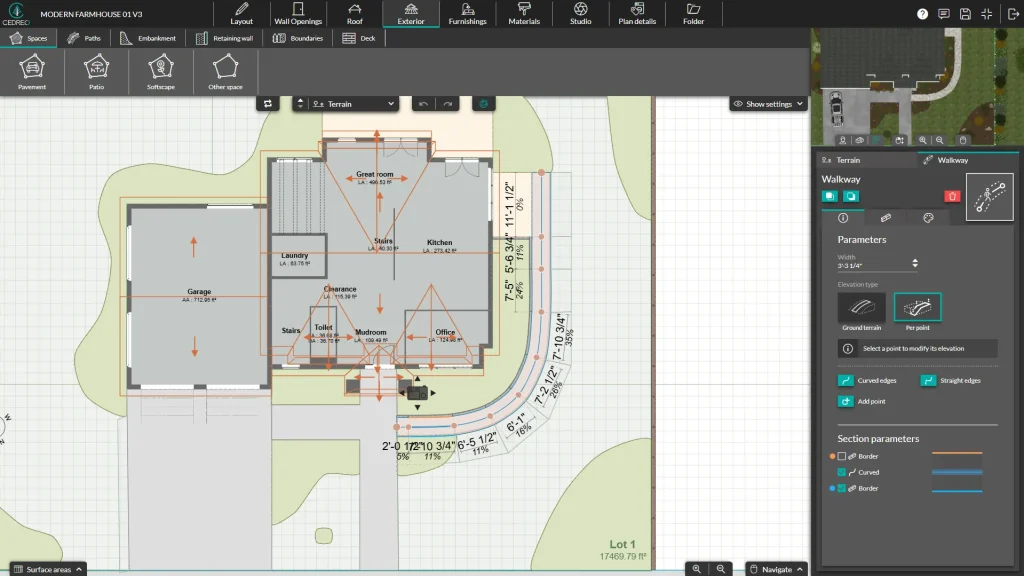
Why this matters: Hardscapes show the project’s footprint beyond the existing buildings on the page, which is what reviewers and clients actually care about.
In Cedreo, go to the Exterior step:
- Open the Paths sub-menu and select Driveway, Walkway, or Free shape path.
- Click point-by-point to lay out the path, then double-click to finish.
- Adjust width and elevation in the side pane (you can elevate per-point for sloped driveways).
- Open the Spaces sub-menu for Pavement, Patio, or Softscape regions to mark out parking pads, patios, and lawn zones.
- Add borders to any region by selecting the second tab in the side panel and clicking “Add all over.”
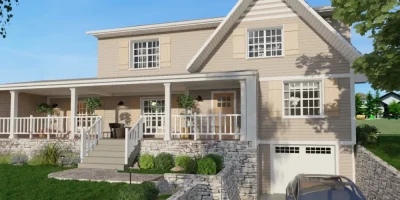
Step 6: Place Landscaping and 3D Site Objects
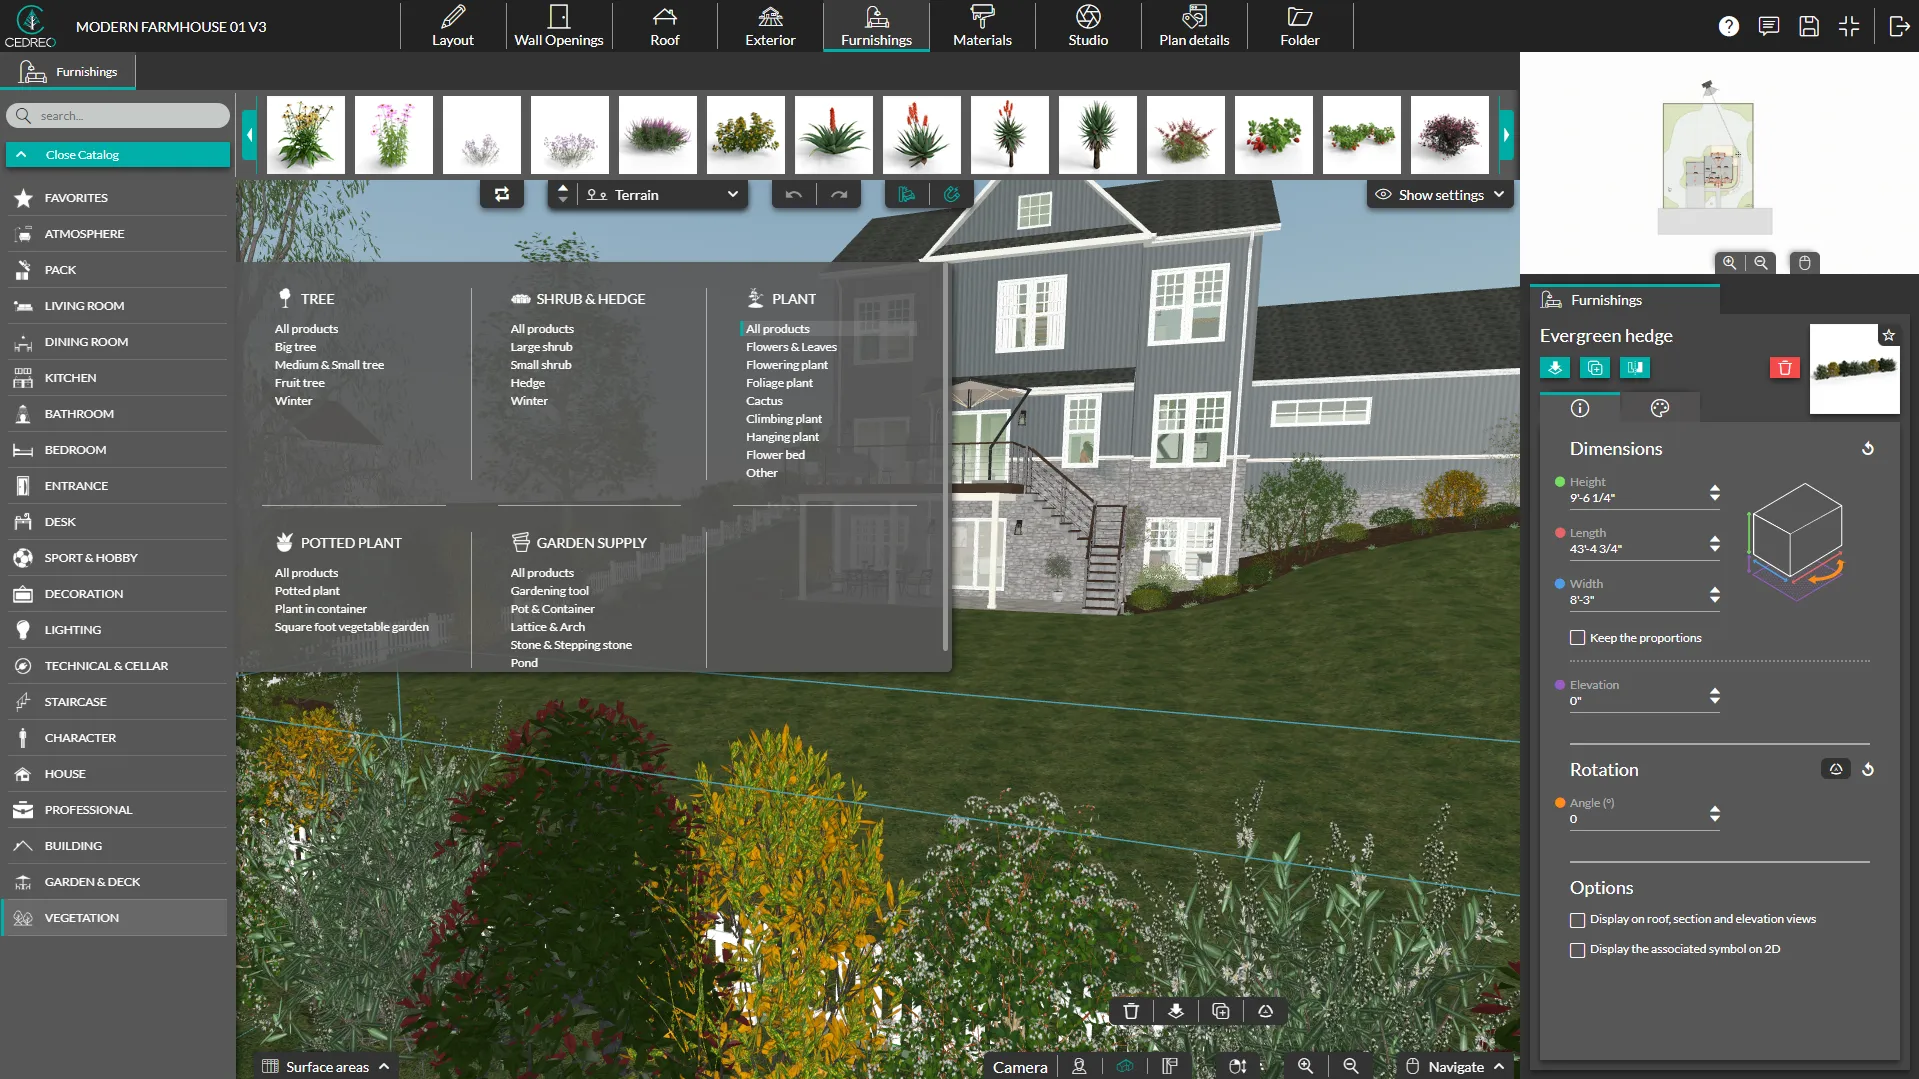
Why this matters: Trees, fences, and outdoor features can shift the building footprint and change how the lot reads to a client.
In Cedreo, go to the Furnishings tab:
- Use the search bar to find specific items (try “tree,” “shrub,” “fence,” “shed,” or “post”).
- Drag and drop the trees you want to preserve into the location where they actually stand.
- Add new landscape elements where the design calls for them, including any shed or outbuilding on the property.
- Select any item and check “Display the associated symbol on 2D” so the object appears on your final site plan.
For projects where landscape design is the main deliverable, see our landscape site plan guide for more depth.
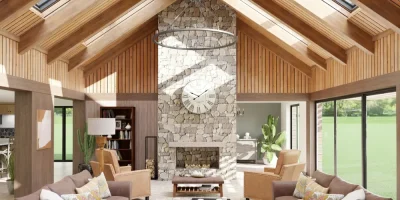
Step 7: Apply Surface Materials
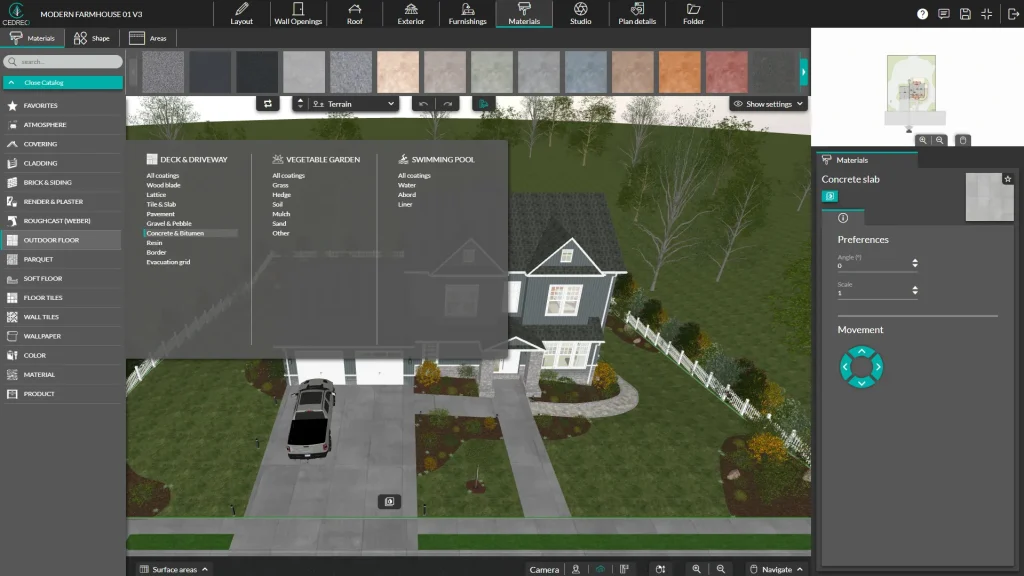
Why this matters: Material textures turn a flat technical drawing into something that looks like the finished site, which is what wins client meetings.
In Cedreo, go to the Materials tab:
- Browse the catalog by category or use the search bar to find concrete, asphalt, pavers, gravel, or grass.
- Click a material thumbnail to select it.
- Hover over the area on your project (driveway, patio, walkway) and click to apply.
- Use the assistant feature to apply the same material to all similar items in the project.
- Click any applied material to fine-tune its scale, angle, or movement from the side pane.
Materials transfer automatically to the 3D view, so you can rotate the project and check how the textures look together.
PRO TIP! Contractors we work with often use this step to mock up two or three material options in 3D renderings for a client meeting, then present the comparison side-by-side in the same presentation document.
Step 8: Select the Scale and Export the Plan

Why this matters: A plan submitted at the wrong scale or sheet size gets rejected, plain and simple.
In Cedreo, go to the Folder tab:
- Click the Download jpg button in the right-hand parameters of your plan.
- Set the orientation (landscape or portrait).
- Choose your format (A, B, C, Arch A, Arch B, or Arch C) to match your county’s required sheet size.
- Pick the scale your permit office requires from the drop-down menu.
- Adjust margins as needed.
- Choose Paper quality for printed submissions or Digital for email.
- Click the green Download button.
If your county wants a DWG/DXF file, click the DXF File icon in the right column instead and save the drawing directly to your computer.
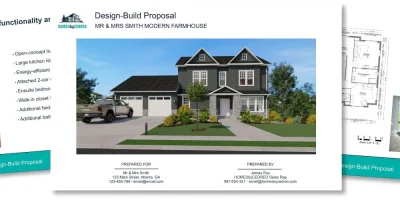
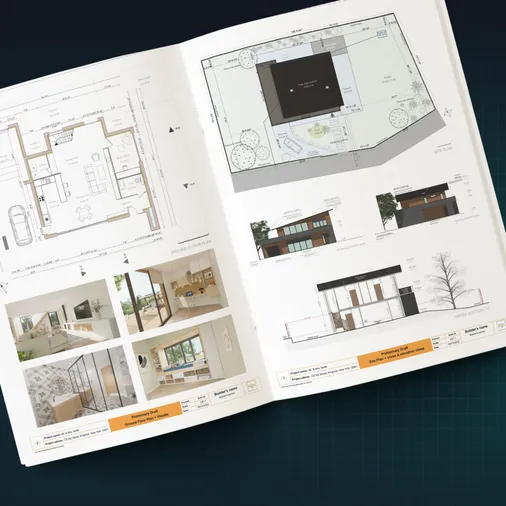
Step 9: Build the Presentation Document
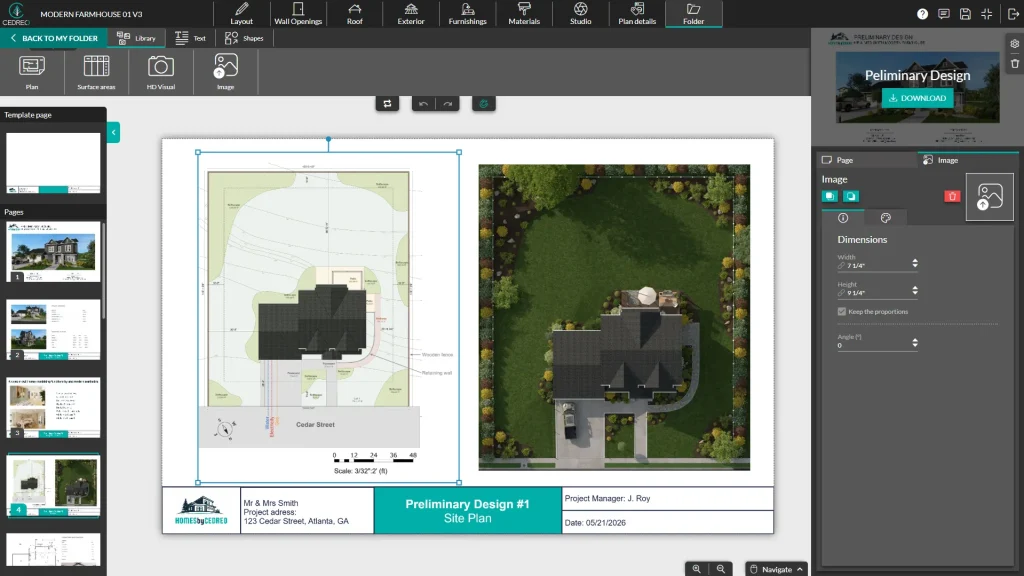
Why this matters: The presentation document is what you actually put in front of a client or stakeholder for approval, branded with your logo.
In Cedreo:
- Go to the Folder tab and click “Create a new document.”
- Set the orientation and format, then add your company logo to the Template Page so it appears on every page.
- Use the Library tools to drop in your site plan, HD Visual renderings, surface area tables, other plans (floor plans, cross-sections, elevations) and any external images.
- Add text boxes for project notes, your business name, the property address, and any HOA requirements you need to flag.
- Use the Shapes tool for arrows, lines, and rectangles to create makeshift legends or call out key features on the page.
- Drag pages into your preferred order, then click Download to generate a PDF.
The presentation document keeps everything in one branded package, which is what makes it easier to win client approval and city sign-off.
Site Plan Drawing: Mistakes That Get Plans Rejected
From what we’ve seen across the contractors and builders we work with, even an experienced pro can lose a week to a rejected site plan.
Here are the four most common reasons plans bounce back.
- Not checking the local permit checklist before starting. Requirements vary by municipality and community, and for example a missing stormwater note or sediment-control detail can delay a permit by weeks.
- Drawing at approximate scale instead of exact scale. Permit offices reject plans where stated dimensions don’t hold up on the printed sheet at the declared scale, which is why an accurate site plan is the minimum every reviewer expects for compliance.
- Showing only the proposed structures without existing conditions. Reviewers want existing and proposed structures shown together, so a deck addition still needs the location of the existing house, any neighboring buildings, and mature trees located on the lot drawn on the page even when those features aren’t changing.
- Getting terrain wrong before buildings are placed. Grading errors cost nothing to fix at the drawing stage, but the same errors discovered during construction can require demolition and rebuild before the project ever gets approved.
How Much Does It Cost to Make a Site Plan?
The cost depends on the method you choose:
- Licensed land surveyor: $1,000 to $3,000 per project, with the highest accuracy and a stamp the city will recognize for new construction.
- Drafting services: At least $200 to $500 per plan, faster than a surveyor but priced per drawing and not site-specific to your workflow.
- Site plan software like Cedreo: Per-plan cost trends to zero, since the drawing is produced as part of the normal design workflow rather than as a separate billable step.
For a deeper breakdown of pricing factors, see our site plan cost guide.
For contractors and builders running back-to-back projects, the math gets clear fast.
- Spend hundreds or even thousands outsourcing it.
- Or make site plans yourself with Cedreo site plan software.
Plus, while you’re working in Cedreo, you can also draw the matching floor plan for the building so the interior layout and site map stay tied to the same Cedreo file.
Draw Site Plans Faster With Cedreo’s Site Plan Creator
Site plan drawing doesn’t have to be the bottleneck on every proposal.
With Cedreo, contractors and builders can:
- Import any property document (PDF, JPEG, PNG, DWG, DXF) and trace to scale.
- Draw lot lines, setbacks, terrain, retaining walls, existing buildings, and trees in a single project.
- Generate 2D site plans, 3D visualizations, and presentation documents with a single software.
- Iterate on the drawing as fast as the project changes, with no per-plan cost.
Don’t have an account yet?
Sign up for a free Cedreo account today.
Site Plan Software FAQs
How do you draw a site plan from scratch?
Start with your property document and a known scale, then draw your property lines, add setbacks, place existing buildings and proposed structures, and finish with terrain and landscape features.
In Cedreo, the whole drawing happens inside one project file using the Layout, Exterior, and Folder steps.
How long does it take to create a site plan in Cedreo?
A typical residential site plan takes about 2 hours or less from import to export if you use software like Cedreo.
Builders we work with often have a finished, client-ready project presentation (including floor plans and 3D renderings) in a few hours after they start drawing.
What file formats can I import into Cedreo to start a site plan?
Cedreo accepts PDF, JPEG, PNG, DWG, and DXF files for your trace image.
That covers nearly every format your county assessor, surveyor, or closing documents will provide.
What is the difference between creating a site plan and obtaining one?
Creating a site plan means drawing it yourself based on the property dimensions and document you have.
Obtaining one means getting a previously approved site plan from your local government, courthouse, or title agency, which only works if a recent drawing is on file.
Do I need a licensed surveyor to create my site plan?
In many cases (small additions, decks, simple residential remodels) a surveyor’s stamp isn’t required, while new construction and complex projects often need one.
Check your local permit office before you start so you know what’s required for approval.
Can I draw a site plan without CAD experience?
Yes. Cedreo’s site plan creator is designed for contractors and builders who don’t have a CAD background
Cedreo has easy-to-use point-and-click tools instead of CAD command lines, as well as a workflow shaped around real residential development projects.
How do I add setback lines to a site plan?
In Cedreo, click the edge of your lot in the Layout step and enter the required setback distance in the Setback line field.
The software draws a continuous offset boundary along that property line.
What’s the difference between a site plan and a floor plan?
A site plan is the top-down view of your entire property, showing the location of the building footprint, lot lines, and outdoor elements like trees and driveways.
A floor plan shows the interior layout of one building level (you can build both inside the same Cedreo project).
In addition to site plans, can I create other types of plans in Cedreo?
Yes. Cedreo also handles floor plans, electrical plans, cross sections, elevation views, and roof plans, all from the same project file.
What scale should I use for a site plan?
Use whatever scale your local permit office requires (common scales are 1″ = 10′, 1″ = 20′, or 1:100).
In Cedreo, you can select your scale before exporting so the printed plan matches exactly what your permit office requires, with no manual conversion needed.