How to Make a 3D Home Design with Cedreo
To make a 3D home design with Cedreo, just follow the steps as shown on the user interface. Draw the floor plan, add the windows and doors. Then modelize and design the terrain. From there, furnish rooms, apply materials, and generate photorealistic 3D renderings together with the presentation documents. All within a single cloud-based platform that requires no CAD experience.
- Set up your project. Log into your Cedreo account and create a new project. Enter the project name and basic details. You can start from a blank canvas or import an existing floor plan (JPG, PNG, PDF, DWG, or DXF format) and trace over it. You can also import a survey plan and model the terrain with elevation lines, embankments, and retaining walls.
- Draw the floor plan in 2D. Use the continuous wall drawing tool to create exterior walls, then add interior partitions. Cedreo’s smart magnetism tools ensure your walls snap into place accurately. Add doors and windows by dragging and dropping them from the library. Adjust dimensions by clicking on any element. As you draw in 2D, the 3D model updates simultaneously in the split-screen view.
- Add multiple levels. Cedreo supports up to 6 levels including a basement. Duplicate your ground floor plan to create upper stories with the same footprint, then modify room layouts, wall positions, and openings as needed. Add staircases to connect levels.
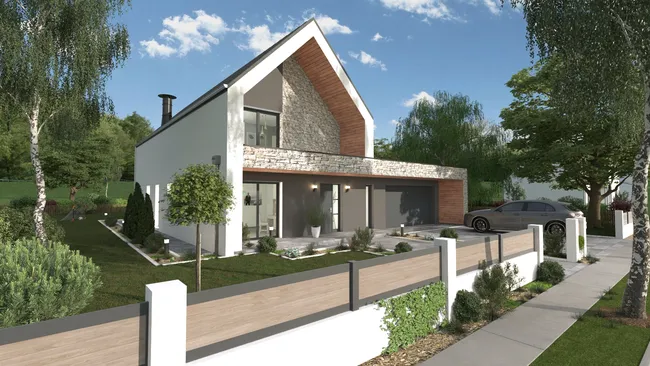
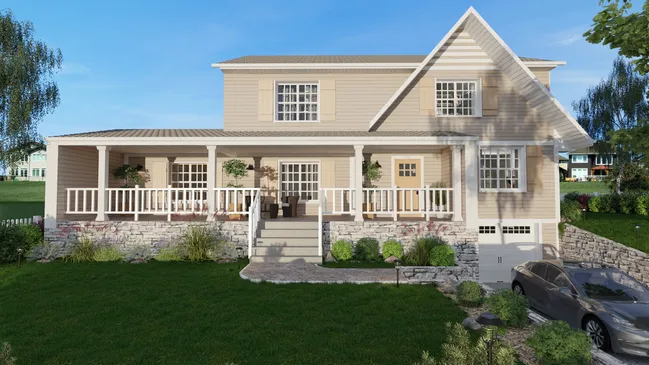
- Design the roof. Choose from four roof types (gable, hip, shed, or flat) or draw a custom roof manually. Select roofing materials like tiles, shingles, or metal from the material library. The roof immediately appears in the 3D model.
- Furnish and decorate. Switch to the 3D decoration mode and access Cedreo’s built-in library of over 10,000 3D objects. Add furniture, appliances, light fixtures, flooring, paint and textures, bathroom fixtures, kitchen cabinets, and outdoor landscaping elements. Use grouped product packs to speed up the furnishing process. Customize dimensions, colors, and textures for any item.
- Design the exterior and landscaping. Add siding, stone, brick, or other exterior finishes to the outside walls. Place trees, shrubs, fences, driveways, patios, and outdoor furniture. Draw the natural terrain with the lot boundaries and setback lines to get an accurate site plan.
- Generate photorealistic 3D renderings. Choose your camera angles for both interior and exterior views. Save viewpoints to easily compare different design options. Adjust sun orientation and select a background image, then click to get a 3D rendering. Cedreo generates photorealistic 3D images in approximately 5 minutes. You can also generate 3D floor plans that show a bird’s-eye view of the fully furnished layout.
- Create a client presentation. Compile your site plan, 2D floor plans, 3D floor plans, cross-sections, elevations, surface area tables, and 3D renderings into a branded presentation document within Cedreo. Add your company logo, project details, and notes. Export or share the presentation directly with clients.
The entire process, from blank canvas to photorealistic 3D renderings, typically takes about 2 hours for a standard residential project. Revisions are fast because any change you make to the 2D plan instantly updates the 3D model and all associated plans.