Here’s why architectural renders have become an essential tool for building professionals
An architectural rendering of a building is a 3D image created from a digital model.
It’s the last step in the architectural design process because it turns a technical plan into a clear, immersive picture.
For your clients, architectural renderings bring the plans to life so they can feel the volumes, lighting, and textures and imagine themselves in a design that doesn’t exist yet.
For you as a building professional, it is a teaching tool that saves time.
Meetings with clients, stakeholders, and trades go faster and there are fewer misunderstandings.
- So which type of rendering should you choose for each project?
- What are the expert tips to make your renderings more appealing to clients?
- And which architectural rendering software should you use?
This guide gives you the answers you need to leverage the power of 3D architectural rendering to help grow your business.
Key Takeaways
- 3D architectural rendering speeds up your clients’ decisions and makes your design work easier.
- Each type of rendering, from interior renderings to exterior renderings, meets a specific project need.
- Avoid common mistakes like poor framing, harsh lighting, cluttered scenes, or distorted proportions to create more appealing renderings.
- With Cedreo, you create professional architectural rendering visuals in minutes without advanced technical skills.
Why trust us? Here at Cedreo, we’ve got 20+ years of experience working with housing pros in the 3D home design space. We know what it takes for designers and contractors to create architectural renderings that land them more jobs!
See How You Can Create Complete Projects with Cedreo
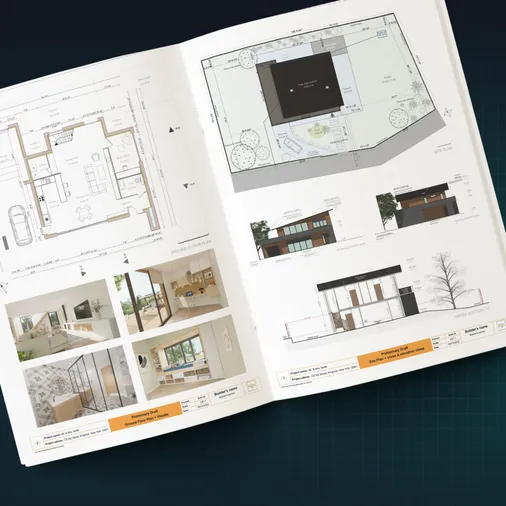
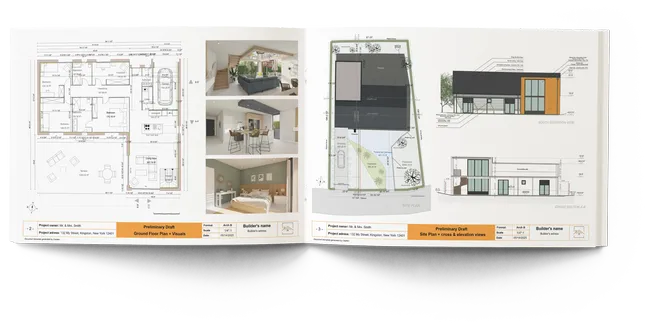
Plans – Get site plans, 2D floor plans, electrical plans, cross sections and elevation views — with all the technical details you need for a comprehensive project overview.
3D Visualizations – Use interior and exterior 3D renderings as well as 3D floor plans to help clients understand the finished project.
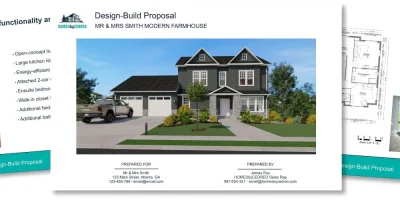
Documentation – Manage all your visual documents in one place, so it’s easier to present and sell your projects.
No credit card required, no commitment
Architectural Rendering, Your Ultimate Sales Conversion Tool
In construction, getting a client to say “yes” usually comes down to two things.
- The total project cost…the rational argument.
- The client’s ability to visualize what does not exist yet…the emotional side.
Today, even the clearest 2D architectural drawings are no longer enough to trigger a decision.
3D architectural rendering has deeply changed the client relationship in architecture projects.
By turning your design ideas into realistic three-dimensional images, it removes the distance between your technical professional vision and your prospect’s fuzzy imagination.
The concrete benefit is that your contact can understand your design intent and really buy into your proposed architectural design.
“With Sketchup you can get a pencil effect whereas with Cedreo it is photo realistic, and this is what my clients want to see.”
The more polished your rendering is, the more your professionalism and the perceived value of the project increase.
“My objective was to get photorealistic 3D renderings at a much faster pace to help clients visualize their projects and ultimately, boost the sales and overall profit.”
Types of 3D Architectural Visualizations
These are the two most common types of 3D renderings.
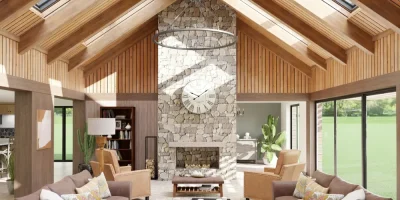
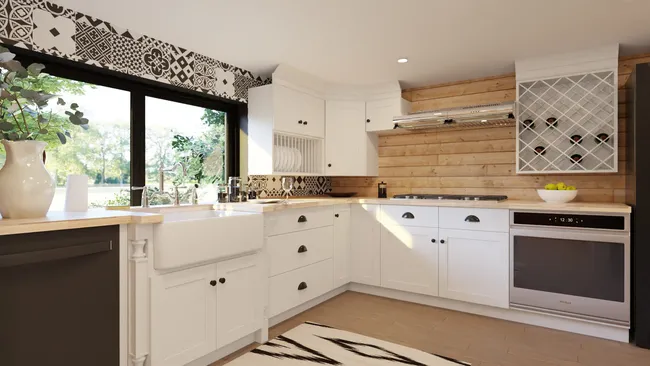
Interior Rendering: Validate Choices, Understand Interior Designs

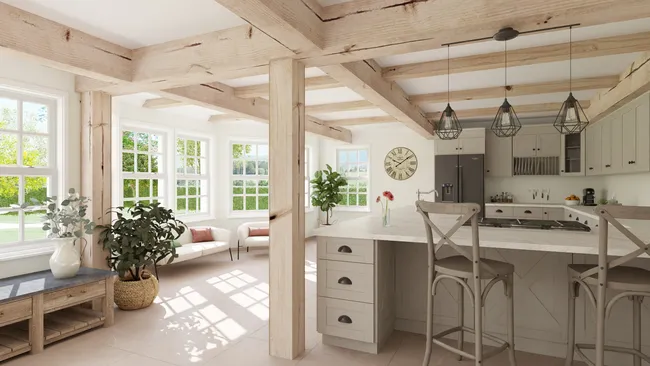
An interior render helps your clients imagine living in their future spaces.
They show room volumes, finishes, light, and how people move between each area.
To be convincing, your interior rendering needs two key qualities.
- Be realistic: build your architectural visualization like a photograph with a natural viewing angle, clear depth, detailed textures, and well-balanced shadows and reflections.
- Stay consistent with your prospects’ decorative tastes and family situation by using the information from your initial brief to create an interior design image that truly attracts them personally.
PRO TIP! Cedreo
With Cedreo’s built-in library, you get a wide choice of finishes plus thousands of ready-to-use furniture items and décor objects.
And with decorating packs, you get easy access to all objects in a specific style so you can create a coherent interior design mood in just a few minutes.
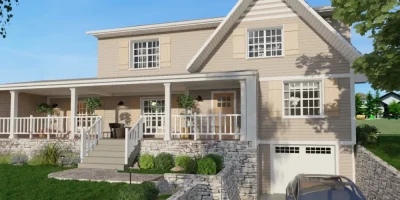
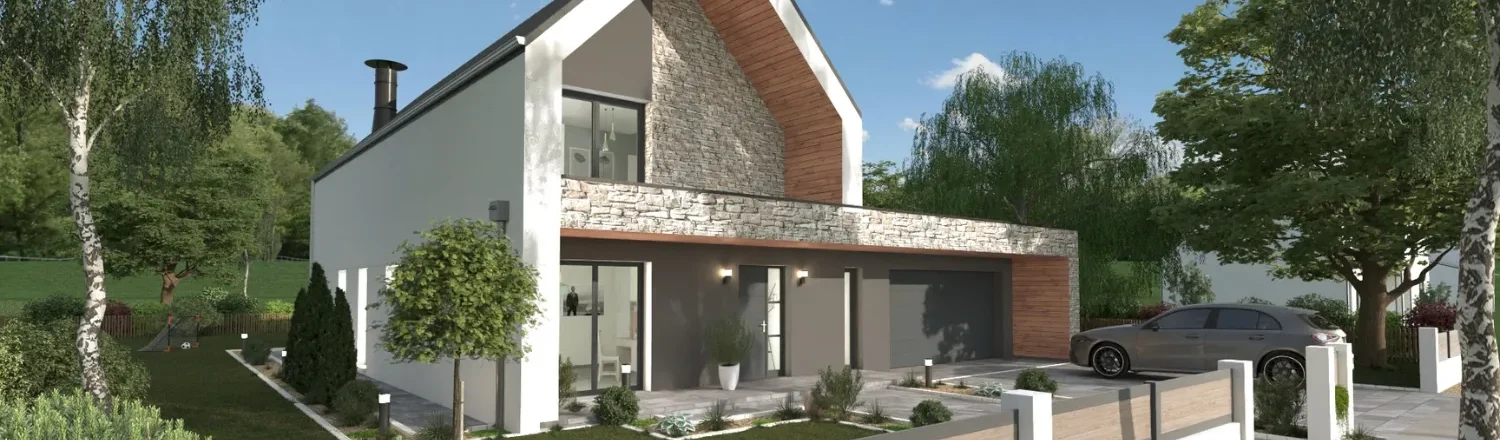
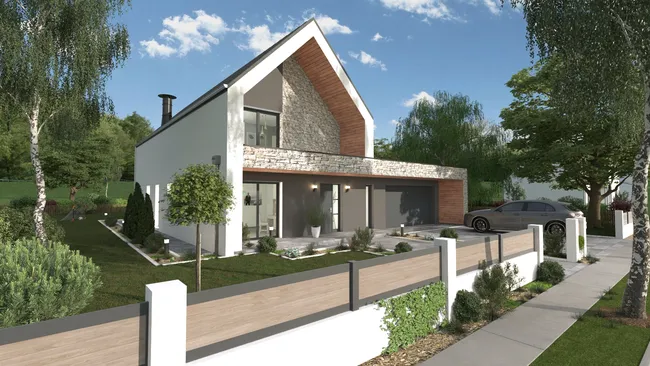
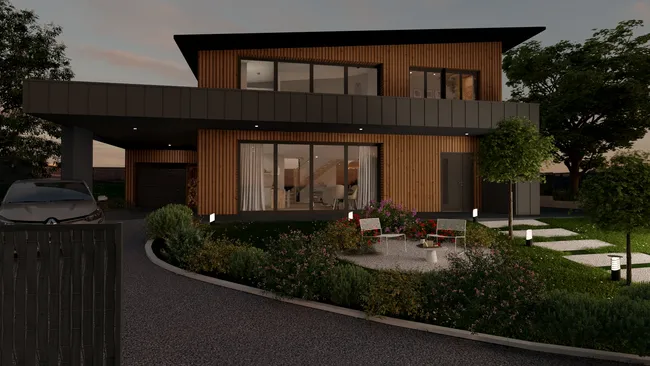
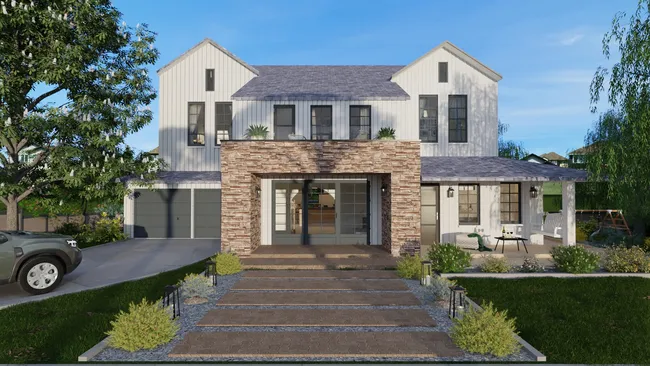
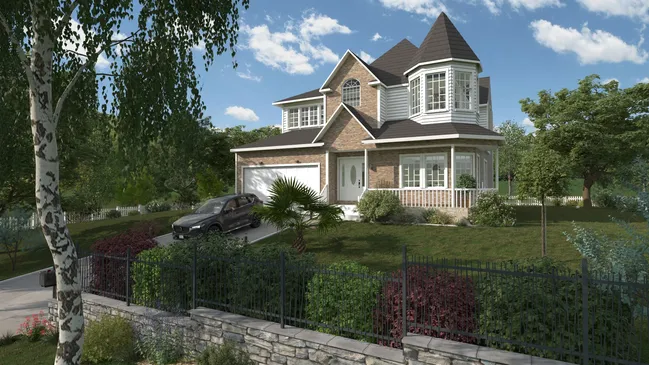
Exterior Rendering: Show the Curb Appeal
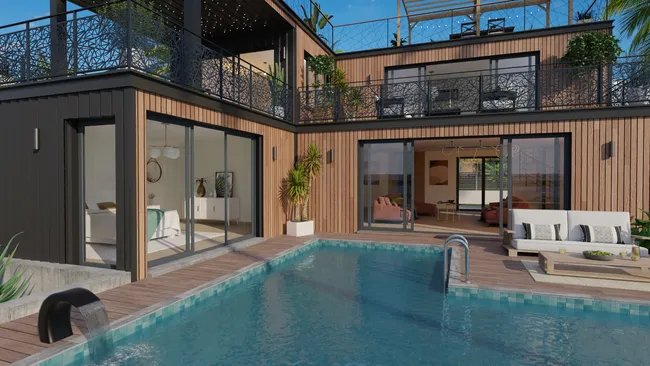
An architectural rendering of a building gives a realistic view of the future house or addition in its real environment.
It shows driveways and access points, facade materials, how the building sits on the lot, and the landscape design around it.
Exterior renderings are extremely useful since they highlight your architectural design, the harmony of textures, and reinforce your professional image.
PRO TIP! Cedreo
To create emotion, an exterior rendering doesn’t need to look perfect, because realistic scene includes the small imperfections of everyday scenes.
So instead of a flawless, cold 3D model, leave a few objects on the table or some taller grass in the garden for a more realistic scene.
How Professionals Use 3D Architectural Illustrations
Here’s how professionals use them during key stages of a project.
1. Concept Design Phases
Depending on your role (builder, architect, project manager), interior renderings are usually created during the early concept design phase or during layout studies.
They help you:
- Validate finish selections
- Visualize interior volumes with the position of partitions, furniture layouts, and circulation between rooms
- Compare several layout options or interior design concepts for renovation or high end interior design projects
- Reassure the client about the final result
- Speed up decision making throughout the project and adjust the design if needed
A polished image increases the perceived value of your work, helps you explain technical choices, and implicitly justifies your margins.
“Our ideas are best presented through our renderings. Everything that we convert into an actual project gets 3D renderings and a job will result from that.”
2. Project Presentations and Approvals
3D architectural renderings are powerful tools in design reviews, client meetings, and project presentations because they turn abstract plans into clear, realistic images everyone can discuss.
You can reuse the same concept 3D model to create different views tailored to each audience, whether you present to private clients, investors, or internal teams.
These images help stakeholders understand the proposed designs, ask better questions, and make informed decisions sooner.
This, in turn, shortens the approval cycle and helps you stand out from competitors.
PRO TIP! Cedreo
Since Cedreo is cloud software, you can quickly adjust designs and renderings on the fly in the middle of client presentations.
3. Improve marketing communication
Successful 3D rendering visuals enrich all your marketing materials such as websites, brochures, and social media.
Most people don’t get excited about job site photos, and seeing their property as a construction site can even make clients anxious.
On the other hand, high-quality 3D images of your best projects strengthens your brand image, shows the quality of your work, and builds trust with new prospects.
4. Site Preparation & Monitoring
Before construction begins, sharing your 3D renderings with teams (material suppliers and trades) is always helpful.
This simple visual support instantly reduces the risk of misinterpretation on the job site.
A few clear perspectives go a long way toward making sure all stakeholders understand the architectural intent of the project.
Mistakes to Avoid When Creating an Architectural Rendering of a Building
Here are some of the most common rendering mistakes and how to easily fix them.
Architecture Projects that Look Too Empty
Spaces without décor, a flat lot without landscaping, or an exterior rendering with a bare patio feel cold and impersonal.
To help clients visualize real life in the space, always add furniture, everyday objects, and small signs of life to humanize the scene.
And even when you’re doing exterior renderings, don’t forget to furnish the inside since the interior is usually visible through the windows.
“Before, our renders were too empty and not very realistic. But now with Cedreo we furnish, we adjust the lighting, and we get a warm, welcoming visual in just a few minutes.”
Overloaded Scenes
This is the opposite mistake, where you add too many textures, colors, and shadows, and the project becomes hard to read.
To stay on track, always come back to what your client really needs to see to move the project forward.
Most of the time, the essentials are volumes, flow, and accurate lighting.
Wrong Camera Angles
No one sees their house or living room from high above, so camera angles too far from the human eye level aren’t as visually appealing.
- For residential homes, set the camera at about 5’ 6” (1.70 m) high so the three dimensional images match a natural human viewpoint.
- For main living areas, frame the shot slightly at an angle to reveal the depth of the interior space.
- In small rooms, use wide angles to make the space feel larger.
- For your exterior perspectives, the ideal view for the main facade is often a 3/4 view at eye level because it best showcases proportions and the overall architectural design.
Unrealistic Lighting
Lighting that is too harsh or badly oriented can make even stunning renders look artificial, so work with natural light based on the real orientation of the project.
You can also vary times of day to test different moods and find the right balance between brightness and strong shadows.
PRO TIP! Cedreo
Cedreo’s lighting plan feature lets you instantly add a soft ambient light, which is a simple way to remove dark zones from interior renderings and get warmer, more realistic results without complex settings.
Too Many 3D Renderings
Each 3D rendering you create takes time and adjustments.
Producing a large number of similar images without a clear goal isn’t always better for the project.
It’s better to focus on the key views that help stakeholders understand the proposed designs, answer a client question, or support a specific decision in your architecture projects.
For example, if your clients already have an architectural illustration of the main facade of their future home and a view of the terrace at the back, do they really need every angle of the building to make up their minds?
*Check out our expert tips for turning your interior render and landscape architecture renderings into stunning sales tools.
3D Rendering Solutions for Professionals
Here are two main ways you can create 3D rendering visuals, each with its own pros and cons.
Option 1: Outsourcing 3D Renderings
Working with a visualization specialist or an external agency for your architectural perspectives makes sense in several situations.
This route often delivers extremely realistic images.
This is ideal for large high-budget projects where there is tight competition, or for high-end marketing materials like trade show displays.
However, this option requires more planning because delivery timelines depend on the provider’s workload.
Your ability to react to last minute design changes is also limited, especially if your clients are used to quick revisions.
Outsourcing therefore fits best for large, complex projects with high added value, where image quality comes before speed of execution.
Option 2: Create Renderings In-house
Producing your 3D renderings in-house means you keep full control over the entire design process.
You maintain autonomy and responsiveness and it’s easier to manage your architectural rendering costs.
But to protect your margins, you also need to keep an eye on less visible costs, because direct costs like licenses and hardware are easy to track while indirect costs are not.
Training time, long rendering times, back and forth with clients, and late project changes all eat into your profitability day after day.
To keep your production workflow under control, you need architectural rendering software that generates images quickly and lets you update them easily.
Choose the Right Architectural Rendering Software
The rendering software you choose depends on your day-to-day project needs.
If you’re an architect or interior designer working on large-scale commercial projects, your priorities are realism and a high level of customization.
If you’re a home builder, general contractor, or renovation specialist, you likely need simple, versatile rendering software that your whole team can use.
Before you decide, look carefully at three key criteria to select the best architecture rendering software.
- The learning curve: An intuitive tool reduces training time so designers, drafters, project managers, and sales reps become productive faster.
- Level of realism: There’s no need to invest in an ultra-powerful rendering engine if your clients mainly need a clear, immediate view of the proposed design.
- Budget versus frequency of use: Choose software whose cost stays aligned with how often you create renderings.
PRO TIP! Cedreo
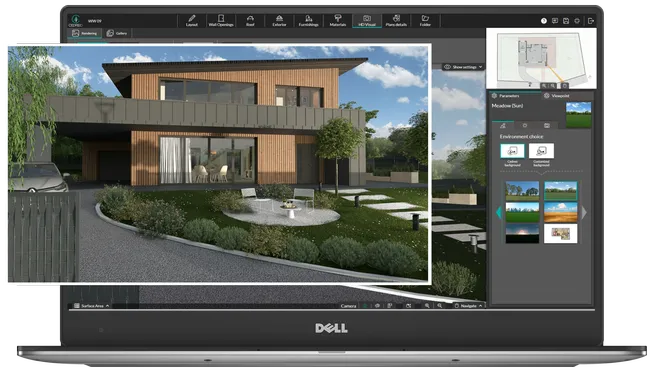
Cedreo is an all-in-one solution with tools for 2D floor plans, 3D modeling, photorealistic interior & exterior renderings, and presentation documents in a single software.
You get the ideal balance between ease-of-use, speed, and visual quality.
Steps to Create Realistic 3D Renderings with Cedreo
Wondering if Cedreo is really the right software for regularly creating 3D visuals?
Are you a contractor or builder and unsure of how to make 3D renders?
Here’s how easy it is to produce realistic three dimensional images in Cedreo software.
- Model the project in 3D: From your 2D floor plans, Cedreo automatically generates the 3D model. Every change you make to the plan instantly updates the 3D view.
- Furnish and decorate: The Cedreo library offers more than 10,000 objects and textures so you can quickly create several options for the same project.
- Set the camera and lighting: Place the camera at eye level and adjust natural light based on the building orientation. Simulate different times of day to test lighting moods.
- Customize the background: Choose a preset environment such as urban, countryside, or coastal, or import a site photo to get a real-life background.
- Generate the photorealistic rendering: In just a few minutes, you get an HD or Full HD final rendering created in the cloud so your computer stays available for other tasks.
- Share your visuals to move projects forward: Your Cedreo images fit easily into client meetings, project presentations, and marketing materials to showcase your work.
Follow the step-by-step guide to make 3D renders with Cedreo.
An integrated solution like Cedreo simplifies your entire workflow, from design to 3D rendering to revisions and sharing.
This helps your project stay consistent from start to finish while saving time at every step.
In architecture and construction, 3D rendering is no longer a luxury reserved for high-end projects…it is an essential part of designing, presenting, and selling any project.
Your clients no longer have to imagine the result because they see it, feel it, and trust you to guide them.
“The renderings produced with Cedreo allow us to communicate our ideas on the website and social media to attract clients and show them how serious we really are.”
With Cedreo, you turn your design ideas into impactful visuals, save time at each phase of a project, and present your design concepts with professionalism.
FAQs
What is architectural rendering and why do professionals need it?
Architectural rendering is a realistic image or animation created from an architectural design that shows what a residential or commercial project will look like before construction begins.
Professionals use it for clear communication with clients and stakeholders so everyone understands the project vision and scope.
How do architectural renderings help you land more projects?
Renderings turn technical plans into visual stories that help clients picture their future space and feel confident about their investment.
When your images deliver stunning results, clients remember your proposal and are more likely to choose it over a competitor’s.
Can you create architectural renderings without CAD experience?
Yes, you can create professional architectural renderings without being a CAD expert by using modern three dimensional modeling software.
Tools like Cedreo are built for builders, remodelers, and interior designers so you can produce 3D rendering visuals with simple workflows instead of complex CAD commands.
What should you include in an architectural rendering presentation to clients?
Focus on a mix of exterior renderings, interior renderings of key rooms, aerial renderings, and landscape architecture renderings.
Add simple notes or reference images for materials, colors, lighting, and layout so clients see how the design meets their needs.
How do you present design options using architectural renderings?
Show design options side by side with the same camera angle and similar lighting so clients can easily compare layouts, materials, and details.
You can create several versions of the same space in Cedreo and walk clients through the pros and cons of each option during your project presentations.
What are the most common mistakes when using architectural renderings with clients?
Common mistakes include scenes that look too empty or too busy, unrealistic lighting, and images that don’t match the client’s style or way of living.
Another frequent issue is showing too many views at once instead of a few clear renderings that tell the story of the project and support decision making.