Stop losing clients to confusing presentations. A well-built architecture presentation board shows your vision clearly and gets proposals approved faster.
You have a great design.
Your client has a vision.
But if those two things never connect clearly, you lose the project.
That’s the challenge most contractors and builders face every time they walk into a client meeting.
Without a clear architecture presentation board, clients struggle to grasp what you’re actually proposing for the space.
They second-guess your design ideas.
They delay decisions.
They ask for changes you already thought through.
But a well-crafted architecture presentation board changes the conversation entirely.
It gives clients something concrete to react to, builds confidence in your design choices, and shows that you’ve already done the thinking for them.
This article covers everything builders and contractors need to know about creating an architecture presentation board that wins more business.
Key Takeaways
- A great architecture presentation board combines floor plans, 3D renderings, mood boards, material samples, and furniture selections in one organized document.
- Presentation boards reduce revision cycles because clients can see the complete design concept before any work begins.
- A clear structure and consistent visual style make your design board easier for clients to understand and far more persuasive.
- Cedreo lets contractors and builders create professional presentation boards with 2D floor plans, photorealistic renderings, and a full material library in a fraction of the usual time.
Why trust us? Here at Cedreo, we’ve got 20+ years of experience working with housing pros in the home design space. So we know what it takes for contractors and builders to create design presentations that help them land more clients!
See How You Can Create Complete Projects with Cedreo
Plans – Get site plans, 2D floor plans, electrical plans, cross sections and elevation views — with all the technical details you need for a comprehensive project overview.
3D Visualizations – Use interior and exterior 3D renderings as well as 3D floor plans to help clients understand the finished project.
Documentation – Manage all your visual documents in one place, so it’s easier to present and sell your projects.
No credit card required, no commitment
Why Are Architecture Presentation Boards Important?
A great presentation board doesn’t just describe your design.
It sells it.
Here’s why contractors and builders who invest in polished presentation boards consistently win more proposals and close more projects:
- They help potential clients visualize the completed space before a single wall is built.
- They reduce costly revision cycles by presenting the full design concept upfront, so clients raise concerns early rather than late.
- They speed up project approvals because there’s less room for misinterpretation when everything is laid out visually.
- They demonstrate your professionalism, attention to detail, and expertise to every potential client, other designers, or stakeholders reviewing the work.
- They make your design choices transparent, giving clients confidence in what they’re approving.
- They differentiate your proposal from competitors who show up with rough sketches and vague descriptions.
When clients can see exactly what they’re getting, decisions happen faster and misunderstandings happen far less often.
That’s the real business case for creating a well-crafted presentation board every time.
What Does an Architecture Presentation Board Contain?
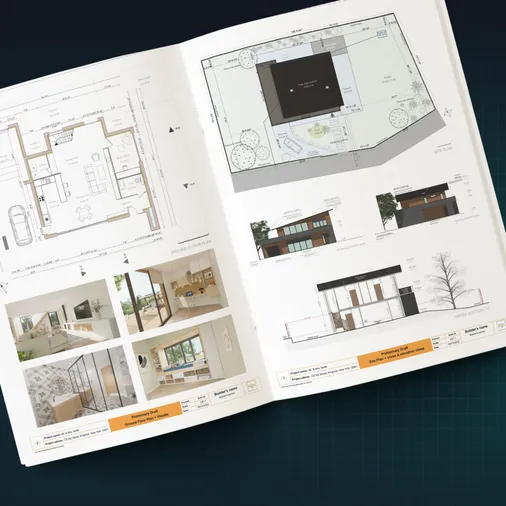
A complete architecture presentation board brings together all the visual and technical elements of your house design project in one organized document.
The exact contents vary by project type, but most professional design boards include:
- A site plan showing the building footprint on the lot with landscaping, driveways, and access
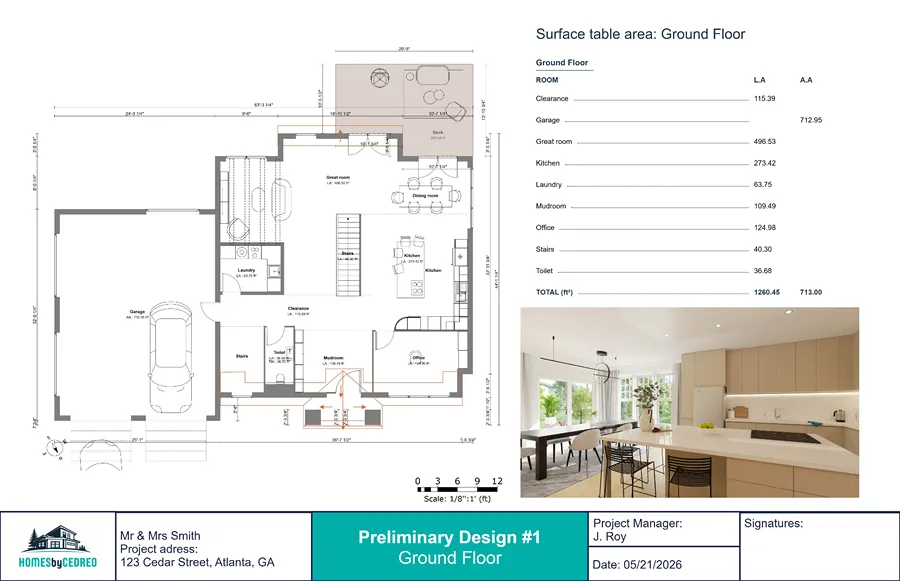
- 2D floor plans for each level of the project, with room dimensions, labels, and surface areas
- Exterior elevation views and cross sections showing facade details and ceiling heights
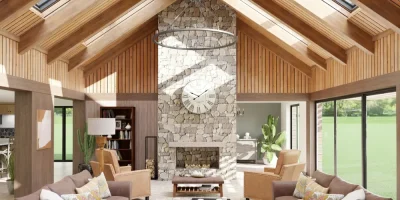
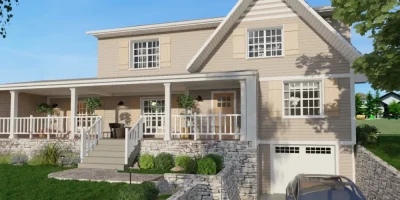
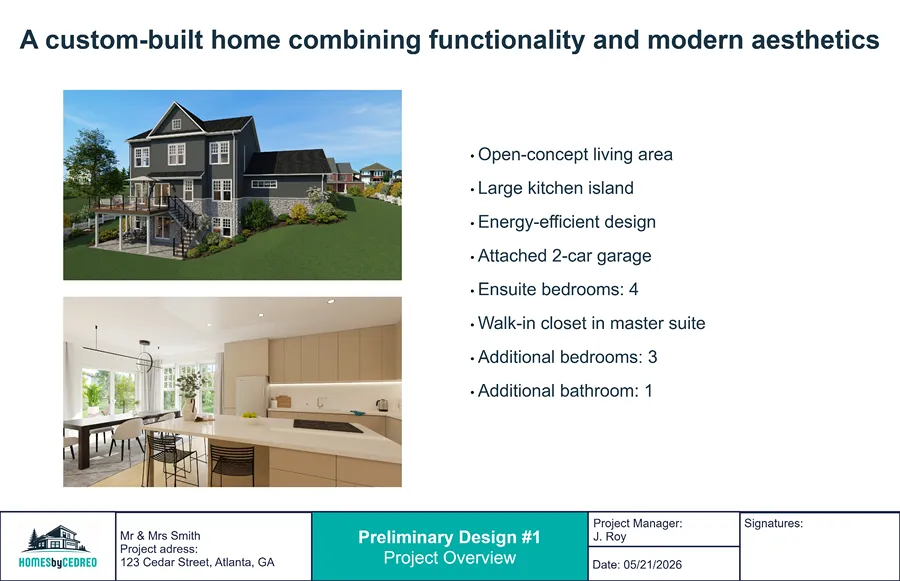
- Photorealistic 3D interior and exterior renderings
- Furniture and fixture selections organized by room
- A surface area breakdown by room
- A project budget summary
The more complete and organized your board, the easier it is for clients to understand the project and approve the proposal.
Cedreo lets you create all of these important elements within a single platform, so you’re never jumping between programs or reconciling different document versions.
PRO TIP! Even if you present the main proposal digitally, consider adding a few physical elements to your architecture presentation board.
For example, a small mood board with fabric swatches, furniture samples, and layered textures can help clients connect the design to the real space and demonstrate the style, inspiration, and finish quality more clearly.
How to Make an Architecture Presentation Board: Step by Step Tips
Here’s how to create a complete, professional architecture presentation board using Cedreo.
Step 1: Define Your Design Concept
Every great presentation board starts with a clearly defined design concept.
This step is part of the design process and happens before you open Cedreo or any design software.
Take time to define the overall design aesthetic, your client’s key priorities, and the key design elements at the heart of the project.
Start by gathering reference images and rough sketches that capture the mood, direction, and inspiration for the project.
These become the raw material for your mood board and give clients something concrete to react to before any plans exist.
A few practical tips:
- Use consistent fonts and graphic styles throughout the board
- Keep the focus on the main ideas
- Tell a story from concept to detail
- Include a high-level budget breakdown so clients know where their money is going.
Clients who see a cohesive vision from start to finish are far more likely to approve the proposal.
Step 2: Model the Terrain
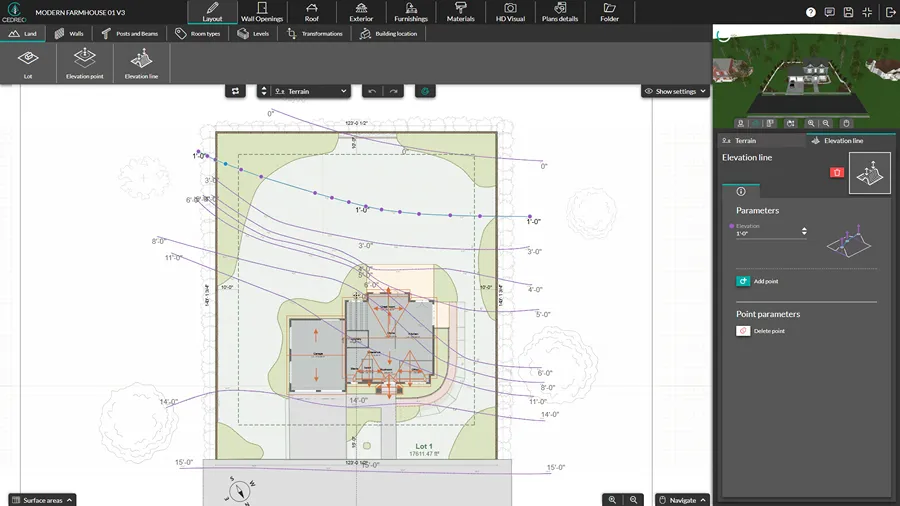
For new construction and exterior renovation projects, everything starts with a detailed site plan.
The slope, level changes, and lot shape all have a direct impact on building placement, foundation requirements, and project costs.
Advice from a Cedreo Expert:
“Cedreo simplifies this step with its terrain modeling tool. Just place the points and elevation lines on the site plan, and the software automatically generates 3D terrain that accurately reflects the natural ground.” – Etienne Bahu
This early-stage modeling helps you flag potential cost drivers before the design goes too far:
- Retaining walls needed to manage slopes
- Driveway or garage access that’s too steep for the proposed layout
- Level differences that call for a split-level design or crawl space
PRO TIP! Compare several building placements on the site before moving to the floor plan. A small shift of just a few feet can sometimes significantly reduce excavation costs or simplify the foundation design.
Step 3: Create the 2D Floor Plan and Instantly See the 3D Model
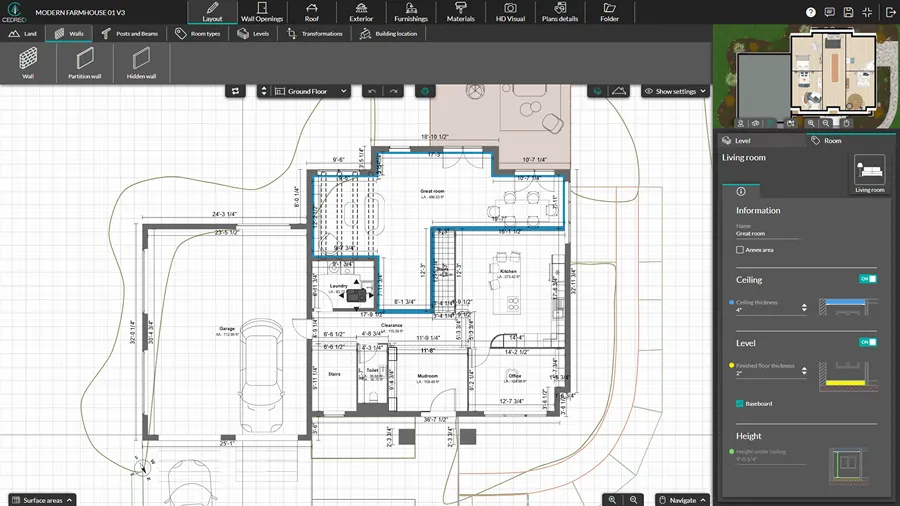
The 2D floor plan is the structural foundation of your entire presentation board.
This is where you define rooms and their layout, plan traffic flow, position openings, and establish the roofline.
With Cedreo’s floor plan software, every wall, opening, and level you draw in 2D automatically generates a full 3D model and exterior elevation views, with no CAD experience required.
This is the crucial stage where your design ideas begin to take physical form, and where you can catch layout issues before presenting the proposal to clients.
For example, if clients request a layout change, you can revise the floor plan and see the updated 3D model in real time.
The CEDREO advantage! Any change you make to the 2D floor plan instantly updates all dependent elements: elevation plans, surface area tables, dimensions, and the 3D model. You avoid the manual re-entry that causes errors and inconsistencies between documents, which improves speed and functionality.
Step 4: Finish the Interior and Exterior Design
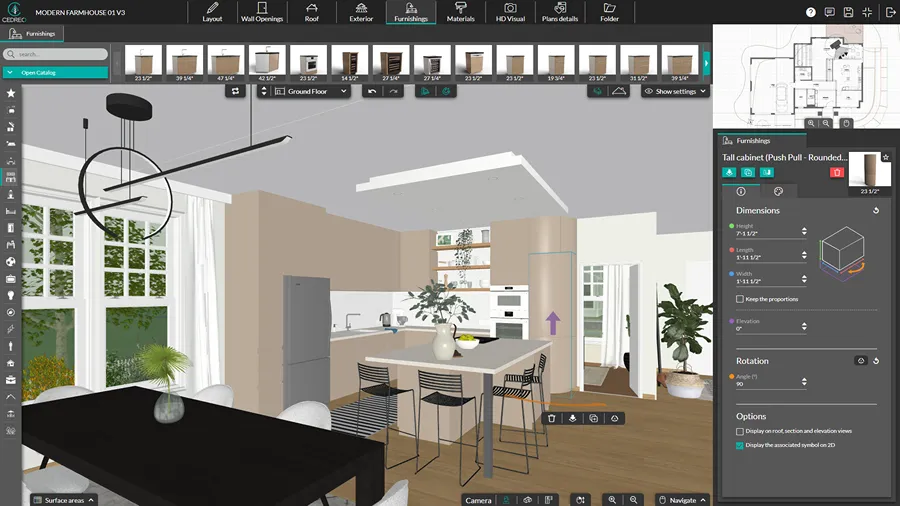
With the structure in place, it’s time to add materials, finishes, and furnishings to bring the design to life.
Test different exterior facade treatments with a single click: stucco, wood siding, stone cladding, panel combinations, and more.
For the interior, Cedreo’s library of 10,000+ 3D furniture, decor, and surface materials lets you furnish every room and validate proportions at a glance, which is incredibly helpful during client reviews.
Pull reference images and inspiration images to validate your ideas, and compare fabric samples, paint colors, and lighting choices before presenting to clients.
This step is also where you test lighting ideas and finalize artificial lighting choices to build a more complete exterior and interior design presentation for clients.
Advice from a Cedreo expert:
“Once your layout is roughly defined, check the natural light. You will immediately see if openings are poorly oriented or if a deck needs to be shifted because it gets too much shade.
The goal is to use the sun simulation as early as possible to avoid making corrections later.” – Etienne Bahu
Step 5: Generate Realistic 3D Views to Sell the Project
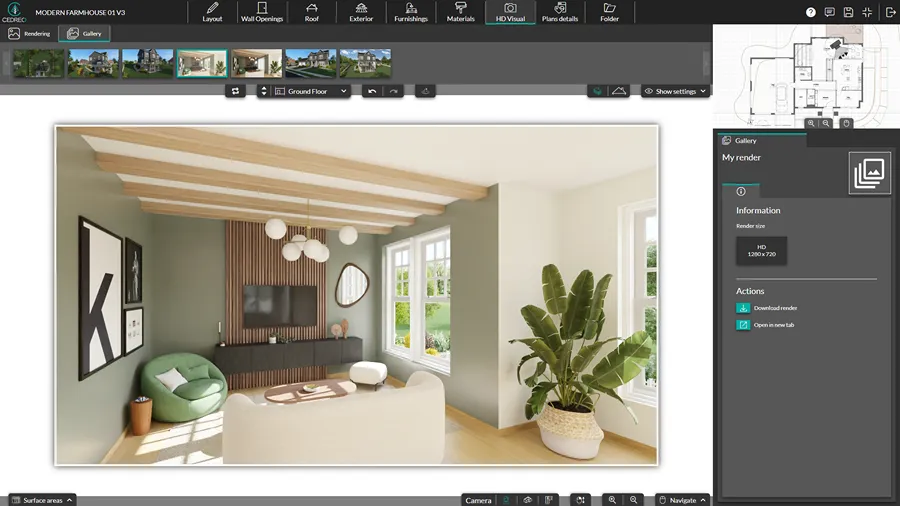
Photorealistic 3D renderings are what turn a good presentation board into one that actually closes projects.
Floor plans and technical drawings communicate information.
3D views create an emotional connection to the design.
A single well-composed rendering of the completed space can turn hesitant clients into confident ones.
With Cedreo, you generate photorealistic interior and exterior renderings in about 5 minutes, with full control over lighting conditions, materials, and camera angles.
Exterior images with realistic sky, shadow, and landscaping give clients the same reaction they’d get from seeing the finished project in person, and these visual elements are among the most compelling assets in your proposal.
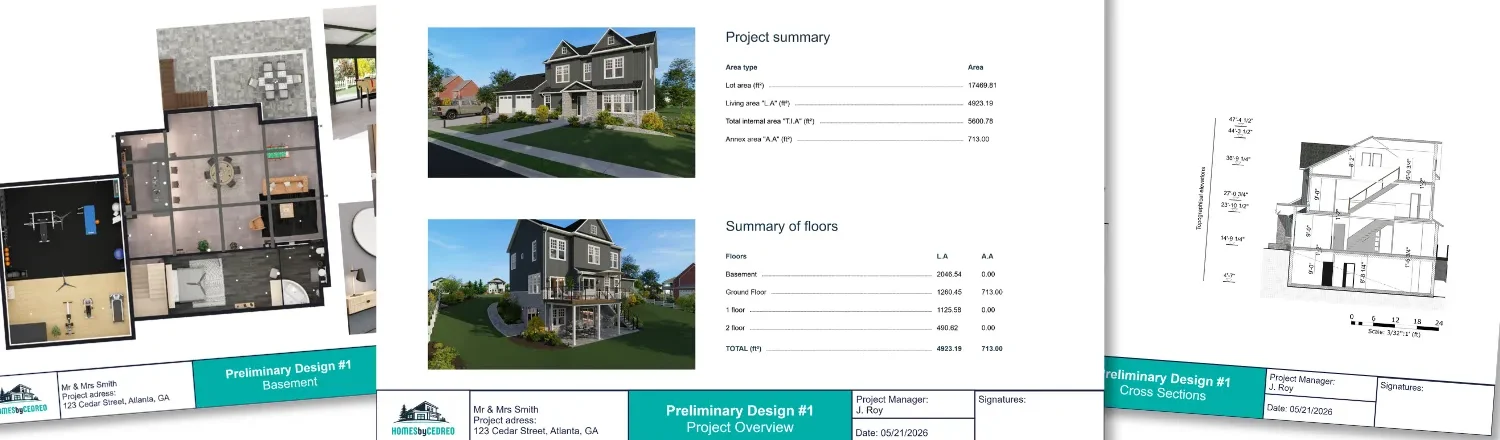
Step 6: Produce Site Plans, Floor Plans, Elevations, and Sections

Once the design is finalized, Cedreo automatically generates the technical plans your presentation board needs: site plan, floor plans for each level, elevation views, and cross sections.
All your drawings come from the same model, so every document is coherent.
And if a client requests a change, all related plans update automatically once you adjust the floor plan.
Cedreo also provides:
- Customizable scales: Choose the exact scale you need (1/50, 1/100, 1/200) before exporting. Forget the manual resizing on layouts. Your documents are directly usable or printable.
- Automatic dimensions: When you modify a partition, an opening, or a level, the dimensions follow your input.
- Custom dimensions & annotations: You have the ability to add additional dimensions and notes to provide clarity for clients and builders.
Step 7: Add Surface Area Calculations
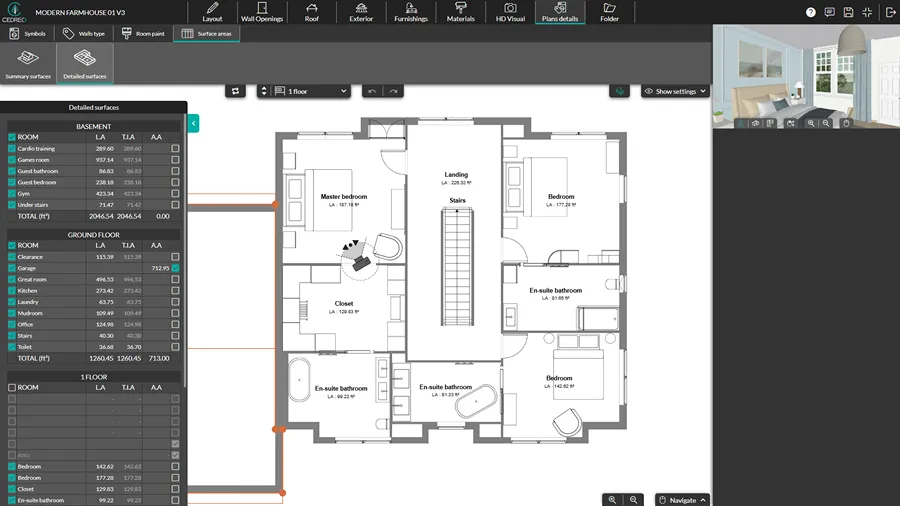
Surface areas affect your project’s budget, pricing, and overall scope, and clients often ask about them.
Cedreo calculates all the relevant measurements automatically from your 2D design: livable area per room, glazed surfaces, total floor area, and more.
Any change to the floor plan updates the surface area tables instantly, with no manual recalculations and no risk of inconsistencies between your plans and your documentation.
Advice from a Cedreo expert:
“For example, if a client absolutely wants a large bay window to the north to take advantage of a beautiful panorama, the surface area table with total glazed area helps anticipate the consequences of this choice on the glazed area distribution .” – Etienne Bahu
Step 8: Combine It All into a Project Presentation PDF

With all your key elements ready, compile the final presentation board into one professional PDF.
Cedreo lets you pull everything into one project presentation document: 2D floor plans, 3D renderings, surface area tables, material notes, and terrain views.
Structure the document so clients can follow the design logic from concept to detail:
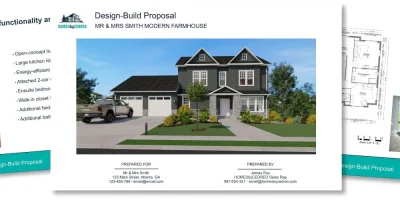
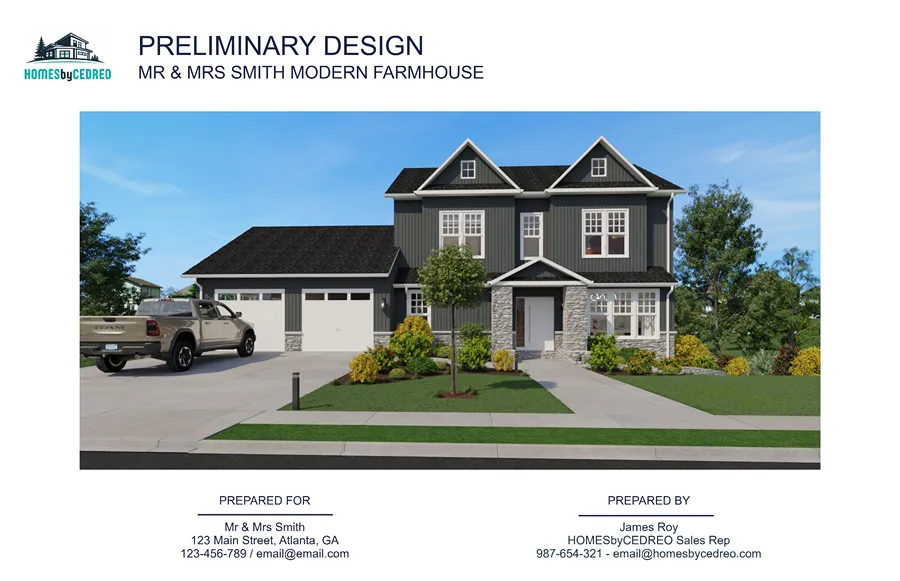
1. Opening image to set the tone
2. Site plan and floor plans for each level
3. Elevation views and cross sections
4. 3D renderings (interior and exterior)
5. Material, furniture, and key selections for other design elements by room
6. Surface area breakdown and budget summary with next steps
For example, if you’re presenting a home addition, open with a dramatic exterior rendering, then walk clients through the floor plans, design ideas, materials choices, and the overall proposal structure in sequence.
You can also export plans as DXF files for collaborators who work in CAD programs.
Build Winning Design Presentations with Cedreo
A great architecture presentation board is one of the most valuable things you can bring to a client meeting in the house design industry.
It shows clients you’ve thought through every crucial detail.
It gives them something real to react to.
And it makes the path from proposal to signed contract significantly shorter.
Creating professional presentation boards that win more proposals starts with having the right tools.
Cedreo gives contractors and builders everything they need:
- 2D floor plans and 3D models generated from a single design
- Photorealistic interior and exterior renderings in about 5 minutes
- 10,000+ furniture, decor, and material options to showcase every design choice and add a personal touch
- Automated surface area tables that update with every floor plan change
- Professional presentation documents with your company branding, exported as a print-ready PDF
Stop spending days on design presentations that should take minutes.
Try Cedreo for free and start closing more proposals with a lot less effort.
Architecture Presentation Board FAQs
How do you structure an architecture presentation board?
Start with strong opening images, then move through the site plan, floor plans, elevations, 3D renderings, material selections, and a budget summary with next steps.
Cedreo’s presentation documents compile these visual elements into one organized, branded PDF that clients can review on any device.
What software is used to make architecture presentation boards?
Cedreo gives contractors and builders one platform for terrain modeling, house plans, 3D renderings, and document assembly.
That means you can create a polished design board without juggling multiple programs or re-entering data after every revision.
How do you make a presentation board without design experience?
Software like Cedreo removes the need for advanced drawing skills or formal training.
You build a floor plan with drag-and-drop tools, then add furniture, materials, lighting, and style details, and combine it with 3D images to create a presentation board that communicates your ideas.
What file format should I use for a digital design presentation board?
PDF is the standard format because it preserves formatting across devices and keeps all the information in one place.
Cedreo exports presentation documents as print-ready PDFs and also supports DXF/JPG export of house plans for CAD collaborators.
How do you present a remodeling project to a client?
Walk clients through the board section by section, starting with the design concept/mood board, then moving through the plans, 3D images, materials, textures, and budget.
Cedreo lets remodelers compile all of these elements into one professional presentation document with company branding for digital sharing or print.