A well-built interior design presentation board turns your concept into something they can see, feel, and say yes to.
The best interior design in the world won’t win the job if you can’t communicate it clearly.
That’s because most clients don’t see what you see.
They’re not trained to read floor plans, interpret material samples, or picture a finished room from rough sketches.
Without strong visuals, even brilliant ideas fall flat in a presentation.
But an interior design presentation board closes that gap.
It’s not just a nice visual summary, it’s your most persuasive selling tool.
It transforms a client’s uncertainty into excitement.
So whether you’re working on a single-room refresh or a full home renovation, this guide covers everything interior designers need to create interior design presentation boards that win more projects.
Key Takeaways
- A strong interior design presentation board communicates your design concept clearly and builds client confidence before a single wall is painted.
- The most effective boards include combinations of a mood board, color palette, material selections, floor plans, and 3D renderings.
- Walking clients through a structured design presentation, step by step, reduces revision cycles and increases approval rates.
- Cedreo’s interior design software helps designers create professional floor plans, photorealistic 3D renderings, and complete project presentations in a fraction of the usual time.
“Why trust us? Here at Cedreo, we’ve got 20+ years of experience working with housing pros in the home design space. So we know what it takes for interior designers to create interior design presentations that help them land more clients!”
See How You Can Create Complete Projects with Cedreo
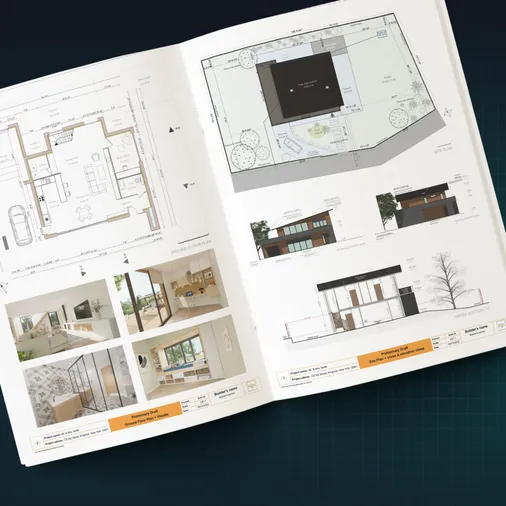
Plans – Get site plans, 2D floor plans, electrical plans, cross sections and elevation views — with all the technical details you need for a comprehensive project overview.
3D Visualizations – Use interior and exterior 3D renderings as well as 3D floor plans to help clients understand the finished project.
Documentation – Manage all your visual documents in one place, so it’s easier to present and sell your projects.
No credit card required, no commitment
What Is an Interior Design Presentation Board?
An interior design presentation board is a curated visual document that communicates your design concept for a space to the client.
It brings together all the key elements of an interior design project, from floor plans and color palettes to material samples and 3D renderings, into one organized, easy-to-follow reference.
Think of it as the deliverable that connects your design process to the client’s decision.
Interior Design Presentation Board vs. Mood Board
These two tools serve different purposes, even though both rely on visuals to communicate ideas.
Here’s how they differ:
Interior Design Board:
- A comprehensive document used to present the full design vision for client review and approval
- Includes floor plans, material boards, furniture selections, high quality renderings, and budget details
- Used throughout the interior design project lifecycle, from the first concept review to final sign-off
- Designed to communicate decisions and demonstrate expertise, not just capture inspiration
Mood Board:
- A curated collection of images, colors, and textures that capture the overall feel or aesthetic direction of a space or project
- Used in the early stages of an interior design project to align on style before committing to specific products
- More inspirational than technical in nature
- Often the first visual you share with a client to establish the design direction
Types of Interior Design Presentation Boards
Not every board serves the same purpose.
For large projects, a complete presentation may combine several of these types together.
For example:
- Material / sample board: Fabric swatches, flooring, tile, countertop samples, and wall finishes physically or digitally assembled to show the material palette for the space.
- FF&E board (Furniture, Fixtures & Equipment): Specific product selections complete with dimensions, finishes, lead times, and vendor details.
- Color palette board: A standalone color story that includes paint codes, material references, and a clear view of how the color scheme comes together.
- Lighting board: Lighting fixture selections and a placement plan showing how light will interact with the space, both natural and artificial.
- Concept / vision board: The narrative behind the design, often the opening piece of a multi-board presentation, used to establish emotional direction before diving into specifics.
What to Include in an Interior Design Plan
A complete interior design presentation walks the client through every stage of the design, from concept to completion.
Here’s what to include in each section.
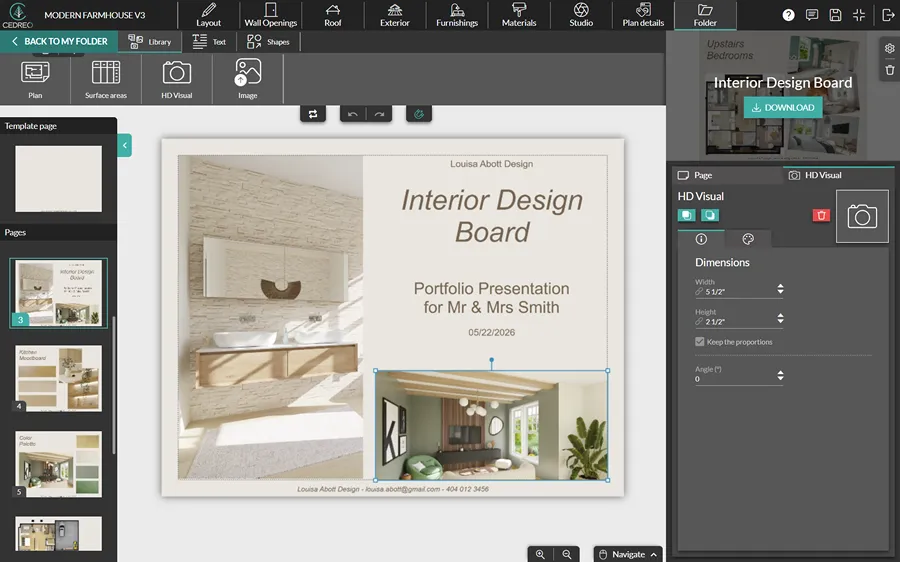
Cover Page with Project Name and Designer Branding
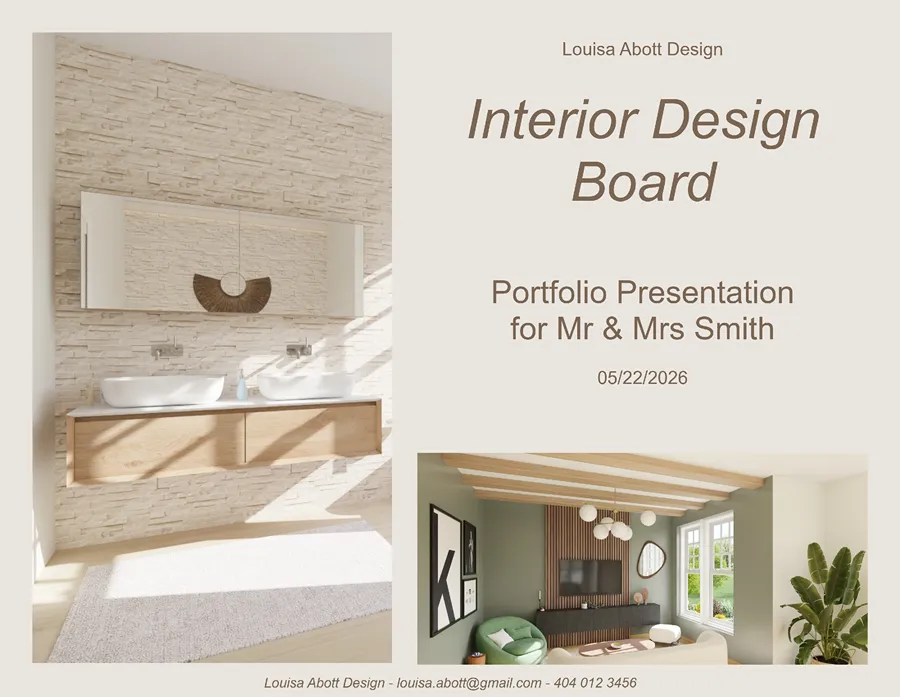
The cover page sets the tone before a single design element is revealed.
- Include your company name, logo, and contact information
- List the project name, client name, and presentation date
- Use consistent typography and colors from your brand identity throughout
Project Overview and Scope of Work
A concise overview keeps expectations aligned and prevents scope creep later in the design process.
- Briefly describe the project scope: which rooms are included and the overall design goal
- List what’s included in the scope and what falls outside of it
- Reference any agreed-upon constraints like budget limits or timeline requirements
Design Goals / Client Brief Summary
This section shows clients you listened.
- Summarize the key priorities gathered during your client discovery meetings
- Note specific functional needs like storage, accessibility, or lifestyle-specific requirements
- Include notes on style preferences or inspiration images the client shared
Mood Board / Design Concept Direction
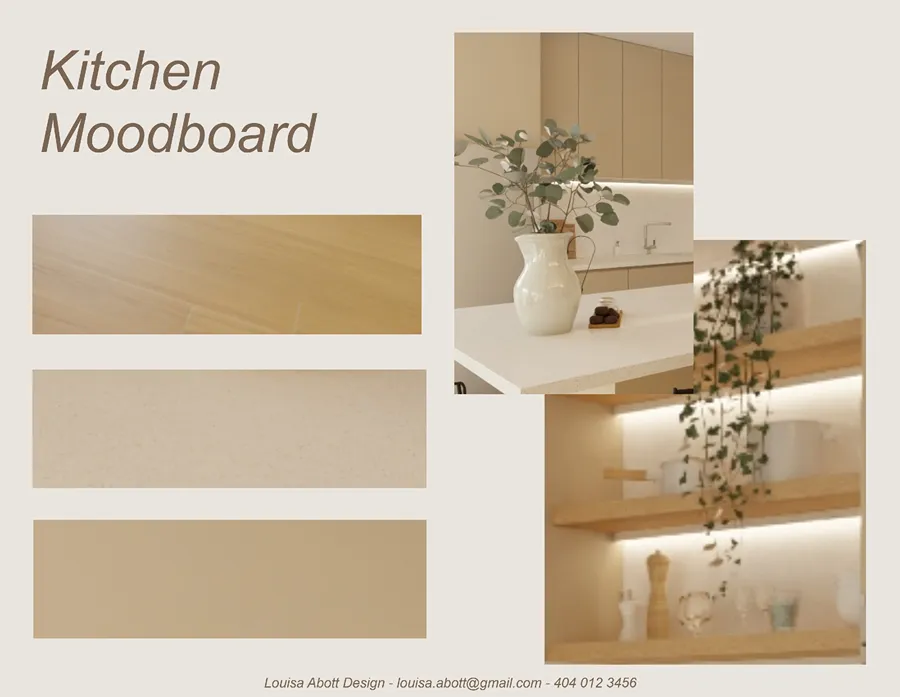
The mood boards are where the design presentation starts to come alive.
- Curate images that capture the desired atmosphere, color palettes, and overall aesthetic direction
- Add brief captions explaining why each image was included and how it connects to the project goals
- Use this section to establish a visual through-line for everything that follows in the presentation
Color Palette
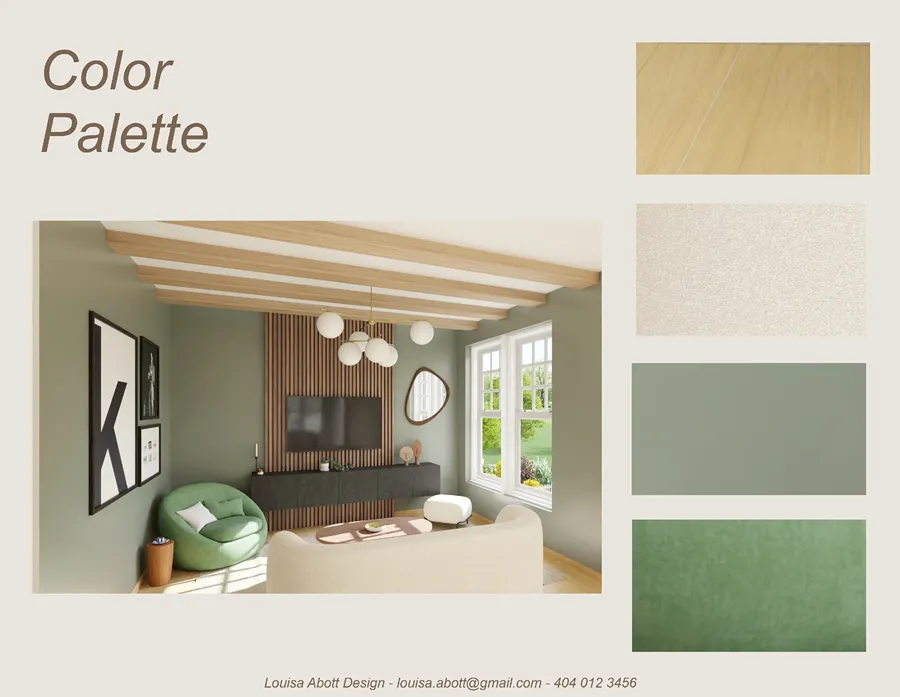
A clear color palette helps clients understand the overall color scheme for the space before any work begins.
- Show primary, secondary, and accent colors together in one view
- Include specific paint brand names and color codes so there’s no ambiguity at the sourcing stage
- Note which surfaces or design elements each color applies to
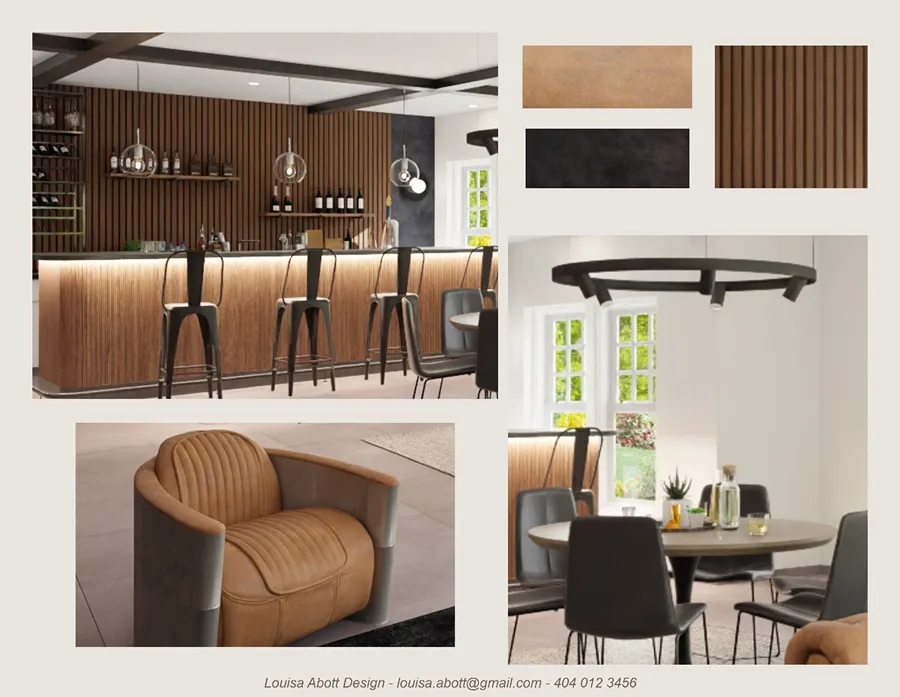
Material Board
Materials are where clients either get excited or start second-guessing.
- Include physical or digital samples of flooring, wall finishes, countertops, tile, and key fabrics
- Label each material with the product name, supplier, cost range, and relevant specs
- Group materials by room or zone for easy client review
Furniture Plan and FF&E Selections
Every furniture piece in the design plan should be justified and clearly presented.
- Include images, dimensions, finish options, and vendor information for each furniture selection
- Organize the furniture plan by room or functional area for easy review
- Note any pieces with long lead times so the client knows what to approve first
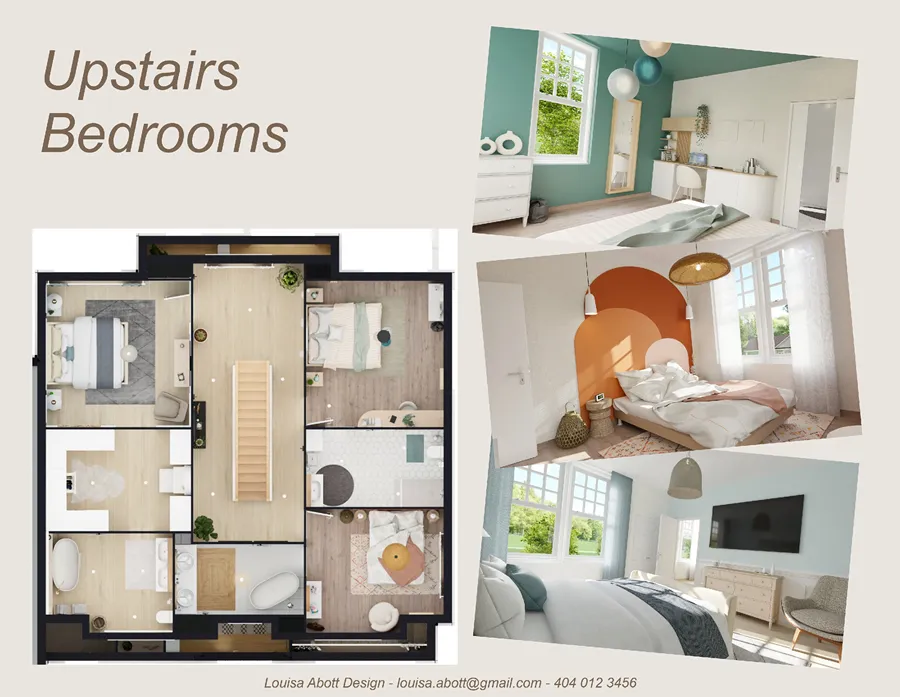
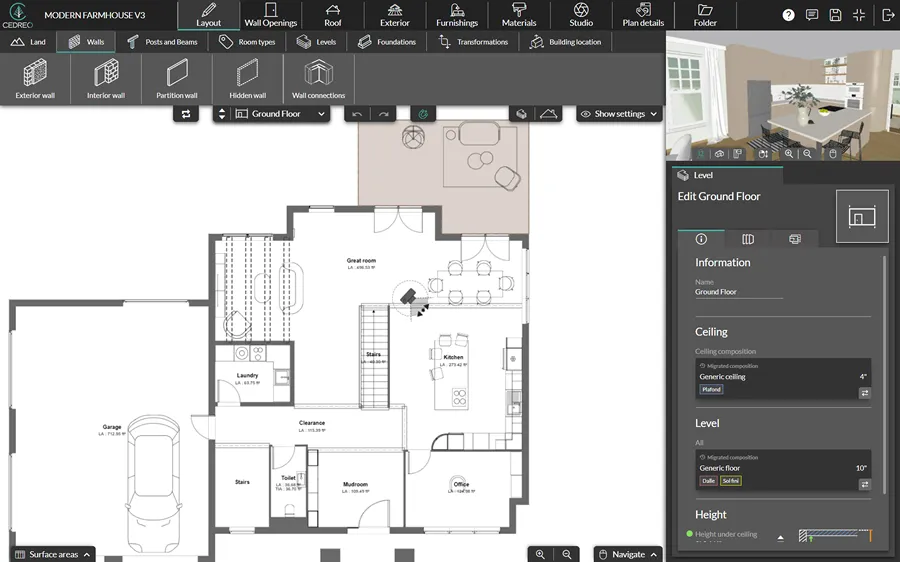
2D & 3D Floor Plans
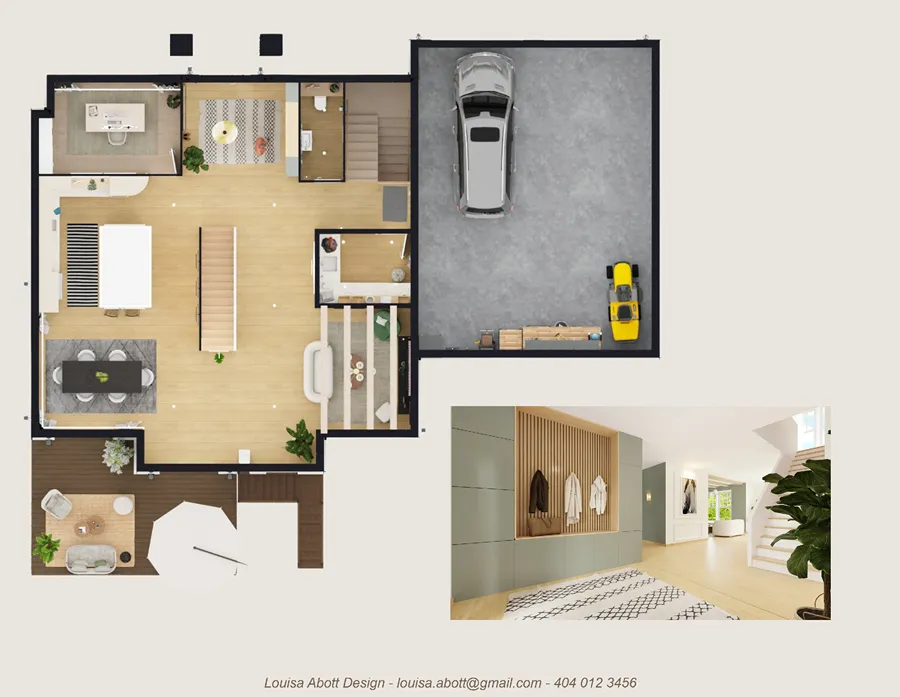
The floor plan is one of the most important elements of any interior design presentation.
- Include a 2D floor plan with accurate measurements and room layout to clearly show the spatial logic of the design
- Add a 3D floor plan to help clients visualize furniture placement and how the room layout feels from above
- Highlight key design decisions like traffic flow paths, focal points, and furniture arrangements
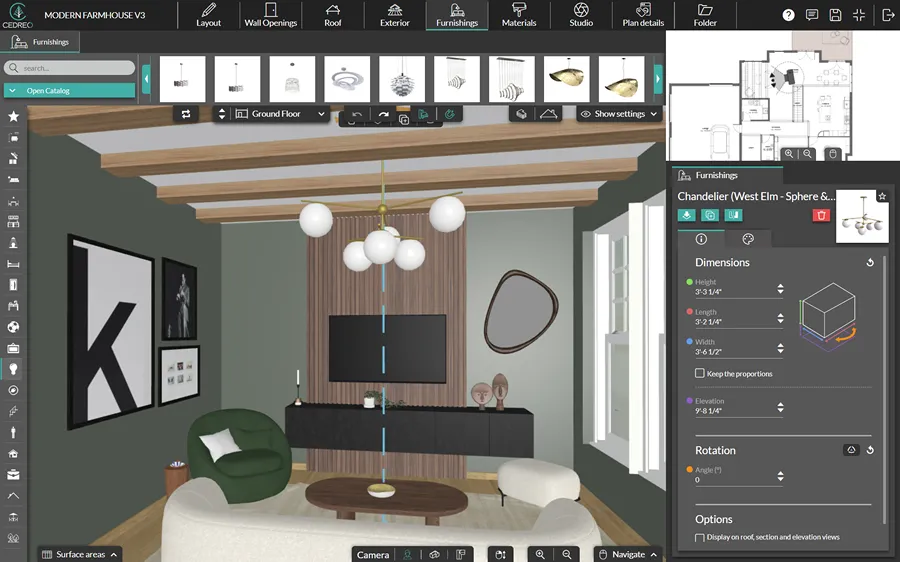
3D Renderings
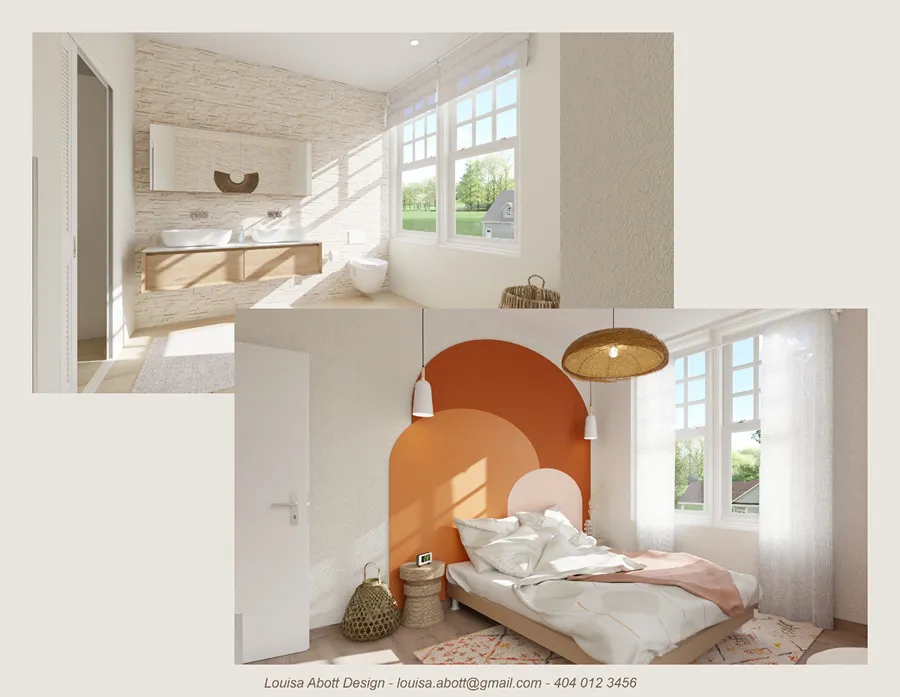
High quality 3D renderings are often the moment a client’s hesitation turns into excitement.
- Present renderings from multiple angles for each key room in the design project
- Ensure renderings accurately reflect the selected materials, furniture, and lighting choices
- Use photorealistic images (like ones from Cedreo) to reduce revision rounds and help clients feel confident in the design decisions
Lighting Plan
Lighting is one of the most impactful and most overlooked elements of any interior design presentation.
- Show fixture placements on the floor plan, including ceiling, wall, and floor-level sources
- Include a lighting schedule with fixture details, brand names, and supplier information
- Indicate natural light sources like windows and skylights, and their effect on each room’s ambiance
- Show real life lighting effects with high quality renderings from Cedreo.
- Present the space in different types of lighting, such as daytime, evening, and nighttime.
Project Timeline
Clients want to know when things will happen.
- Break the project into phases: design, sourcing, construction or installation, and final styling
- Provide estimated start and end dates for each phase
- Call out key milestones so clients know exactly when their input is required and what decisions must be made
Budget Summary or Shopping List
Cost clarity builds trust.
A detailed summary removes the anxiety of the unknown and keeps costs transparent throughout the project.
- Organize by category: furniture, materials, lighting, accessories, and labor
- Include a final budget total and any contingency allowance for unexpected costs
- For shopping lists, include item codes or links so clients can review selections directly
Next Steps and Sign-Off
End every design presentation with a clear action plan so momentum doesn’t stall.
- List the specific decisions or approvals needed from the client
- Include a sign-off section where the client confirms their approval in writing
- State your revision turnaround time and outline how the feedback process works
Interior Design Presentation Templates: Tools and Formats
Templates exist for one reason: to save time.
Building a presentation from scratch for every new interior design project is one of the most draining parts of running an interior design business.
A good template gives you a consistent structure so you can spend more energy on the creative work and less on formatting.
Most effective presentation templates include:
- Pre-built layouts for each section: cover page, mood boards, material board, floor plan, 3D renderings, and more
- Placeholder grids for images and product photos
- Consistent typography, spacing, and branding elements throughout
- Editable color schemes that can be adapted to match each client’s project and your studio identity
Digital templates are the most practical option for most designers.
They’re easier to update, share, and duplicate than printed boards.
Here’s how to do something similar with Cedreo’s presentation documents.
Use Cedreo to Create Templates for Client Presentations
Instead of assembling a design presentation in a separate tool, Cedreo lets you generate professional project presentations directly from your design files.
Combine your floor plans, 3D renderings, and interior design details all into a single, polished document.
The real time-saver is the project duplication feature.
- Create the structure for your design presentation
- Duplicate the project for each new client
- The template carries over to the new project
- When you make updates to the design, the plans in the presentation automatically update in the presentation.
You’re not starting from scratch every time.
Want to see how to create a design board in Cedreo?
Check out the next section.
How to Make an Interior Design Presentation Board
Follow these 5 steps to create a board that communicates your design vision clearly and moves clients toward a confident yes.
1. Choose Digital Board vs. Hard Board
The first decision is the format, and it shapes the entire presentation experience.
Digital boards are versatile, easy to share, and ideal for remote client presentations or when working with clients across different locations.
They allow for quick edits based on client feedback and can include interactive elements like links to specific products or photorealistic 3D renderings.
Digital boards are also a strong option for designers who prefer not to rely on drawing skills to communicate their ideas.
Hard boards, on the other hand, offer a tactile experience that digital boards can’t replicate.
They’re effective for showcasing textures and materials in a way that lets clients physically interact with the design elements.
With benefits to each, many interior designers combine both approaches:
- Digital boards for flexibility and convenience
- Hard boards for physical impact
2. Choose Your Inspiration
Choosing the right inspiration is an important step in crafting a board that resonates with your vision.
Here’s how to approach it:
- Explore broadly first. Look at design magazines, online portfolios, and platforms like Pinterest or Instagram to uncover diverse styles, trends, and fresh ideas.
- Condense your inspiration down to themes, colors, and elements that align with the client’s preferences and the specific details of the project.
- Build your mood boards early in the design process to compile your ideas into a cohesive visual narrative that communicates your creative ideas to the client.
- Involve the client in the inspiration phase to ensure their taste and vision are reflected, which builds stronger buy-in for the proposed design.
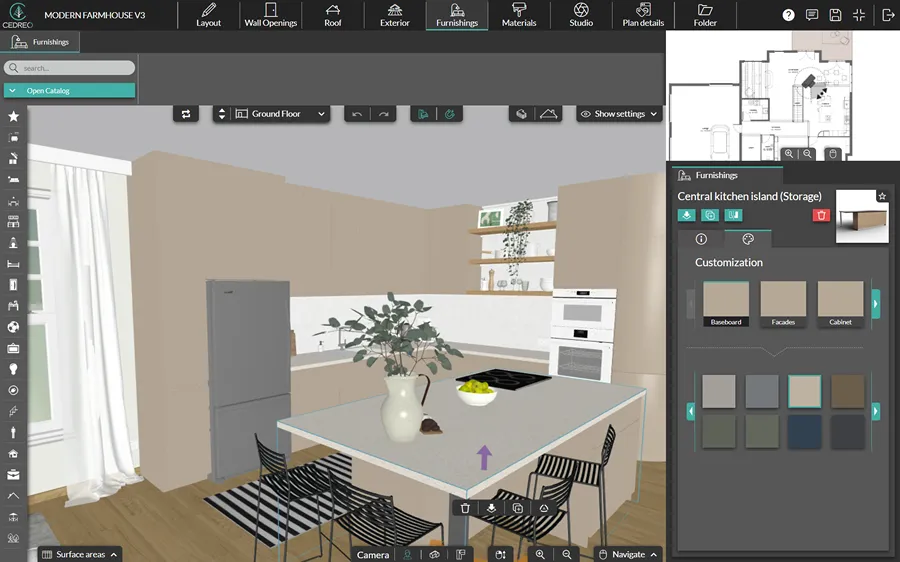
3. Lay Out the Room
The room layout is a critical component of any design board because it shows how the space will function and how different elements will interact within it.
Here are the key tips for creating an effective layout:
- Start with accurate measurements. Confirm the exact dimensions of the space, including doorways, windows, and any structural elements that affect the furniture plan.
- Sketch multiple configurations to explore different furniture arrangements, traffic flow patterns, and potential focal points before committing to one design plan.
- Use floor plan software to visualize the room layout in 2D and 3D so clients get a clear picture of the finished space.
PRO TIP! Cedreo lets you create multiple room layouts in minutes. No drawing skills or CAD experience required. You can generate professional floor plans with furniture and fixtures that help take your design boards to the next level.
4. Highlight Fabrics, Colors, and Materials
The materials you select communicate the feel and quality of the finished space.
Here’s how to present them effectively on your design board:
- Fabric swatches: Include samples of upholstery, drapery, and cushion fabrics. Real swatches on a hard board or high-resolution images on digital boards let clients see the textures up close.
- Color swatches: Use a clear color palette to visually communicate the color scheme and overall mood of the design.
- Material samples: Include samples or images of key finishes like wood, stone, tile, metal, or glass to demonstrate the style and quality of the space.
Keep these considerations in mind when making your material selections:
- Durability: Choose materials suited to the function of the space, not just its appearance.
- Sustainability: Opt for eco-friendly materials where possible to align with client expectations and reduce environmental impact.
- Harmony: Ensure all selected fabrics, colors, and materials create a cohesive look when viewed together as a complete set.
5. Add Furniture and Decor
Furniture and decor bring the design board to life and help clients picture how they’ll actually inhabit the future space.
Some tips for adding these elements:
- Furniture selection: Choose furniture pieces that align with the room’s style, layout, and function. Include images or drawings of each piece on the board to show how they contribute to the overall design.
- Decorative elements: Add decor items like art, rugs, and accessories to give the design personality and make the space feel curated and lived-in.
- Annotations: Use brief labels to describe the significance of each piece, the material, and its role in the overall design plan.
Your board is ready. Here’s how to present it confidently to your client.
How to Present an Interior Design Project to Clients
Walking a client through your design presentation is a skill that’s just as important as the design itself.
Here’s a structured approach that helps designers guide clients from first impression to signed approval:
- Open with the design narrative: Before showing any visuals, connect to the client’s stated goals. Remind them of the problem you’re solving and the vision you’re creating together.
- Walk through the mood boards first: Establish the overall design direction before diving into specific selections. Getting early buy-in on the concept makes the rest of the presentation smoother.
- Present material and color selections: Walk through each material choice and explain how it connects to the overall vision and color scheme.
- Show the floor plan and spatial logic: Explain how the room layout serves the client’s lifestyle, functional needs, and design goals. Use your furniture plan to demonstrate how the space will flow.
- Reveal 3D renderings as the culmination: Save the most compelling visuals for this moment. High quality renderings of the future space are often where clients shift from uncertain to sold.
- Walk through FF&E and budget: Connect each furniture selection and decor item to the design vision, then confirm alignment with the final budget.
- Gather feedback and define the revision process: Invite the client to share their reactions. Explain clearly what happens next if changes are needed, and communicate your typical turnaround time.
- Close with timeline and next steps: End every meeting with specific action items, decision deadlines, and a clear note on who is responsible for each next step.
PRO TIP! For more guidance on creating winning client presentations, check out these related articles: Architecture Presentation Boards and Floor Plan Presentation Tips.
Get Designing with Cedreo Today!
With the right tools, an interior design project becomes an exciting journey of creativity and innovation.
Cedreo is here to support you every step of the way.
Cedreo is engineered to meet the needs of remodelers, architects, interior designers, and builders with features like:
- Effortless 3D modeling: Create stunning 3D models of your designs quickly and easily.
- High-quality renderings: Bring your designs to life with high-resolution renderings that are perfect for presentation boards.
- Streamlined workflow: Cedreo streamlines your design process, from initial concept to final presentation.
Start transforming your design visions into reality with Cedreo today.
With a free version, you’ve got nothing to lose.
Interior Design Software FAQs
What does an interior design presentation include?
A complete interior design presentation typically includes a cover page, project overview, mood board, color palette, material board, furniture and FF&E selections, 2D and 3D floor plans, 3D renderings, a lighting plan, project timeline, budget summary, and a sign-off section.
Designers using Cedreo can generate many of these elements, including floor plans and high quality renderings, directly within the software.
Should an interior design presentation board be digital or physical?
Digital boards are easier to share, update, and adapt for remote client presentations, while physical boards create a tactile experience that can be more persuasive in face-to-face meetings.
Many designers find it beneficial to present digitally for convenience and bring physical material samples to in-person client meetings.
What is an interior design presentation template?
An interior design presentation template is a pre-built layout that gives designers a repeatable structure for creating client presentations.
Cedreo’s presentation documents feature lets you build a project template once and duplicate it for each new client, saving significant time on every design project.
What is the interior design presentation process?
The interior design presentation process follows these steps: establish creative direction, build mood boards, select materials and colors, develop the floor plan, create 3D renderings, and walk the client through each section.
The goal is to guide clients from the initial concept to confident approval.
How to make an interior design presentation?
To make an interior design presentation, start by organizing your content into a clear structure: cover page, project overview, mood boards, material and color selections, floor plan, 3D renderings, furniture plan, and budget summary.
Use design software like Cedreo to generate professional floor plans and photorealistic renderings, then compile everything into a polished presentation document that tells the full story of the design project.
How do interior designers present their work?
Interior designers typically present their work through structured presentation boards that combine mood boards, floor plans, material selections, 3D renderings, and budget summaries.
Tools like Cedreo help streamline this process by generating professional floor plans and photorealistic renderings that can be compiled directly into a polished client presentation.