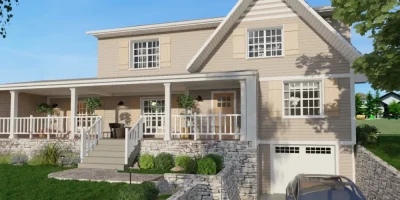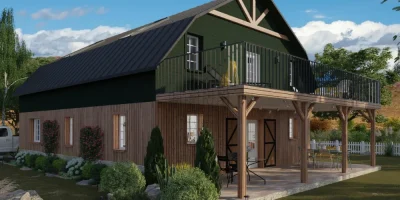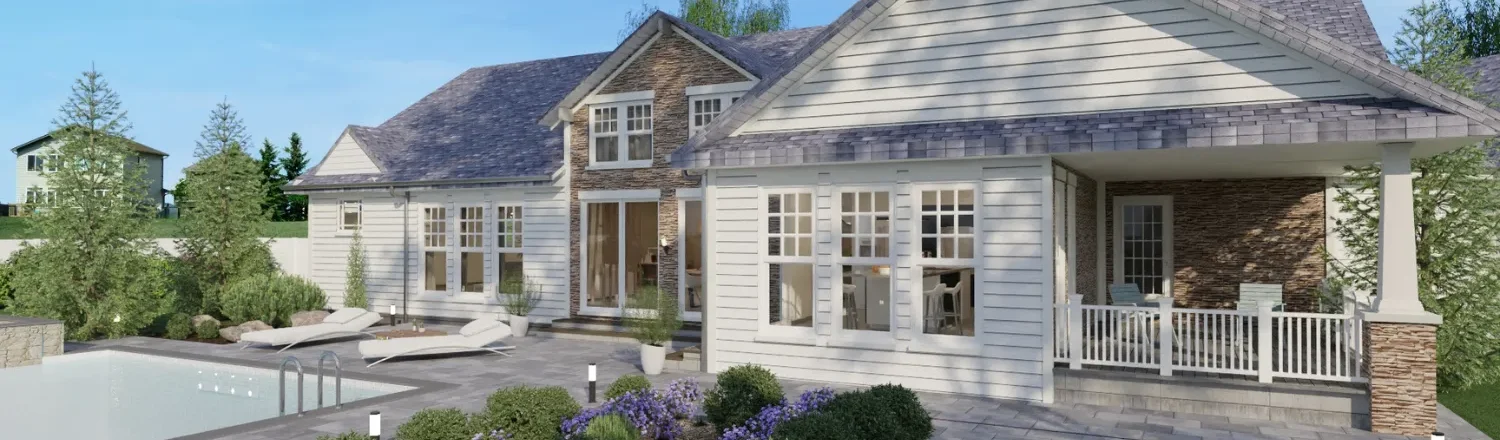
For new homes, new outbuildings, or additions to existing homes, an architectural roof plan is what ties all of the elements together. The roof plan might be a simple 2D schematic, or a 3D rendering that shows the materials, features, and roof angle in detail.
A roofing contractor and homeowner typically have different expectations of a roof plan. But with the right tools, designers and builders can easily create roof plans that satisfy both clients and contractors.
In this blog post, we’ll take a look at:
- What a roof plan is
- What a roof plan includes
- Types of roof plans
- Who uses roof plans
- How to draw a professional roof plan
Let’s get started!
What Is a Roof Plan?
For a simple roof, the plan might be just a scaled 2D drawing that shows dimensions. Detailed roof plans will include a lot more information (which we’ll explain in the next section).
Roof plans often change during the design stage, especially if clients make requests that change the footprint of their home. A roof plan may also change based on factors such as availability of materials or local building codes. A roofing contractor working on a residential roof plan should be prepared to make revisions and present new designs for contractors and clients.
What a Roof Plan Includes
A roof plan includes roof dimensions, specifications for roof pitch/slope, the placement of vents and drainage, and material specifications. It may also include framing details.
Depending on the complexity of the roof, a roof framing plan could include:
- Dimensions and styles of windows and skylights
- Shape (such as A-frame or gambrel)
- Trim colors
- Downspout styles and finishes
- Flashing type
- Tile or shingle patterns
- Chimney placement and design
- Dormer styles
- Overhangs and eaves
- Ridge start and end points
- Roof scuppers
Multi-slope roof plans will also include specifications for transitions and runoff.
When roof plans include a lot of detail, most roof planning professionals prefer to create a 3D rendering, so clients can view the roof from several angles. Roof planning software makes it easy to generate renderings internally, without needing to hire an outside firm. Keeping the roof plan in-house also means the designer can quickly make changes based on client feedback.
Types of Roof Plans
Now that we’ve covered what a roof plan is and the types of details it usually includes, let’s look at the difference between 2D and 3D roof plans.
2D roof plans
Before creating a 2D roof plan, designers need to either create a floor plan or use an existing floor plan, to ensure the roof has the correct parameters.
A 2D roof framing plan is a technical drawing that shows an overhead view of the roof details and measurements. Using roof planning software, designers can “validate” the roof by clicking a box and letting the software test the physics of the roof.
3D roof plans
Once the 2D roof plan is finalized, you have a few options for creating a 3D roof plan:
- Export the 2D design to a separate 3D modeling program
- Use CAD design software to make the rendering
- Use your rendering-creation feature in your design platform
Cedreo’s all-in-one home design platform lets you create your 3D roof plans with just a few clicks, and while the image is being processed, you can continue working on other projects. You can keep all of your project deliverables — from blueprints to 3D renderings — in Cedreo’s cloud-based platform.
Who Uses Roof Plans
Designers, home builders, remodelers, and architects use roof plans to ensure any roof they design is structurally sound. Roofing contractors and framers use roof plans to make sure they build a roof to the exact specifications. They also use roof plans whenever redesigning an existing roof.
Depending on building codes, local ordinances, and homeowners’ association rules, builders may need to submit roof plans for approval before beginning roof construction.
How to Draw a Roof Plan
Drawing a roof on a house may sound complicated, but it’s easy to do when you have the right tools. Cedreo lets home professionals design roofs in minutes — with just a few clicks — and make revisions as needed.
Follow these steps to create a roof framing plan:
1. Import or draw floor plan
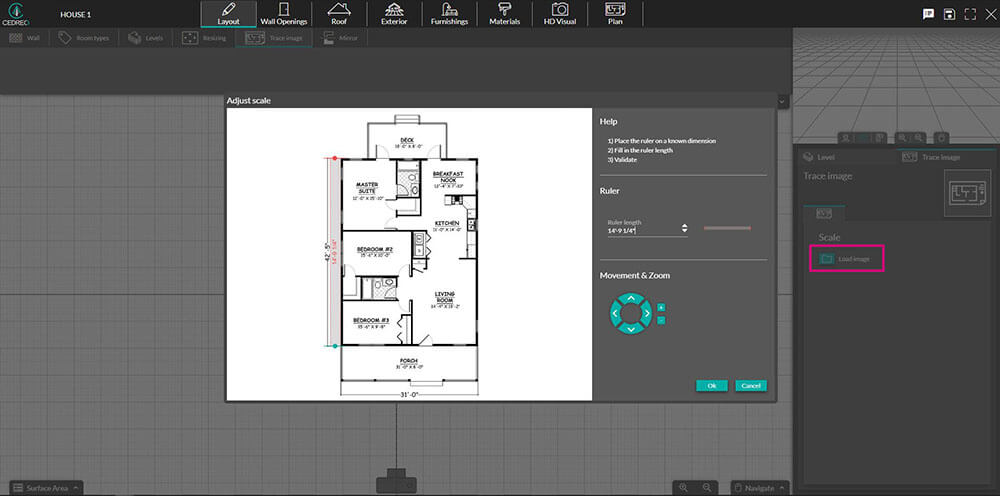
Import an existing floor plan or draw one in Cedreo. Click the “Trace Image” button to import your floor plan from your computer, and you can then trace it to create your roof. If your project involves adding a second level to a home, you can simply duplicate the single-level floor plan to create the second story, then insert the roof.
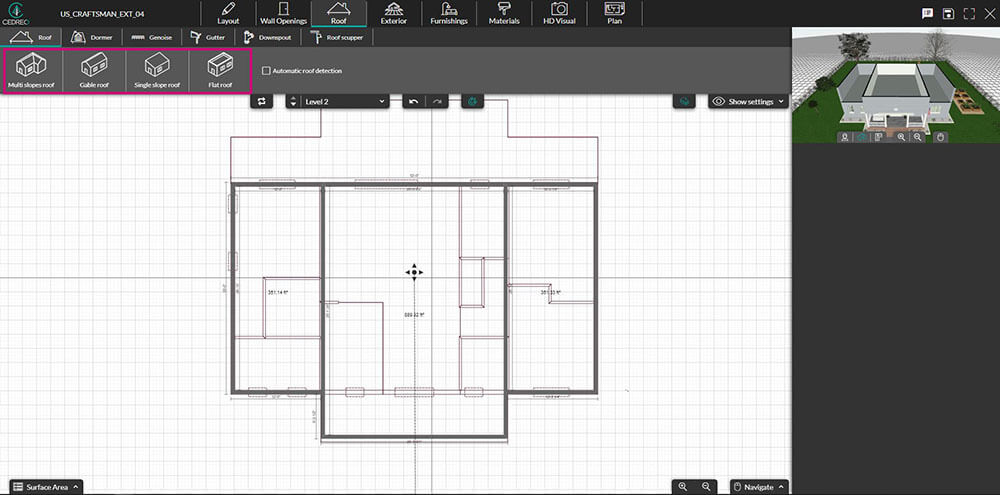
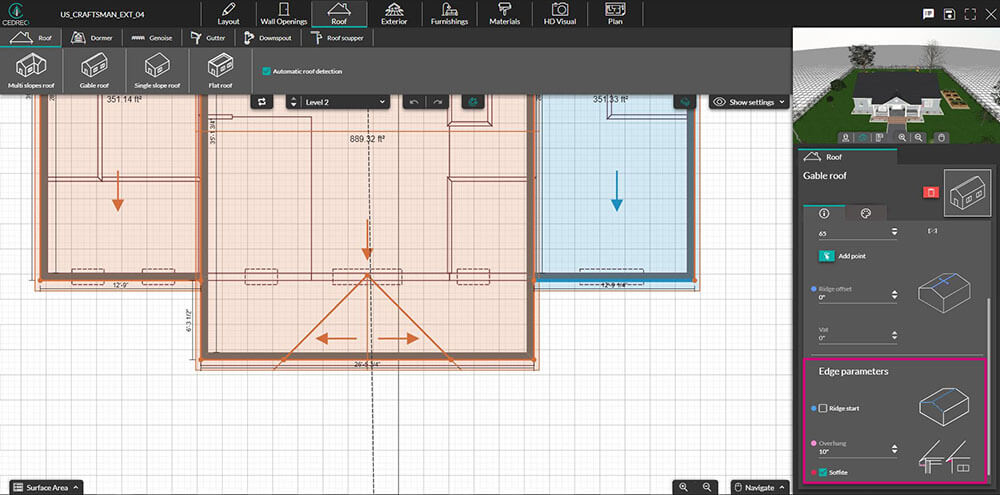
2. Select roof type
As shown in the roof plan example below, you can click on the “Roof” tab, then select the type of roof you want to create — multi-slope, single slope, gable, or flat.
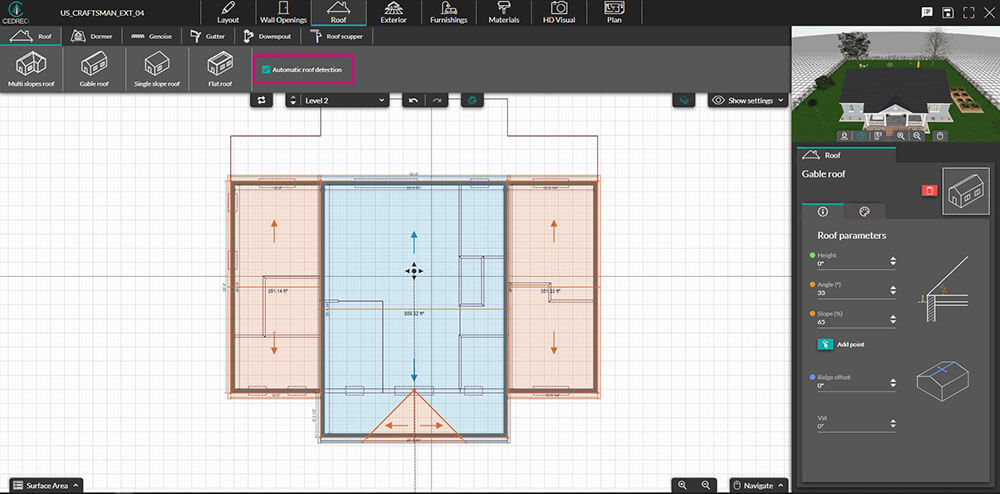
3. Draw manually or add automatically
You can draw your roof or generate one automatically — just click “Automatic roof detection,” then “Validate,” and Cedreo will add a roof to your plans and show you a 3D image of the building and roof. You can rotate the 3D image and view it from different angles.
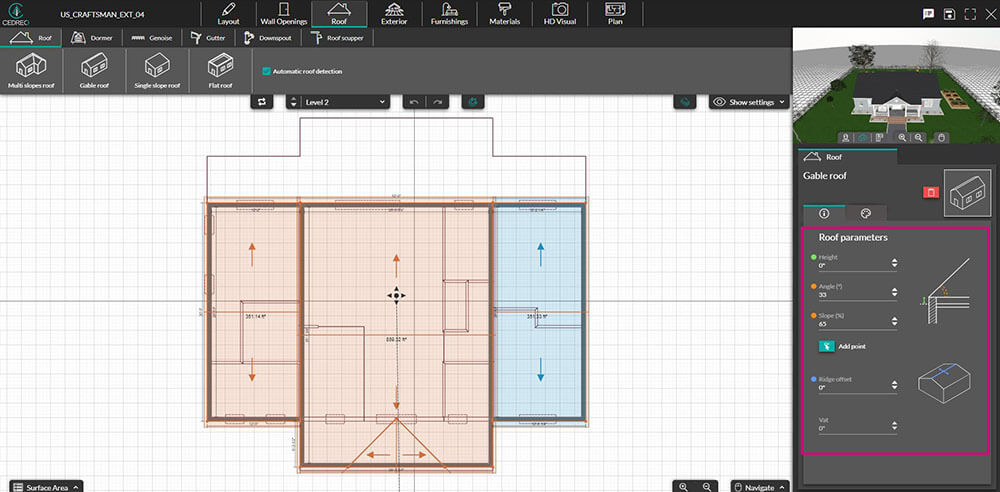
4. Customize roof parameters
Whether you drew your own roof or created one automatically, you can customize your parameters. (Remember to click “Validate,” when you’re done making changes).
5. Set edge parameters
You can adjust the overhang, ridge start, underside, and roof valley under the “Edge parameters” heading in the right sidebar.
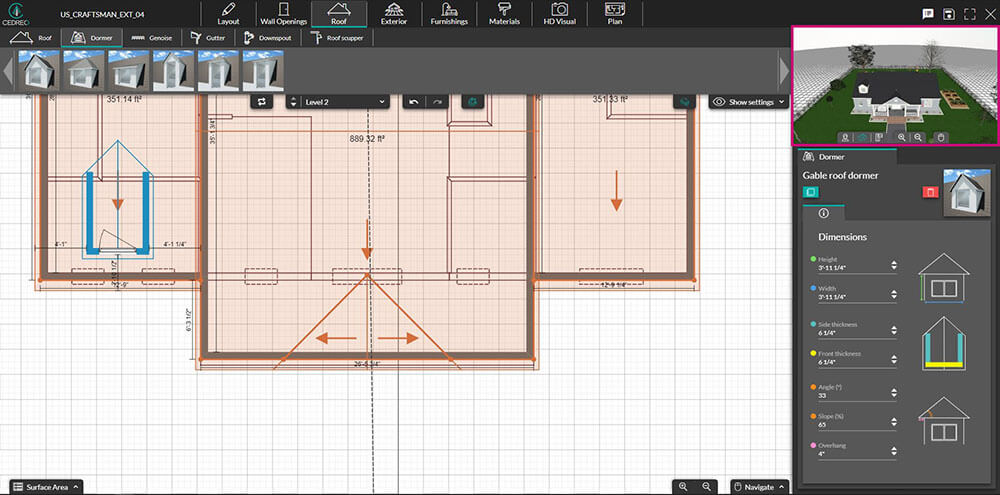
6. Add and customize exterior elements
Choose drag-and-drop elements from the Cedreo library to customize dormers, friezes, gutters, downspouts, and scuppers.
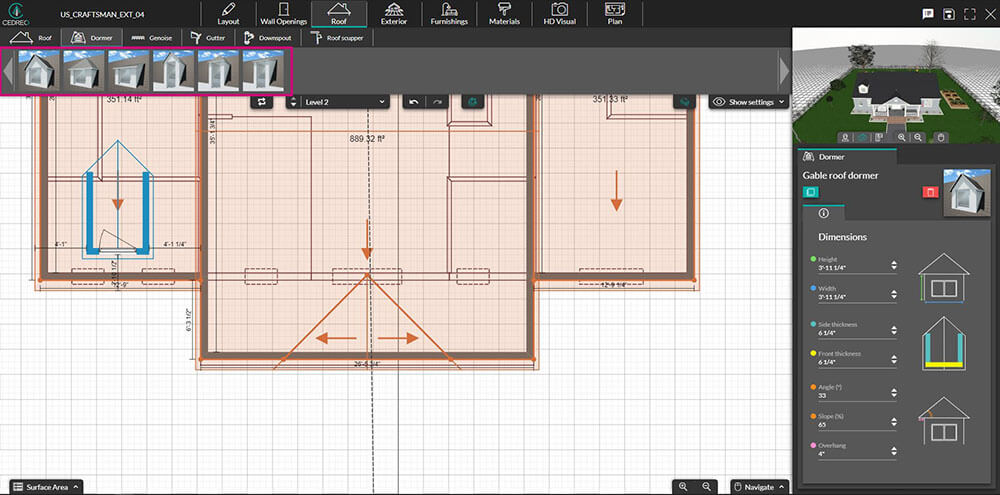
As you add elements to the 2D roof plan, the 3D preview image on the right will update automatically. The most recently added object’s dimensions will appear in the right sidebar, where you can adjust the dimensions.
7. Customize surface materials
Now you’re ready to add the finishing touches. Choose a roofing type — such as tiles, shingles, or corrugated metal — and choose the colors for your roof and roof fixtures.
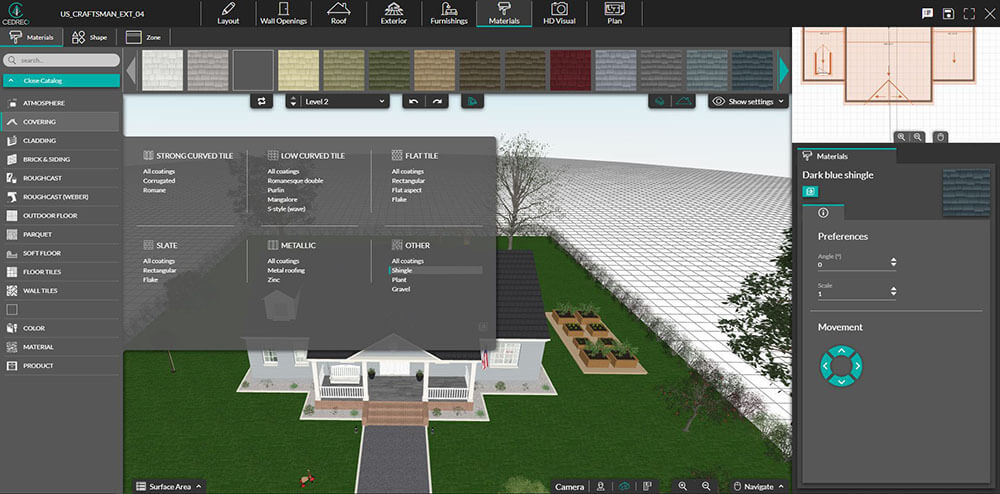
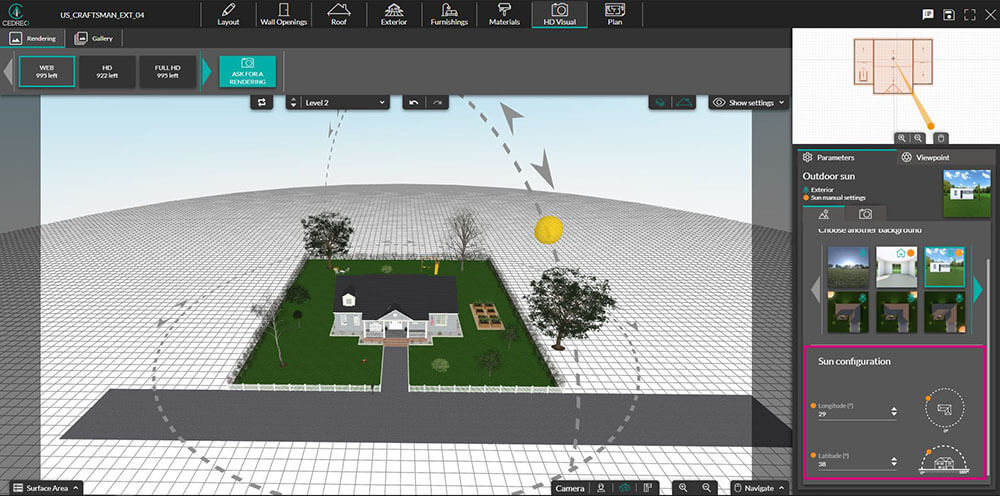
Show clients how their home will look at different times of day by changing the sun orientation.
Cedreo’s roof planning features let you quickly make changes based on client feedback, so they can see updates in real-time. That means you can accelerate the approval process and shorten the overall project timeline.
Create a Roof Plan Today
You don’t need CAD software to create a roof plan. Cedreo’s simple home design platform lets users easily create cloud-based roof plans, and with our roof validation feature, you can be sure your roof design is structurally sound.
Finish your designs faster, and create roof plans that delight clients and give contractors all the information they need. Sign up for a free trial today, and see how Cedreo makes roof planning easy.