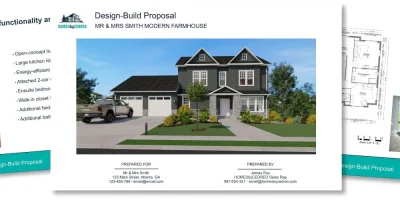
Build trust that helps clients say “YES” by showing them 3D renderings of the proposed project.
Has this ever happened to you when trying to sell a homeowner on a project?
They sit across the table, staring at a flat floor plan.
You verbally explain all the great ideas you have.
They nod politely, but they don’t sign.
They say they need to “think about it.”
Now picture a different meeting.
You pull up some 3D photorealistic renderings with a finished view of the proposed project, with the exact finishes and materials they asked about.
Their eyes light up.
They sign that evening.
3D renderings for contractors can make all the difference.
And we’ve seen it first hand.
Contractors who show clients a 3D rendering of the finished construction project before signing close more jobs, have fewer change orders, and collect better reviews.
The rendering software that creates these visuals is not just a design tool.
It is a sales tool that builds trust and prevents costly miscommunication once construction has started.
So in this guide, we will break down exactly how 3D renderings for contractors work, why they close deals faster, and how to start creating them yourself with no design background required.
Key Takeaways
- 3D renderings remove the visualization gap that causes homeowners to hesitate, helping contractors close bids faster and with more confidence.
- Renderings reduce change orders by turning vague expectations into a clear visual agreement before construction begins.
- Using a quick rendering tool for contractors like Cedreo, you can create photorealistic images of a project in one to two hours with no design training.
- Sharing renderings on your website, Google Business Profile, Instagram, and Houzz generates leads and builds credibility with new clients.
Why trust us? Here at Cedreo, we’ve got 20+ years of experience working in the home design space. So we know what it takes for contractors and builders to create project designs and renderings that help them land more clients!
See How You Can Create Complete Projects with Cedreo
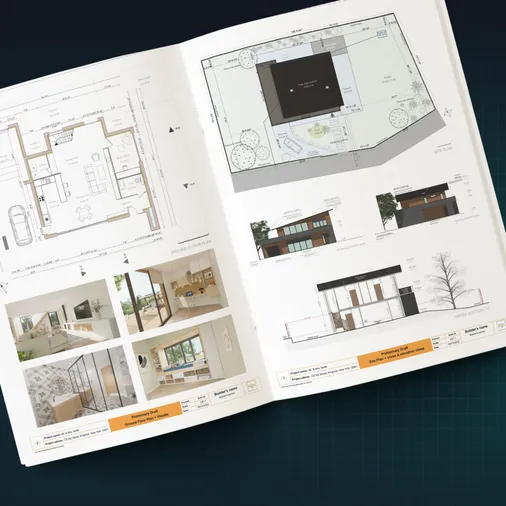
Plans – Get site plans, 2D floor plans, electrical plans, cross sections and elevation views — with all the technical details you need for a comprehensive project overview.
3D Visualizations – Use interior and exterior 3D renderings as well as 3D floor plans to help clients understand the finished project.
Documentation – Manage all your visual documents in one place, so it’s easier to present and sell your projects.
No credit card required, no commitment
Why Homeowners Hesitate (and How It Costs You the Job)
Most homeowners are not construction professionals.
They can’t just look at a 2D floor plan and picture what the finished interior space will look like.
That gap between what you see in your head and what the client sees in theirs is where deals die.
When a homeowner can’t visualize the outcome of a renovation project, two things happen.
First, fear of regret kicks in.
- They worry about spending thousands of dollars on something they aren’t sure they will like.
- So they delay the decision, ask for more time, or go with a competitor who made the construction project feel less risky.
Second, vague expectations create problems once the project starts.
- “That’s not what I pictured” is one of the most expensive sentences in contracting.
- It leads to change orders, schedule delays, and strained client relationships.
One thing we’ve noticed from working with contractors is that the projects with the fewest headaches are the ones where the client saw a realistic visualization of the interior and exterior before signing.
A rendering closes the visualization gap.
It turns an abstract idea into something concrete, something the homeowner can point to and say, “Yes, that is what I want.”
3D rendering software gives contractors like you the ability to bridge that gap without the expensive process of hiring architects or designers to create a realistic visualization for them.
What Are 3D Renderings?
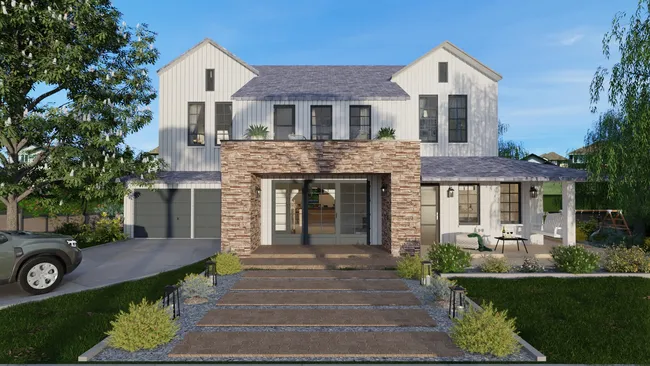
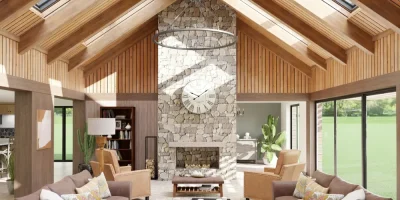
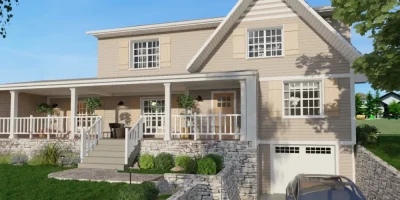
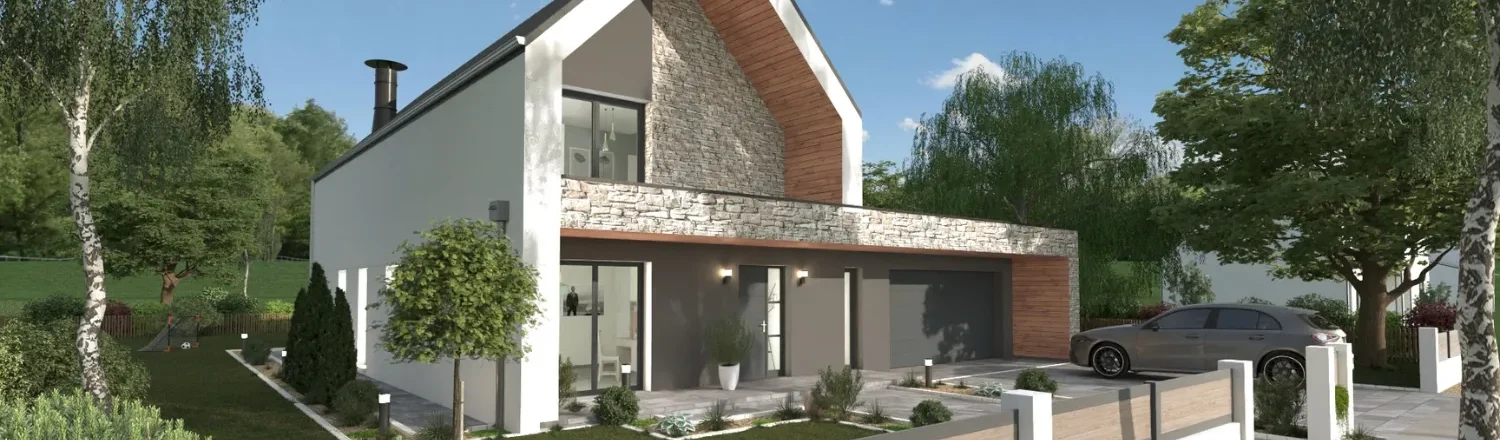
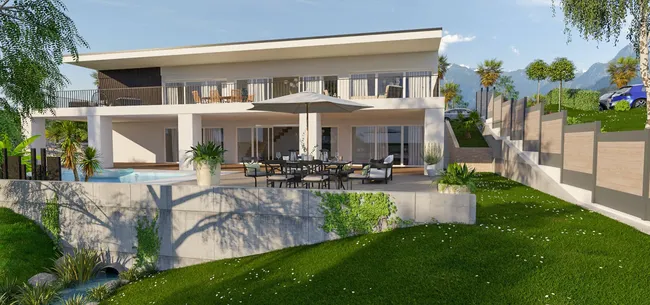
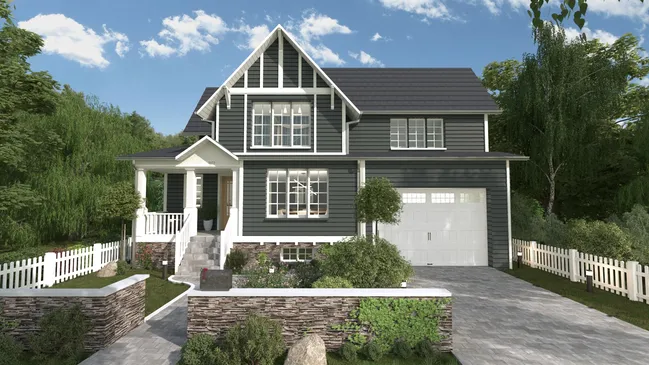
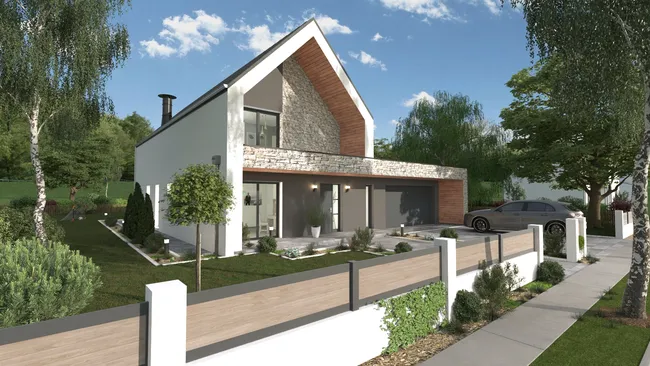
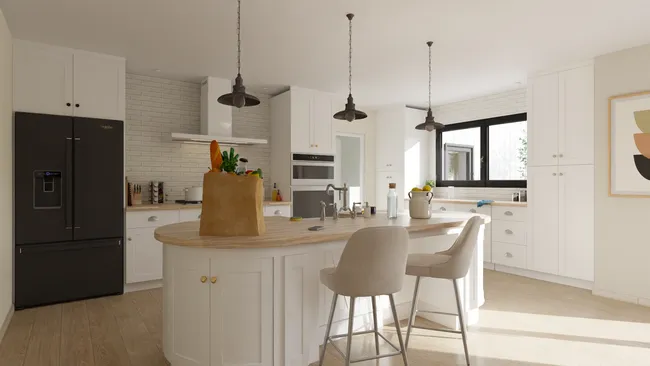
A 3D rendering is a photorealistic image generated from a 3D digital model of a space.
It shows what a room, a home, or an exterior will look like with specific materials, lighting, furniture, and finishes applied.
Think of it as a photograph of a construction project that hasn’t been built yet.
Architects and designers have used 3D rendering for decades, but modern rendering software has made it accessible to anyone.
Fortunately, you don’t need to understand building information modeling (BIM) or parametric modeling to use a tool like Cedreo.
The software handles the technical complexity behind the scenes.
Here’s how renderings compare to other visual tools contractors use.
| Feature | Sketch | 2D floor plan | 3D rendering |
| Visual realism | Low (hand-drawn concept) | Medium (top-down layout) | High (photorealistic image) |
| Shows materials and finishes | No | No | Yes |
| Shows lighting | No | No | Yes (day and night) |
| Shows furniture in place | Rarely | Basic symbols only | Yes (3D objects) |
| Client can picture the result | Somewhat | Difficult | Easily |
| Requires design training | High-quality sketches take skill | Limited training required | Not with modern software |
The key takeaways:
- A sketch doesn’t require computer skills, but does require a level of drawing ability.
- A floor plan isn’t hard to create, but only gives a general idea of where things go.
- A 3D rendering shows them what the interior and exterior will actually look like, complete with materials, lighting, and furniture in place.
And with software like Cedreo, you don’t need to hire architects or designers to create one.
With the right rendering software, any contractor can produce client-ready realistic visuals in-house.
This helps you save big on architectural rendering costs.
It eliminates the cost of outsourcing to architecture firms or freelance designers (which can run $300 to over $1,000 per image) and puts creative control back in your hands.
5 Ways Contractors Use 3D Renderings to Close More Jobs
A rendering isn’t just a pretty picture.
It is a visualization tool that moves the sales process forward, locks in scope, and opens the door to higher-margin work.
Here are five practical ways contractors like you can use 3D renderings to win more bids and run smoother construction projects.
1. Pre-Sale: Build Confidence and Speed Up Decision Making
The rendering becomes the deciding moment in the client meeting.
When a homeowner sees their specific space transformed in a photorealistic image, the project stops being hypothetical.
It becomes real.
That emotional shift is what moves clients from “let me think about it” to “when can you start?”
Most architects and designers have understood the power of visualization for years.
Now rendering software gives contractors that same ability to show, not just tell.
How it helps you close more jobs:
- Removes the guesswork that causes hesitation and delayed decision making
- Makes your proposal stand out from competitors who only show flat floor plans or verbal descriptions
- Positions you as a professional who invests in the client experience
- Gives the homeowner something tangible to share with their spouse or partner, which speeds up the approval process
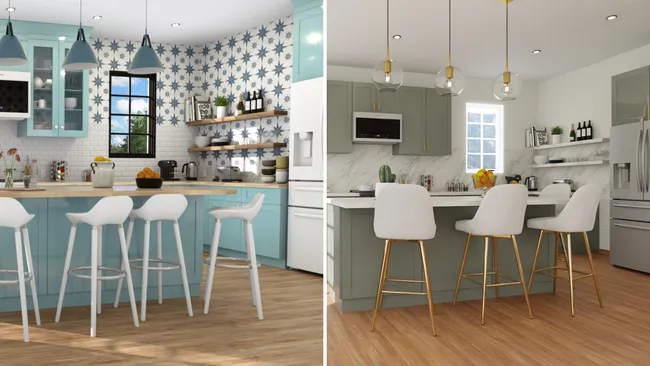
2. Materials and Finishes: Clients Pick Faster When They See It Rendered
How many times has a client spent weeks going back and forth on countertops, tiles, or cabinet colors?
When you render those materials in their actual interior space, the decision making process accelerates dramatically.
Clients commit to finishes faster when they see them in context instead of staring at small swatches.
The rendering software lets you swap materials, update lighting, and show different interior design options in minutes, so clients can compare realistic visuals side by side.
How it helps you close more jobs:
- Eliminates the “I need to see more options” stall by showing materials rendered in the real room
- Reduces back-and-forth emails and meetings
- Builds confidence that the materials work together before you order anything
- Prevents costly material returns and reorders caused by buyer’s remorse
3. Scope Lock: Reduce Change Orders During Construction
A rendering becomes a visual contract.
Once the client approves a rendering that shows the exact layout, materials, and finishes, “that is not what I pictured” stops being a problem.
From what we have seen work for contractors, the ones who present a detailed rendering at the approval stage deal with significantly fewer mid-project changes.
The visualization locks in scope before construction begins, protecting your margins and your schedule.
How it helps you close more jobs:
- Creates a documented visual reference both parties agreed to, which reduces disputes
- Catches design misunderstandings before construction starts, not during
- Protects your margins by preventing scope creep and unplanned rework
4. Upsell: Show the Upgrade in the Client’s Space
Here is a sales technique that contractors who use rendering software swear by.
Create two renderings of the same interior space.
- One with the standard selections.
- One with the premium upgrade.
The waterfall countertop, the coffered ceiling, the custom built-ins with quality finishes.
When a homeowner sees the upgrade rendered in their space with the right lighting and furniture in place, the price difference suddenly feels worth it.
How it helps you close more jobs:
- Makes the value of premium options visible and emotionally compelling
- Increases average project value without a hard sell
- Helps clients justify the upgrade to themselves (and their partners)
- Turns a cost conversation into a value conversation
5. Referrals: Social Media and Portfolio Content
A before-render and after-photo post is some of the most engaging content on Instagram and Houzz for remodeling professionals.
It shows intentional design thinking, not just “before it was ugly, now it is nice.”
That kind of content builds trust with new clients before they ever contact you.
Many architects and designers already share project visualization content online.
Contractors who do the same stand out from the competition.
How it helps you close more jobs:
- Generates organic leads from social media and your website portfolio
- Shows prospective clients exactly what your design process looks like
- Differentiates you from contractors who only post jobsite photos
- Provides shareable content that clients forward to friends and family, creating referrals
The Best Rendering Tool for Contractors: What to Look For (& Why Speed Matters Most)
Not every rendering software is built for contractors.
Many 3D modeling tools on the market were designed for architects, interior designers, or visualization specialists.
They have powerful advanced features and complex 3D modeling capabilities, but they also have steep learning curves and workflows that assume you have hours to spend on a single rendering.
You need the results without the complexity.
Here’s what to look for in rendering software that actually fits the way you work. (and why Cedreo fits your needs).
Speed: Same-Day Turnaround
Same-day turnaround means you can create a floor plan and 3D renderings to include in a proposal in a single sitting, or generate new rendering options based on client feedback without scheduling another meeting.
Why it matters:
A rendering tool is useless if it takes three days to produce one image.
Rendering speed is the difference between closing a deal while the client is excited and losing momentum.
What to look for:
- Software that’s easy enough to use, you can make edits to 3D designs within the same consultation or within 24 hours
- Fast rendering speed so once you request a rendering the software generates it in a few minutes, instead of hours
No Design Skills Required: Built for Contractors, Not Architects
This means the rendering software should be intuitive enough for someone with zero 3D modeling or design experience to produce professional-quality visuals.
Why it matters:
The tool must be operable by someone whose expertise is construction, not 3D modeling.
Many rendering tools built for architects and designers assume knowledge of complex features like advanced lighting setups, manual camera controls, or custom 3D modeling workflows.
Contractors don’t need those advanced features.
If the software requires weeks of training in 3D modeling, it is the wrong tool for your construction workflow.
What to look for:
- A user friendly interface with drag-and-drop functionality and pre-built object libraries that eliminate the need for 3D modeling from scratch
- User friendly software that turns a floor plan into a 3D model without a steep learning curve
Full Output: Floor Plans, Renders, and Project Documentation
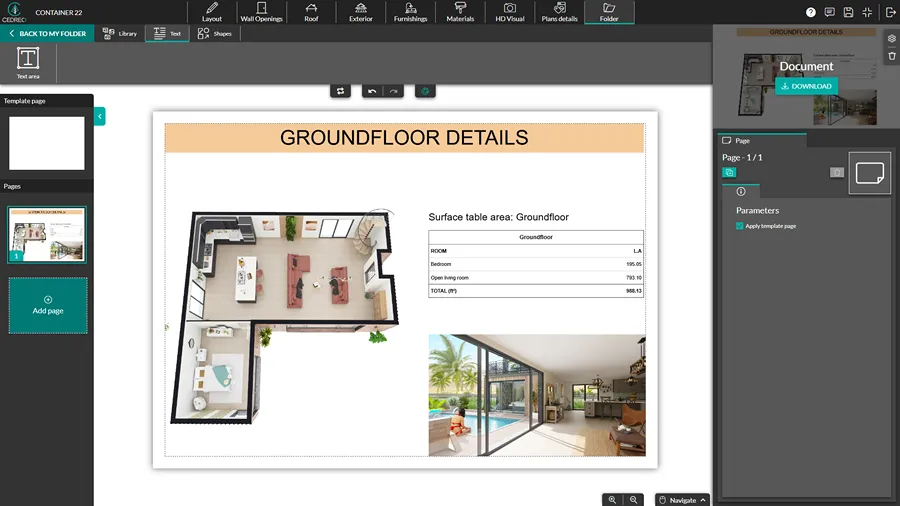
Full output means one tool produces everything you need for a client presentation: 2D floor plans, interior and exterior 3D renderings, and exportable project documentation, all without switching between separate software.
Why it matters:
The best rendering tool for contractors doesn’t just generate a pretty picture.
It has seamless integration between design and documentation that saves hours compared to using separate software tools for each deliverable.
When you can hand a client a complete package (floor plans, interior and exterior renderings, and a professional proposal) from a single platform, you look more professional and close faster.
What to look for:
- Software that generates floor plans, interior and exterior 3D renderings, and exportable contractor proposals in one workflow
- The ability to create a variety of plans with varying levels of detail for clients or your construction teams.
How to Create a Rendering in Cedreo: A Quick Walkthrough
If you’ve never used rendering software before, here’s what creating a rendering in Cedreo actually looks like.
The whole point is to show you this is achievable, even if your expertise is swinging hammers, not clicking a mouse.
If you don’t have an account, you can create a free one now.
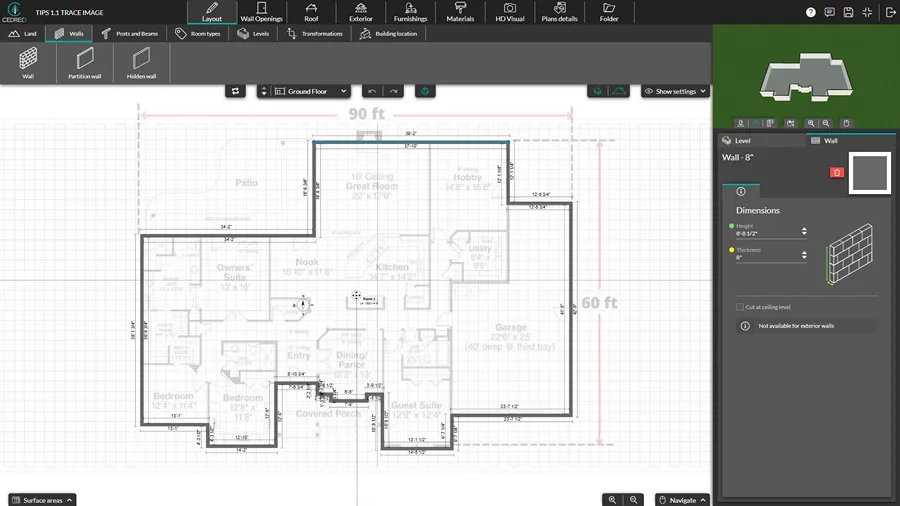
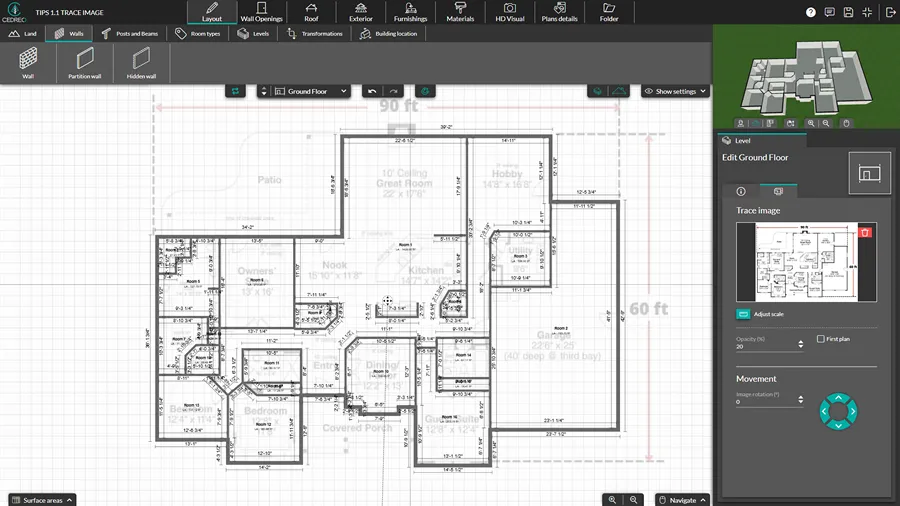
- Start with the floor plan. Import an existing blueprint image to trace over or use the wall tool to draw your floor plan from scratch. Add walls, set room dimensions, and place wall openings (doors, windows, sliding doors).
- Furnish and decorate the interior space. Browse or search the library of 10,000+ 3D objects. Drop in furniture, fixtures, and decor, and then apply materials like flooring, countertops, paint colors, and tile to every surface.
- Set up the exterior (if needed). Add terrain modeling, landscaping elements, outdoor furniture, and exterior finishes.
- Adjust the lighting and camera angles. The software automatically applies natural lighting based on the window placements and orientation. Fine-tune interior and exterior lighting (including sun orientation). Set your camera angle to frame the shot exactly how you want the client to see it.
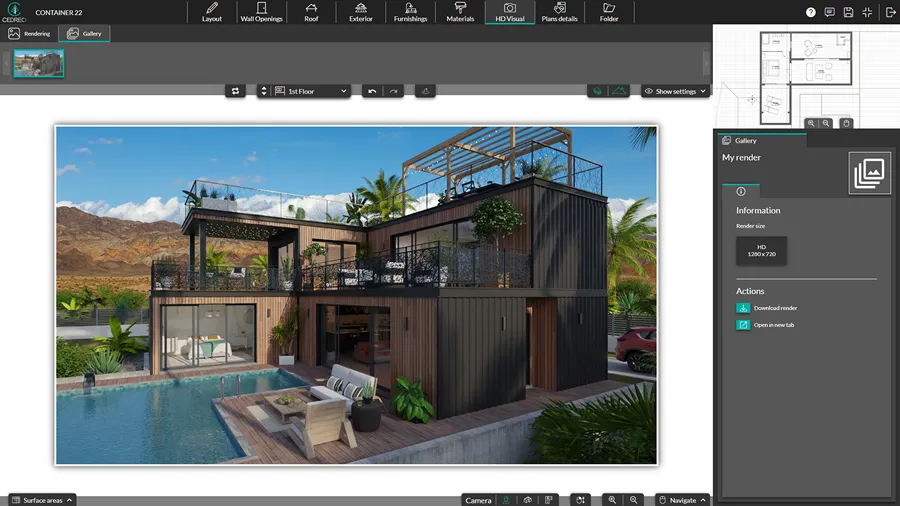
- Generate the rendering. Request a photorealistic rendering. Cedreo produces high quality renderings in about five minutes. The rendering speed means you can create multiple views of the same project in a single session.
- Export and share. Download your rendering, floor plans, and project documentation. Package everything into a client-ready proposal within the software.
That is the entire workflow.
No parametric modeling.
No building information modeling expertise.
No architecture background needed.
The rendering software handles the complex 3D modeling behind the scenes so you can focus on design ideas, client conversations, and selling the features of the project.
PRO TIP – For a deeper walkthrough and tips on making better renders, check out our full guide on how to make 3D renders.
Where to Share Your Renderings to Get More Leads
Creating great renderings is only half the value.
Sharing them in the right places turns a single construction project into a lead generation tool.
Here is where to post your renderings for maximum impact, with some pointers on digital marketing for contractors.
Website portfolio page
- Before-render and after-photo pairs outperform traditional before-and-after photos because the rendering makes the transformation feel intentional, not accidental
- It shows clients you planned the final look, not just reacted to problems
- Many architects, designers, and builders use portfolio pages as a lead generator, and contractors should too
Google Business Profile
- Renderings in your photo gallery signal professionalism at the moment of first contact
- When someone searches for a contractor and sees photorealistic project visualization in your listing, you immediately stand out from competitors showing only raw jobsite photos
Instagram and Houzz
- A rendering plus finished result is the highest-engagement format for remodeling content on these platforms
- It tells a story of conceptual designs becoming reality, and that story generates shares, saves, and direct messages from prospective clients
PRO TIP! Create a simple template in a program like Canva for your social media posts: rendering image on the left, finished photo on the right, with a short caption explaining the project scope and timeline. Consistency in this format builds recognition and trust with your followers over time.
Is the Time Investment Worth It?
Most contractors who’ve never used a rendering tool assume it takes too long to be practical.
It is true…creating a rendering, even with an easy-to-use tool like Cedreo, does take more time than not creating one.
To create a 3D house design that you can generate 3D renderings from takes one to two hours for a typical project.
That includes drawing or importing the floor plan, furnishing the interior, applying materials, and then generating the photorealistic images.
Now compare that to the cost of not having renderings.
| Time spent on renderings | Time (+revenue) lost without 3D visuals |
| 1-2 hours to create the 3D home design | 2-4 days of rework per change order |
| 5 minutes to generate a single 3D rendering image from the design | Weeks of back-and-forth on material selections |
| Minutes to show an upsell option | Lost revenue from missed upsell opportunities |
| One session to lock in scope | Strained client relationships from unmet expectations and multiple meetings |
The math is not even close.
Add 3D renderings to your estimates and proposals and you get…
- Fewer revisions
- Faster client sign-off
- Higher-value project additions (upsells)
All of that more than covers the one to two hours you spend on creating a 3D home design with renderings.
And the rendering software itself is cost effective because it pays for itself on the very first job.
Start Closing More Construction Projects with 3D Renderings
3D renderings give your clients the confidence to say yes, protect your margins from change orders, and turn every finished project into a lead-generating portfolio piece.
And if you choose Cedreo, you don’t need a design background or expensive software.
Cedreo gives you the features you need to make it simple:
- Create floor plans, renderings, and project presentations in one platform
- Generate photorealistic images in about five minutes
- No 3D modeling training needed
- Cloud-based access from any computer with an internet connection
Sign up for a free account today!
3D Rendering for Contractors FAQs
Do contractors use 3D renderings?
Yes, more contractors are adopting 3D renderings to help clients visualize finished projects before construction begins.
Renderings improve close rates, reduce change orders, and make the sales process more professional.
How much does a 3D rendering cost for a remodel?
Outsourcing a single 3D rendering to a freelance designer or architecture firm typically costs $300 to over $1,000 per image.
Using rendering software like Cedreo, you can create renderings in-house for a fraction of that cost.
Can a general contractor create 3D renderings without design training?
Yes, user friendly software like Cedreo is built for construction professionals, not designers or architects.
The intuitive interface uses drag-and-drop tools and pre-built libraries, so no 3D modeling or architecture experience is needed.
Is there a quick rendering tool for contractors?
Cedreo is a quick rendering tool for contractors that produces photorealistic images in about five minutes.
The full workflow from floor plan to finished renderings typically takes one to two hours.
How fast can a contractor create a 3D rendering?
With a tool like Cedreo, most contractors can complete a full home design in one to two hours.
The rendering speed is fast because the software generates the photorealistic image in about five minutes once the 3D model is set up.
Do homeowners expect 3D renderings before signing a contract?
Increasingly, yes, because homeowners are used to seeing realistic visuals in home design shows and online content.
Providing a 3D rendering with quality interior visualization sets you apart and builds the confidence they need to commit.
How do 3D renderings help contractors avoid change orders?
A rendering acts as a visual contract.
When the client approves a photorealistic image showing the exact layout, finishes, and materials, there is much less room for “that is not what I expected” disputes during construction.
Are 3D renderings worth it for small remodeling projects?
Yes, even a small bathroom or kitchen interior remodel benefits from a rendering because it reduces miscommunication and helps close the deal faster.
The time investment is minimal compared to the cost of a single change order.
How do contractors use 3D renderings on Instagram and Houzz?
Contractors post before-render and after-photo comparisons, which are some of the highest-engagement content for remodeling contractors.
These posts showcase the design process and attract leads from homeowners planning similar projects.
How do 3D renderings help close bids faster?
Renderings remove the project visualization gap that causes clients to hesitate.
When a homeowner can see exactly what the finished interior will look like with realistic lighting, materials, and furniture, they make decisions faster and feel more confident signing the contract.
How to use 3D renderings for home remodel visualization?
Use rendering software like Cedreo to create a 3D model of the remodel with accurate dimensions, materials, and lighting.
Share the photorealistic images with your client during the design phase to align expectations and speed up approval.