With so many homeowners choosing to “improve, not move,” the demand for functional, well-designed additions has never been higher.
But you know how easily these projects erode your profits through client indecision, scope creep, and communication breakdowns.
This guide provides a professional’s framework, starting with a breakdown of home addition costs before diving into three main steps: Design, Management, and Communication. Nailing these three steps ensures more profitable projects and happier clients.
Key Takeaways
- A successful home addition begins with a collaborative design phase that provides clarity for all stakeholders.
- Formal change order processes are critical to protecting your timeline and profitability.
- Using Cedreo for 3D visualization turns client indecision into confident approval.
- Proactive communication about budget and schedule builds trust and prevents disputes.
Why trust us? Here at Cedreo, we’ve got 20+ years of experience working with housing pros in the home design space. We know what it takes for home builders, contractors, and designers to create house addition plans that land them more jobs!
Home Addition Construction Costs: What to Expect
Setting a realistic budget starts with understanding the key structural factors that drive the cost of different addition types. While material and labor costs vary, the complexity of the build itself sets the foundation for your pricing and the initial conversation with your client.
Here are the basics of what to expect for three main types of additions:
- Bump-Out Additions – Average Price Range: $5000 – $30,000
- Full Build-Out Additions – Average Price Range: $25,000 – $150,000+
- Second-Story Additions – Average Price Range: $100,000 – $300,000+
For more details on budgeting for different types of home additions and cost estimations per square foot, check out our Home Addition Cost article.
Now let’s look at three steps to more streamlined home addition construction projects.
Step 1: Designing the Home Addition (The Foundation of Success)
This is the most critical phase of any house addition construction project. Errors, miscalculations, or client misunderstandings here will be magnified tenfold during the build. That’s why the goal here is to create a bulletproof plan that gets everyone on the same page.
The Initial Client Meeting: Aligning Vision, Budget, and Feasibility
Your first meeting is about excavating the “why” behind the “what.”
Are they looking for more functional space for a growing family, or are they planning to sell in five years, making resale value a key consideration in their investment? Clients often describe solutions, not needs.
They might say, “We need a 20×20 family room addition for extra space,” when their actual need is, “We want the functionality of a new house without the hassle of moving” or “We need a comfortable space for our family to watch movies without feeling cramped.” That might be solved with a smaller, more cleverly designed space.
This is also the time to have the budget conversation, even when it’s uncomfortable.
Many homeowners have an unrealistic “HGTV number” in their head for what a renovation should cost. That’s why it’s important to anchor the conversation in the reality of local material and labor costs to manage expectations, establish a workable, realistic budget, and solidify your credibility as a reputable contractor from day one.
PRO TIP This is also the time in the design process to investigate local building codes (setbacks from property lines, height restrictions, zoning, etc.). This ensures you know exactly how they’ll impact the home addition project moving forward.
Why Modern Design Tools Outpace Traditional Methods
In the past, the initial design process was a major bottleneck that created delays and frustration. It usually revolved around these two options.
- Outsourcing to an architect: This traditional route involves a slow, linear process of back-and-forth communication that often leaves you playing telephone between the client and the designer. Each round of revisions can add time and significant cost to the project.
- Wrestling with complex CAD: Using generic CAD software internally presents its own challenges. It has a steep learning curve, is often overkill for presenting residential project proposals, and isn’t intuitive enough for live collaboration with a client.
That’s why 3D home design software changes the game entirely.
It transforms a stuffy sales meeting into a collaborative design workshop. By sketching out addition options in real-time with the client, you dramatically compress the feedback loop from weeks to minutes, and this demonstrates a level of professionalism that builds immense client confidence.
Here’s how builders can use modern software during Phase 1.
Bringing the Home Addition to Life with 2D and 3D Plans
The key to gaining rapid client buy-in is immediacy. With a tool like Cedreo, you can instantly show a client the impact of their suggestions.
“Wondering what another window on that wall looks like? Let’s add it right now.”
“What if this room were two feet wider? Here’s how that affects the roofline.”
This dual-view (2D & 3D) approach is incredibly powerful.
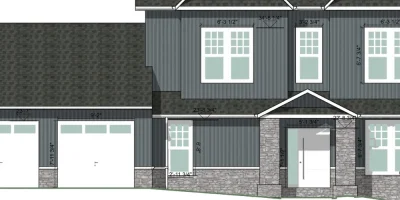
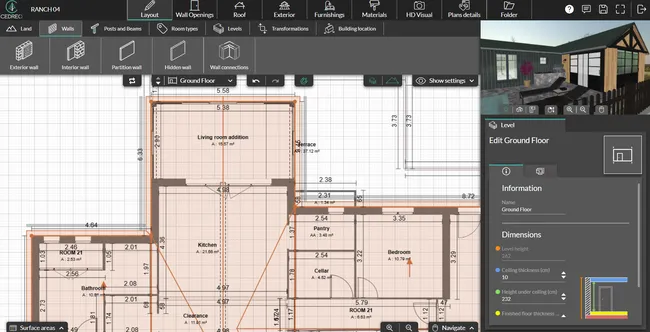
Use Cedreo floor plan software to quickly draft common 2D plans that serve as the foundation of the design:
- Site plans
- 2D floor plans
- Elevations and cross sections (add notes related to material selections and dimensions)
- Electrical plans
- Other plans with technical symbols and custom annotations
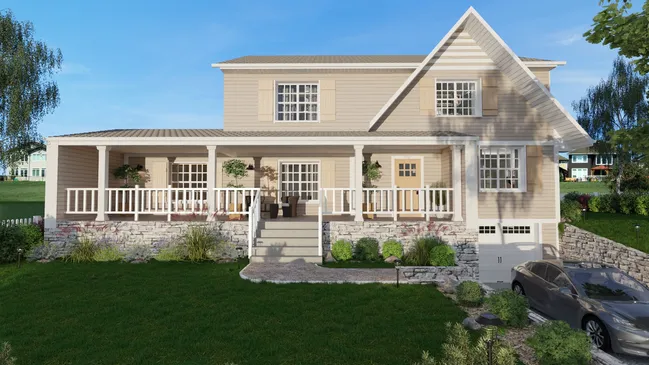
Use the precise 2D floor plans to confirm functional layouts and clearances that appeal to the client’s logical side.
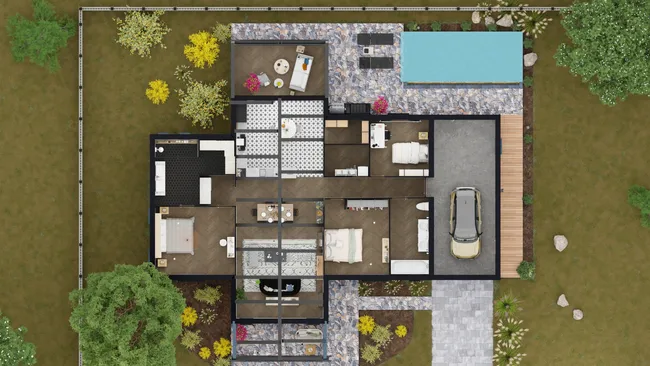
Then show them the 3D floor plan to give them an emotional connection to the space and to make it easier to get a feel for the overall flow.
PRO TIP! Create a professional project presentation (Cedreo makes it easy!) with 2-3 distinct options during the first design meeting. This frames you as a creative partner and helps guide the client toward a feasible design you know you can build efficiently.
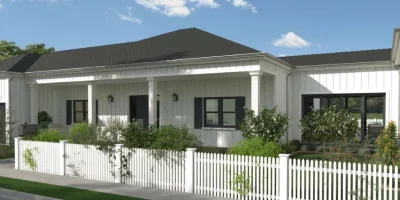
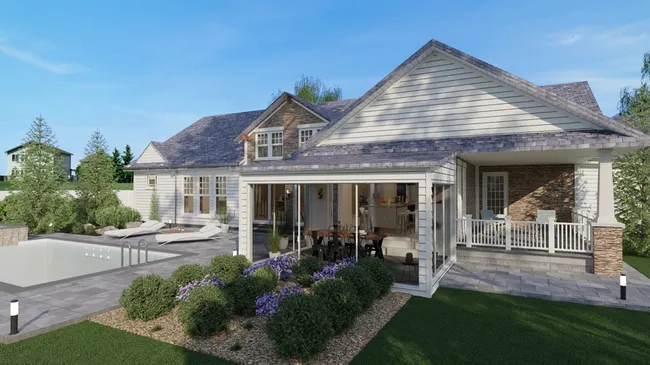
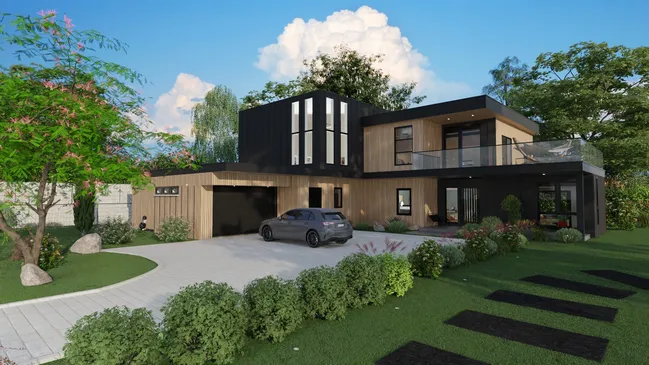
Using Photorealistic Renderings to Finalize Selections and Win Deals
Photorealistic renderings are the ultimate tool for eliminating ambiguity and preventing the project from stalling during the selections phase.
A client may not understand what “brushed nickel fixtures” look like next to “off-white shaker cabinets,” but they know instantly if they love it when they see it in a photorealistic image.
The rendering becomes the visual contract for the project.
It’s the difference between showing a client a few small siding samples and showing them a stunning image of their “new” home at sunset with the chosen siding, trim, and roofing all in place.
This level of clarity provides the confidence that gets the contract signed and prevents the most expensive type of change…the one made after materials are already installed.
Now the project moves from initial consultation and concept to phase 2.
Step 2: Home Extension Project Management for a Smooth Build
This phase of the home additions is all about logistics and detailed planning.
How many times has a project been derailed by a subcontractor scheduling conflict?
This phase is where you translate the approved design into a physical reality, on time and on budget, through a game of scheduling and risk management.
Effective Timeline Coordination for Building and Extension Projects
An efficient build starts with smart scheduling and subcontractor management.
- Work backward from the client’s desired completion date to create your plan.
- Pad your schedule with a 10-15% contingency for weather, inspections, and other potential delays. Never present the “best-case scenario” timeline to the client.
- Order long-lead items like custom windows, trusses, and specialty fixtures the moment the design is finalized and the deposit is paid.
- Don’t schedule installers until the materials they need are physically on-site.
- Conduct a pre-construction walkthrough with your key subs to spot potential conflicts early.
Establishing a Formal Change Order Process for Home Additions
A formal change order process isn’t about saying “no” to clients. It’s about creating a clear, professional system for saying “yes” while protecting your profitability. When a client requests something outside the original scope, the process should be automatic.
- Stop work: Instruct crews to pause all work on the affected areas.
- Document and price: Create a formal Change Order Document, not a text message. It should include a detailed description of the new work, a clear cost breakdown (materials, labor, and your margin), and the impact on the project timeline.
- Get client sign-off: The client must sign the document, acknowledging they accept the new costs and delays, before any new work begins.
PRO TIP! For best results, document this change order process in the initial contract so it’s clear how change orders and their payments work.
Essential Project Management Tools for Home Addition Projects
Successful contractors know it’s not about using one tool for everything, but the right tool for the right job.
For the “upstream” work of design and visualization, a purpose-built tool like Cedreo is essential. It’s how you get the project sold and defined correctly from the start.
For the “downstream” work of managing the house extension’s complex logistics, dedicated project management platforms help streamline internal operations:
- Buildertrend: This comprehensive platform is designed for the day-to-day management of the build itself. Its strength lies in its powerful internal tools for tracking the budget in real-time and managing financials, from estimates to invoicing.
- Procore: A powerful and widely-used platform trusted for managing complex projects, it excels at connecting everyone from the architect and general contractor to the subcontractors on a single system for streamlined internal workflows.
- JobTread: This platform offers tools to manage projects from lead to close, including estimates, punch lists, bids, and invoicing.
Step 3: Mastering Client Communication During Addition Construction
This final phase is all about maintaining the trust and confidence you built during the design stage. The physical house extension construction process is inherently messy and stressful for homeowners, but proactive, clear communication is the antidote.
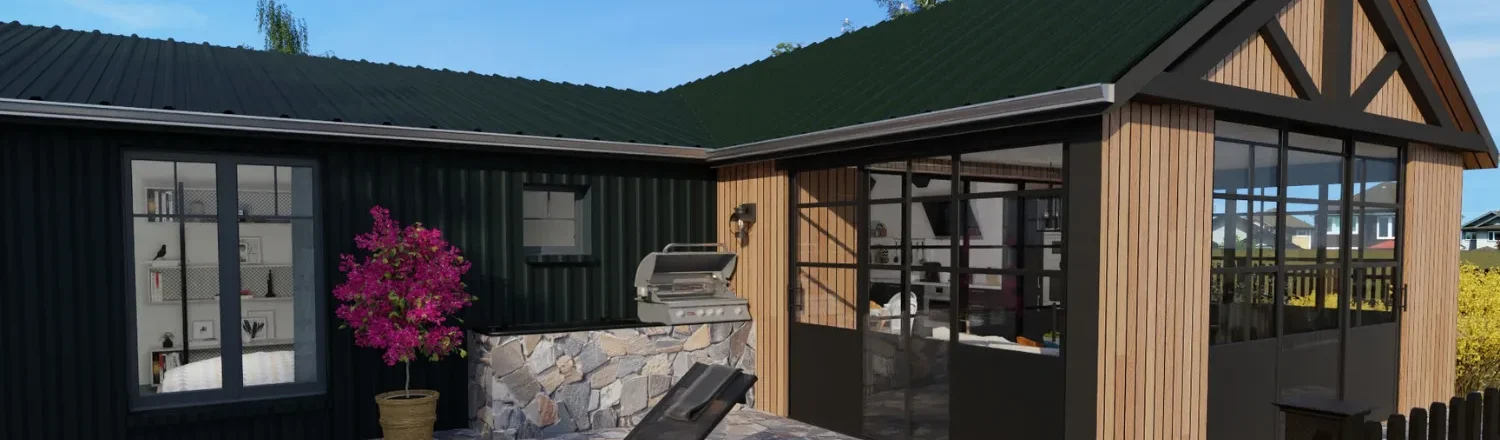
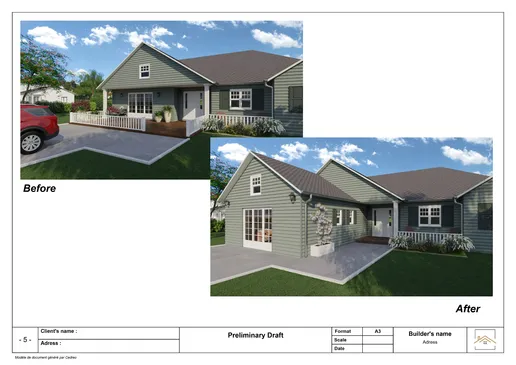
Providing Clear Progress Visualization
Clients living through the noise and dust often struggle to see the progress. Regular updates that include new photos from the site alongside the original 3D rendering serve as a powerful “before and after” tool.
This constantly reassures the client that the chaos is organized and is leading toward the beautiful image they approved.
Frame the progress against the vision. For example: “This week the framers completed the walls for the new family room. As you can see in the attached photo, the window placement matches the rendering we created perfectly.”
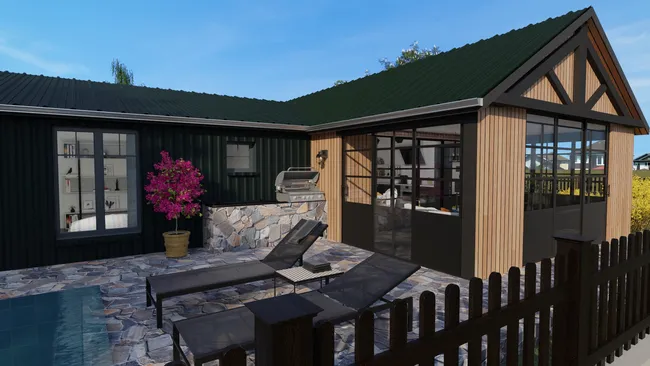
Handling Design Modifications with Agility
This is the point where modern design tools like Cedreo offer a clear advantage after a change order is formally approved. A client needs to see the change to feel confident about paying for it. Your workflow should provide an immediate, positive feedback loop that reinforces your professionalism and responsiveness:
- Immediately open the project in Cedreo.
- Make the agreed-upon modification, like moving a wall or changing a window.
- Generate a new photorealistic rendering in minutes.
- Send the updated visual to the client for a final “looks good” before proceeding.
Managing Timeline and Budget Updates Proactively
The worst kind of update is a surprise. Never let a client be surprised by a delay or a cost issue. Proactive communication, even with bad news, builds trust.
Establish a consistent day for a brief weekly update. It should always cover:
- What was accomplished this week.
- What is planned for next week.
- Any issues or delays encountered and your plan to mitigate them.
- A current budget status.
If a delay happens, explain why and what you’ve done to manage it. This shows you are managing the problem, not just reporting it.
Essential Tools for Better Client Communication

Modern contractors leverage technology to keep clients informed and projects running smoothly by separating tools for visual and administrative communication.
Use Cedreo for visual clarity: This is your primary tool for visual communication, which is the most effective way to prevent costly misunderstandings. Use it to share updated photorealistic 3D renderings to confirm changes and create professional presentation documents to formalize design approvals.
Project management software for daily operations: To handle the administrative side of communication, look for platforms that provide a central client hub for all project information and communications. This cuts down on one-off texts, calls, and emails that are hard to keep track of.
- Buildertrend and JobTread: These tools (mentioned in step two) also feature client portals that help centralize communications with homeowners.
- Houzz Pro: The client dashboard feature allows clients to track project progress, approve estimates, and make payments online
- Jobber: A popular choice that provides clients with a professional online hub to approve quotes, check appointment details, and pay invoices, while also sending automated reminder texts.
A Modern Workflow for Building an Addition on a House
Mastering the three steps of design, management, and communication is the formula for profitable house addition construction.
By leveraging Cedreo to create 2D/3D plans and photorealistic renderings in minutes, you eliminate client indecision and prevent costly errors. This modern, design-first approach empowers you to effectively manage projects and land more profitable contracts.
Ready to streamline your house addition projects?
Plan your next build today with Cedreo. Try it for FREE now.
Home Addition Construction FAQs
Is it cheaper to build a house or add an addition?
As a general rule, adding a home addition is a less expensive investment than building a new house from the ground up. An addition leverages your current home’s existing foundation and systems. This saves quite a bit of money compared to the cost of land, new utilities, and creating an entire structure.
What is the cheapest way to build an addition for more floor space?
For homeowners of a small home looking to add floor space, the cheapest room addition is typically a bump-out. While the cost per square footage can be high, the overall project cost is lower. This is due to simpler foundation and roof work compared to a full-scale home addition.
Is it cheaper to add on or build up for more living space?
It depends on the type of building and extension project. For creating more living space, adding on (a build-out) is sometimes cheaper than building up (a second floor). Building up often involves getting your general contractor to reinforce the entire existing structure. However building out can also require extensive site and foundation work.
How much does building an extension on a house cost?
The cost of a house extension depends on several factors, including the type of addition, material choices, and local labor rates in more expensive areas. You also need to budget for design fees from an architect and costs to comply with local building codes and property lines.