For remodelers, contractors, and designers, finishing a basement isn’t just about adding square footage — it’s about creating a functional, inviting space that your clients will love. Whether your clients want to design a basement for a family room, a home office, or a high-end basement bar, it’s important to understand the basics of a basement project.
In this 10-minute read, you’ll get everything you need to know.
- Budgeting and planning tips
- Expert construction and design ideas
- Ways to streamline your planning and design process
Ready to see how a newly finished basement can maximize value for your clients? Start with the first section to get an idea of how much a basement remodel can cost.
How Much Does it Cost to Finish a Basement?
The cost of a basement renovation can vary significantly depending on a variety of factors. It’s important for you and your clients to understand their basement remodel cost and what can affect it.
Here are the average costs of different types of basement finishing:
- Basic Remodel ($7,000 – $15,000)
For budget-conscious clients, even a modest investment can turn at least part of an unfinished basement into valuable living space. Think basics: framing a few walls, insulation, installing drywall, and adding simple flooring like carpet or vinyl. For a smaller budget like this, your client may only be able to refinish part of the basement. This type of remodel is ideal for clients who want a little bit of extra space without major structural changes or high-end finishes. - Mid-Range Upgrade ($15,000 – $30,000)
Mid-range projects are perfect for clients looking to blend style and functionality. This budget range covers essentials mentioned above (framed walls, insulation, drywall) throughout more of the basement, along with some nicer finishes like luxury vinyl plank flooring, and mid-range lighting fixtures. The top of this price range could include adding a bathroom where there is already existing plumbing and installing an egress window for safety, - High-End Customization ($30,000 – $50,000+)
For clients seeking a high-end, custom look, a $30-50,000+ investment allows for premium finishes and advanced design features. This level of remodeling could include custom cabinetry, running new plumbing for a bathroom or kitchenette, or even adding a door to create a walkout basement.
It’s important to remember that the overall project cost will depend on factors like basement size, material choices, and labor costs in your area.
Things to Prepare Before You Start Converting
Every successful basement remodeling project starts with solid preparation. Tackling some crucial tasks up front like permits and material selection, can help you avoid costly surprises later. Here are a few things to handle before getting started.
Apply for a Permit
What to Do:
Start by checking in with your local building authorities to find out exactly which permits you’ll need for the project. For most basement finishing projects, you’ll probably need permits that cover structural, electrical, and plumbing work. It’s best to get these applications submitted early on so you don’t hit any delays once you start.
Why:
Getting permits isn’t just about obeying the law — it’s also about safety and long-term value. Permits ensure your work complies with local codes, which protects your client, your crew, and the project itself. Plus, a permitted, code-compliant basement boosts the home’s resale value.
Take Care of Any Dampness
What to Do:
Before doing any framing or insulation, check the basement for moisture issues. A quick moisture test you can do is the plastic sheet test. Securely tape a sheet of plastic to the basement wall and/or floor. Wait 48 hours to see if any condensation forms on the underside of the plastic. You may need to install a sump pump if it doesn’t already have one, seal up cracks, add a dehumidifier, or install or modify the home’s drainage system.
Why:
Excess moisture can cause trouble for a finished basement, leading to everything from mold growth to structural damage. It’s always easier to manage moisture issues before you finish the basement. Plus, it protects the quality of the entire project, which adds value for your clients over time.
Choose Your Materials
What to Do:
Help clients decide on specific materials before construction starts. Cedreo’s 3D rendering software makes it easy. You can actually show clients how different materials will look in their finished basement. That makes it easier for clients to envision the end result and feel confident about their choices.
Why:
Materials matter—a lot. Choosing moisture-resistant, durable materials will go a long way in creating a basement that feels just as comfortable and polished as any other part of the house. Plus, different materials may need to be installed in different ways which could affect the way walls are framed or utilities are run.
Steps to Finish a Basement
Once you’ve sorted out the permits, moisture control, and materials, it’s time to get started with the real work of transforming that unfinished space into a finished basement. Here’s a step-by-step breakdown to guide you through each major phase, along with some pro tips to help you streamline the process and create a quality result your clients will love.
Important: Keep in mind that these are the basic steps. The exact steps and even the order some are completed will depend on your client’s specific basement space.
1. Frame & Insulate
Explanation:
Framing and insulating the basement walls is the first step to bringing the space together. In most places, it’s recommended to install unfaced extruded polystyrene foam insulation directly onto the foundation walls first. Then stud walls are built in front of that.
The stud walls can then be filled with additional insulation (such as fiberglass batt or rock wool insulation). When framing, start by marking out where each wall will go. Don’t forget to take into account existing features like heating ducts, pipes, or support beams.
Tips:
- Leave access panels for future needs: If you’re framing around any utility lines or valves, leave small access panels. It’ll make future maintenance a lot simpler and prevent clients from needing to cut into finished walls.
- Anchor the bottom plate securely: Since basements typically have bare concrete floors, use concrete screws to fasten the bottom plate.
- Choose pressure-treated wood for bottom plates: Any wood against concrete will be affected by moisture from the concrete over time. So using pressure-treated lumber for the bottom plates helps prevent rot and mold.
- Account for ceiling height requirements: Some local codes have minimum basement ceiling heights, so make sure your framing won’t interfere. Watch out for low-hanging floor joists or other obstacles, and plan accordingly.
- Wait to install insulation in stud walls until you’ve run new plumbing and electrical.
2. Repair or Wire Electrical Systems
Explanation:
Once the basement walls are framed, it’s time to tackle the electrical work, which includes lighting and outlets to possible new circuits. Especially in older homes or basements with partially finished wiring, it’s important to bring the electrical work up to code before moving on to drywall.
Tips:
- Think ahead for outlets and fixtures: Consider how the finished basement will be used. If there’s a basement bar, kids’ playroom, or home theater in the plan, add outlets where they’ll be most practical.
- Don’t forget to check local building codes: Codes could affect outlet location, type, quantity and more.
3. Run Plumbing Lines
Explanation:
If your project involves adding a basement bathroom, wet bar, or laundry area, you’ll need to run plumbing lines to those new fixtures. Most basements weren’t originally designed with all that plumbing in mind, so careful planning goes a long way. Depending on where the new fixtures will be, you may need to cut and remove some concrete in order to run new drain lines.
Tips:
- Start by finding the main drain line: Before planning out new plumbing, locate the main drain line and try to keep new drains as close to it as possible. This keeps things simple and reduces the amount of concrete you’ll need to break up.
- Use a sewage ejector pump if needed: If your basement plumbing sits below the sewer line level, installing a sewage ejector pump or macerator toilet will be essential.
- Install shutoff valves for easier maintenance: Adding shutoff valves can seem like a small detail, but it’ll make future maintenance a lot easier since it means your clients won’t have to shut off water to the entire house just to fix one issue.
- Finish insulating: Once all plumbing and electrical are installed and inspected, install any remaining insulation in the walls.
4. Finish the Walls
Explanation:
Once you start hanging drywall, the project really comes to life. You’ll install drywall, mud and tape the seams, and then sand them smooth. It’s a dirty job, but getting the drywall finished correctly really provides a polished look.
Tips:
- Cut clean openings for outlets and access points: Measure twice, cut once! Use the right tools (oscillating tool, roto zip, or a good old drywall saw) to get precise cuts for any electrical outlets, switches, or plumbing access points. The last thing you want is to realize you cut the hole too big when you’re installing faceplates after the basement walls have been painted.
- Keep the drywall off the concrete basement floor: If the drywall is touching the concrete floor, it can slowly absorb moisture and develop mold with time. To prevent this, leave at least a ½-inch space between the floor and the drywall.
- Check the drywall screw heads: Before getting out your mud and drywall tape, run a putty knife over all the screw heads to see if any are sticking above the surface of the drywall. This saves you time and hassle later on while mudding.
5. Install the Ceiling
Explanation:
A finished basement ceiling pulls the space together and hides things like ductwork, pipes, and wiring. A suspended ceiling (also known as a drop ceiling) is a popular choice for basements. A drop ceiling is easy to install and allows future access to utilities if needed.
Tips:
- Watch your ceiling height: Before installation, make sure your ceiling won’t drop below code requirements for ceiling height, especially in areas with low-hanging floor joists or pipes. Maintaining the right height keeps the room feeling spacious and compliant.
- Build soffits as needed: For pipes and ductwork that hang below ceiling height, you’ll need to build soffits around them. You need to plan for this before you reach the ceiling stage so you can frame and finish them during the early steps.
- Recessed lighting works best in low ceilings: For a clean, modern look, go with recessed lighting. It saves headroom and creates a streamlined appearance that works well with drop ceilings.
6. Paint
Explanation:
Different contractors may choose to paint at different stages of the remodel. If you paint before flooring, then you don’t have to worry about getting paint on your new floor. However, while installing flooring, you’ll likely nick or scuff the basement walls and you’ll need to touch them up. If you decide to paint after flooring, you’ll need to take extra steps to protect your new basement floors.
Tips:
- Stick with light colors to brighten things up: Since basements don’t get much natural light, lighter colors can make the space feel bigger and more welcoming. Soft whites, light grays, and pale blues are all good choices.
- Go with a satin or eggshell finish: Satin or eggshell finishes strike a good balance for basements. They’re easier to clean than flat paint but don’t highlight imperfections like high-gloss finishes.
7. Finish or Install Flooring
Explanation:
Flooring is one of the biggest factors in making a basement feel finished and inviting. Since basements are prone to moisture, the choice of flooring is important. Options like luxury vinyl plank (LVP) or tile are durable and work well in below-grade spaces. Carpet tiles can also add a cozy feel to family or play areas and you can easily replace individual tiles if they get stained or damaged.
Tips:
- Pick moisture-resistant options: LVP is a favorite for basements because it’s waterproof, durable, and gives the look of wood and laminate.
- Use underlayment for comfort and insulation: Adding underlayment beneath LVP or tile flooring makes the floor more comfortable and provides some insulation, which helps regulate temperature in the basement.
8. Install Lighting and Other Electrical Finishes
Explanation:
Lighting makes a huge difference in a basement. The right lighting can turn it from a dark, underutilized space into a welcoming extension of the home. Since most basements don’t get much natural light, it’s important to layer your light — ambient lighting, task lights, and accents.
Tips:
- Select fixtures before you run electrical: The type of fixtures you choose may determine how and where wiring is run. That’s why it’s important to help your client decide on fixtures before reaching the electrical finishes.
- Install dimmer switches for flexibility: Dimmer switches let you adjust the light levels to fit the room’s purpose, whether it’s a movie night in the home theater or a play area for kids.
- Use accent lighting for a finished look: Consider adding a few accents like under-cabinet lights or spotlights on key areas to add warmth and a polished look to the basement.
- Save money with fixtures: Fixtures can get expensive fast. There’s only so much you can do to save money on basic materials like drywall screws, lumber and insulation. But by choosing budget-friendly plumbing and electrical finishes, you can usually save hundreds or thousands of dollars when finishing a basement.
9. Furnish & Decorate
Explanation:
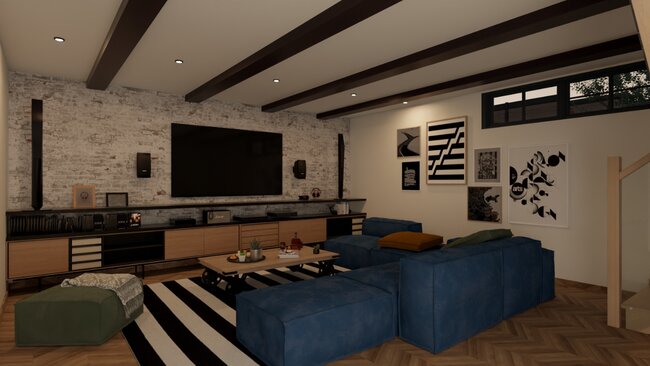
Now for the fun part of finishing a basement — furnishing and decorating. These final touches are what make a finished basement feel like home. Choosing the right furniture, decor, and accessories helps the space come alive. This is the chance to let your clients’ personality and style shine.
Tips:
- Use Cedreo 3D visualization software : With thousands of furnishings, decorations, and surface coverings available, Cedreo makes it easy to create custom finished basements faster than ever. Drag and drop design elements with Cedreo’s intelligent tools. And create realistic 3D renderings to get clients excited about your designs.
Start Designing Your Basement Today!
It’s easy to see why more homeowners want to plan a basement finishing project. Whether it’s simply adding a few basement walls or going for a high-end basement finish, finishing a basement adds to a home’s usable square footage and increases its resale value.
As a housing professional, having the right design and planning tools makes it easier to handle more projects and wow your clients throughout the entire process. That’s why more pros are turning to Cedreo.
Cedreo 3D design software is built for professionals like you. It helps you save time, deliver better presentations, and close more deals. Here’s some of what Cedreo can do for you:
- Quick layouts: Once you’ve got your measurements, it’s easy to draw foundation walls, interior walls, wood beams and more so you can take full advantage of every square foot of the space.
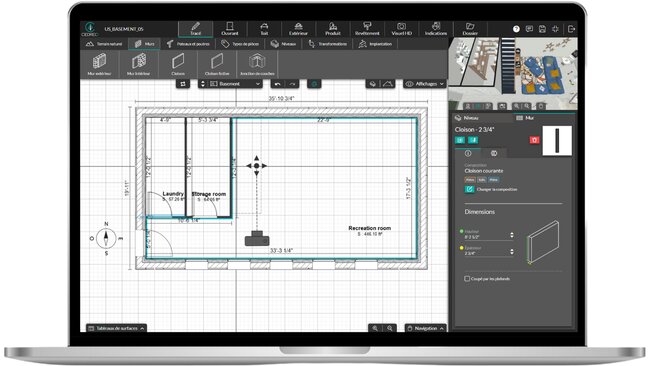
- Quickly visualize design choices: Create 3D renderings that help clients see exactly how their finished basement will look.
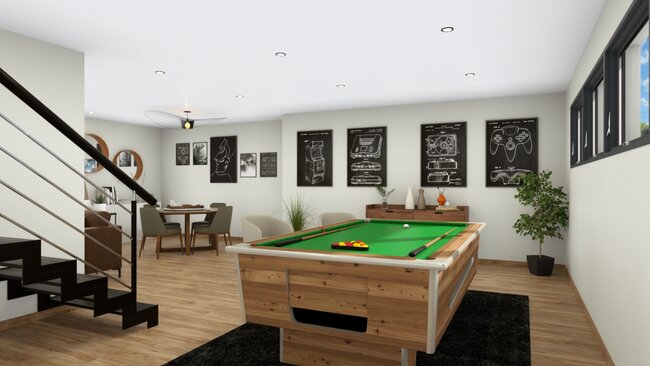
- Deliver high-quality presentations: Show clients realistic visuals that set your design apart and help them feel confident in their choices.
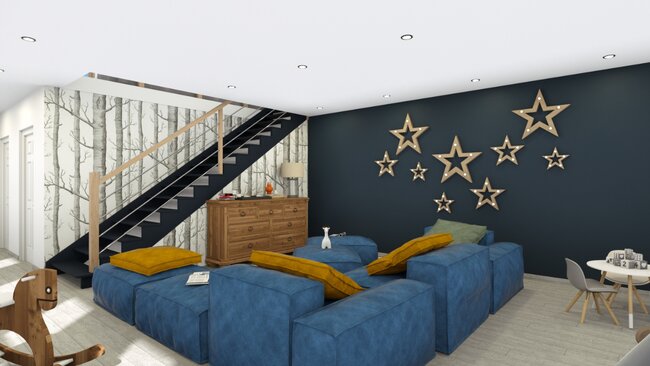
- Save time on every project: Simplify your workflow with intuitive tools that make designing, planning, and presenting faster and easier.
Try Cedreo for free today and take your basement designs to the next level!

