Are you a housing professional gearing up for a kitchen renovation project? Or maybe you’re trying to streamline your current remodeling process?
In this 10-minute read, we’ll guide you through the 9 essential steps of planning a kitchen remodel.
From understanding your client’s needs and desires to executing a flawless renovation, we’ve got you covered. Plus, we’ll give you a few insider tips that’ll help you streamline your design process and land more clients!
Let’s start with how to figure out what your client really needs.
Assess Needs & Wishes of Your Clients
Understanding your client’s vision is the foundational step in any successful kitchen renovation. Here are some tips for quickly assessing their needs and wishes:
Initial Consultation: Start with an in-depth discussion. Listen actively to their ideas, lifestyle, and any pain points they currently experience in their kitchen. Come up with a standard list of questions to ask clients before starting any project that’ll help you understand what they need.
Important! – Spend as much time as you need on this initial consultation. Keep in mind that the clients themselves may not know exactly what they want or need. So be prepared to help guide them.
Budget Discussion: Determine their budget early on. This will guide your planning and help you set realistic expectations.
Functionality vs. Aesthetics: Ask them about their priorities. Are they more focused on functionality, aesthetics, or a balance of both?
Layout Preferences: Explore their layout preferences. Do they prefer an open concept or a more traditional kitchen layout?
Appliance Wishlist: Discuss their appliance wishlist. Are they looking for high-end appliances or energy-efficient options?
Storage Needs: Inquire about their storage needs. Are they avid cooks who require ample pantry space or do they need more countertop space for meal prep?
Lifestyle Considerations: Consider their lifestyle. Do they entertain frequently, have a growing family, or rarely eat at home?
Style Preferences: Pin down their style preferences. Are they into modern, farmhouse, classic kitchen designs, or something else?
Timeline: Discuss their timeline expectations. Are they looking for a quick turnaround or are they flexible with the project duration?
This initial assessment sets the stage for a successful kitchen remodel, ensuring your clients’ dreams become a reality.
PRO TIP! – Relying solely on verbal communication to explain your kitchen design ideas can lead to a lot of misunderstandings. That’s why the pros use 3D design software like Cedreo to visually show clients their design ideas. That piques clients’ interest, manages their expectations, and helps them provide better feedback. And if you go with Cedreo software, you can get professional 3D renderings without needing 3D design experience!
9 Steps to Plan a Kitchen Renovation
Now let’s dive into the 9 basic steps you need to follow when completing any kitchen renovation.
1. Design the Layout with Floor Plan Software
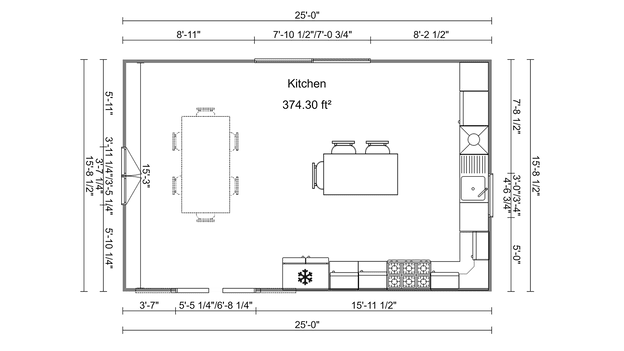
Every kitchen renovation begins with a basic layout. Use modern software like Cedreo and you can create a basic kitchen layout in a matter of minutes.
Cedreo then helps you create a more detailed layout in order to optimize the placement of appliances, cabinets, and workspaces. Add colors, fixtures, and textures from the design library. Once you’re done, you’ll have detailed 2D plans for your construction crew and photorealistic 3D images to impress your clients.
2. Demolition
The first physical step in your project involves the careful demolition of the existing kitchen. Demolition isn’t just about tearing things out. If you’re working in an already finished home, you have to be especially careful not to damage existing plumbing and electrical systems. You also need to think about how to contain dust and debris so you can keep the rest of your client’s house clean and livable. If you do careful and thorough demolition, it will help the rest of your project go much smoother.
3. Rough-In: Framing, Plumbing, Wiring, & HVAC
Most major kitchen remodels involve some type of electrical and plumbing work. And if you’re adjusting the wall layout, you’ll likely have to do some framing and reworking of ductwork or ventilation.
Spend the time you need to get the rough-in stage done right. If the rough-in stage is done well — according to the correct measurements and with all walls plumb and square — the installation of finishes will go much smoother.
4. Finish Walls & Ceilings
With the structural elements in place, it’s time to focus on the aesthetics. Insulate the walls and patch the drywall to create a fresh and clean canvas. Properly finished walls and ceilings provide the foundation for the transformation that lies ahead in your kitchen renovation.DON’T FORGET! – Remember to check local building codes. Before you get started make sure you know what you need in the way of permits and inspections. Most areas will need to inspect the plumbing and electrical work before you cover it up with drywall.
5. Get to Painting
Selecting the right paint colors is a critical aspect of the renovation process. That’s why it’s nice to use a program like Cedreo to test out different paint colors and see what they look like in the 3D images. PRO TIP! – It’s best to tackle the painting before installing flooring, cabinets and appliances. It’s much faster to paint the bare walls at this point rather than trying to paint later around cabinets and above newly installed flooring.
6. Install Flooring

The flooring material — whether it’s hardwood, tile, vinyl or laminate — plays a significant role in both aesthetics and functionality. Most choose to install flooring before installing the cabinets. If your client ever decides to change the cabinet layout in the future, they won’t have to redo their flooring as well. Once you’ve installed the flooring, protect it with cardboard or something similar so that it doesn’t get damaged during cabinet installation.
7. Install Finishes: Cabinets, Countertops, Backsplash & Fixtures
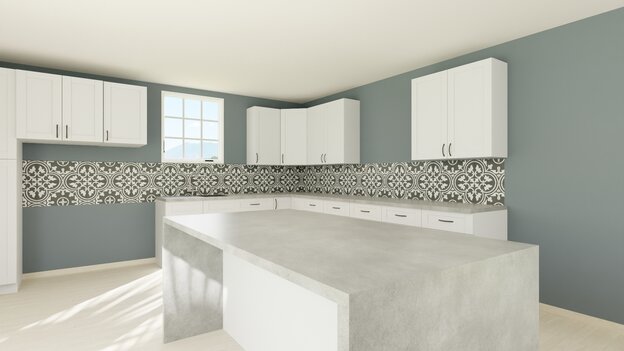
Now is the exciting time when the kitchen turns into a polished and functional area. Mount cabinets, install countertops, and add the backsplash to create a cohesive and visually appealing kitchen. Then install plumbing and electrical fixtures. If the rough-in was done correctly, this stage should go smoothly.
8. Install Appliances
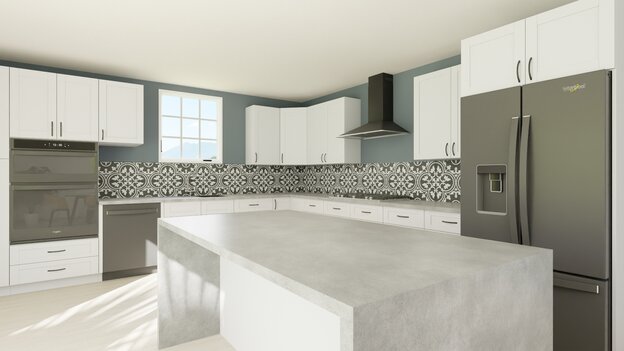
The kitchen’s almost done! Now it’s time to install the appliances. Make sure that each appliance is correctly hooked up to plumbing and electrical systems. A loose connection going to a refrigerator’s icemaker can cause a lot of damage to the newly finished kitchen.
9. Finish with Decor
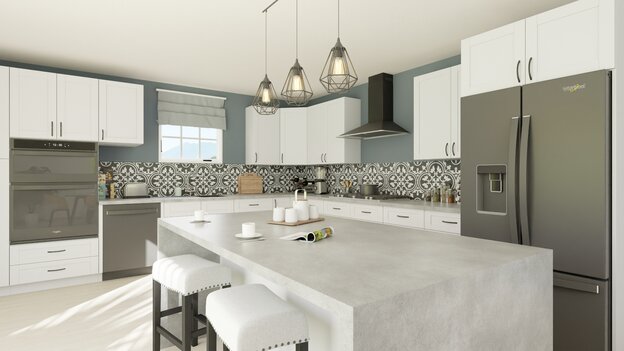
The final step is where your client’s kitchen truly comes to life. Add the finishing touches with decor elements such as accent lighting fixtures, window treatments and carefully selected kitchen accessories. These details inject personality and style into the space, and help your design stand out from the rest.
Cedreo’s design library has 1,000s of different pieces of furniture, decor, accessories and more! Add them to your 3D designs to personalize the space for your clients.
Planning a kitchen renovation can be an exciting journey with the right knowledge and tools. Don’t forget the nine essential steps, from designing the layout to adding the final touches. And remember to spend time getting to know what your clients really need and want from their new kitchen.
Throughout this process, Cedreo’s innovative floor plan software stands out as a valuable asset for remodeling professionals like you. With Cedreo home design software, you get:
- An easy-to-use interface for hassle-free design planning
- Precise layout optimization for appliances and finishes
- Amazing 3D renderings to improve communication and impress clients
- 1,000s of design options from the materials library
- World class customer support
With a FREE version, you’ve got nothing to lose. Sign up today and see what Cedreo can do for your next kitchen renovation project.

