Interior designers love coming up with fun and interesting ideas for their clients’ homes. However, it’s important not just to have those ideas in mind, but to clearly communicate them to clients through an interior design presentation.
When your clients see a detailed representation of the completed project, it’s easier for them to get excited about it and make better design decisions. Better interior design presentations reduce back-and-forth, streamline communication, and help you close more deals.
Fortunately, with design software like Cedreo, it’s easier than ever to create professional interior design presentations that wow your clients.
Ready to take your interior design projects to the next level and start landing more clients? Check out this 5-minute read with some pro tips for your next interior design presentation.
What’s Included in an Interior Design Presentation?
Depending on your client’s needs, an interior design presentation could include several different elements. Here are a few you should consider adding to your next presentation:
3D floor plan
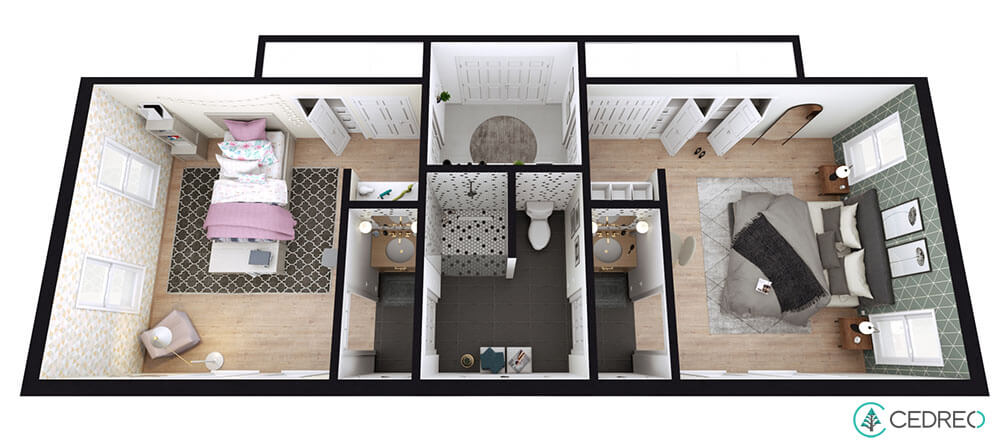
While 2D floor plans are traditionally included in most interior design projects, they can be hard for a lot of clients to understand. 3D floor plans, on the other hand, remove the guesswork and help bring your ideas to life. With Cedreo home design software, you can draw in 2D while instantly seeing the 3D plan view.
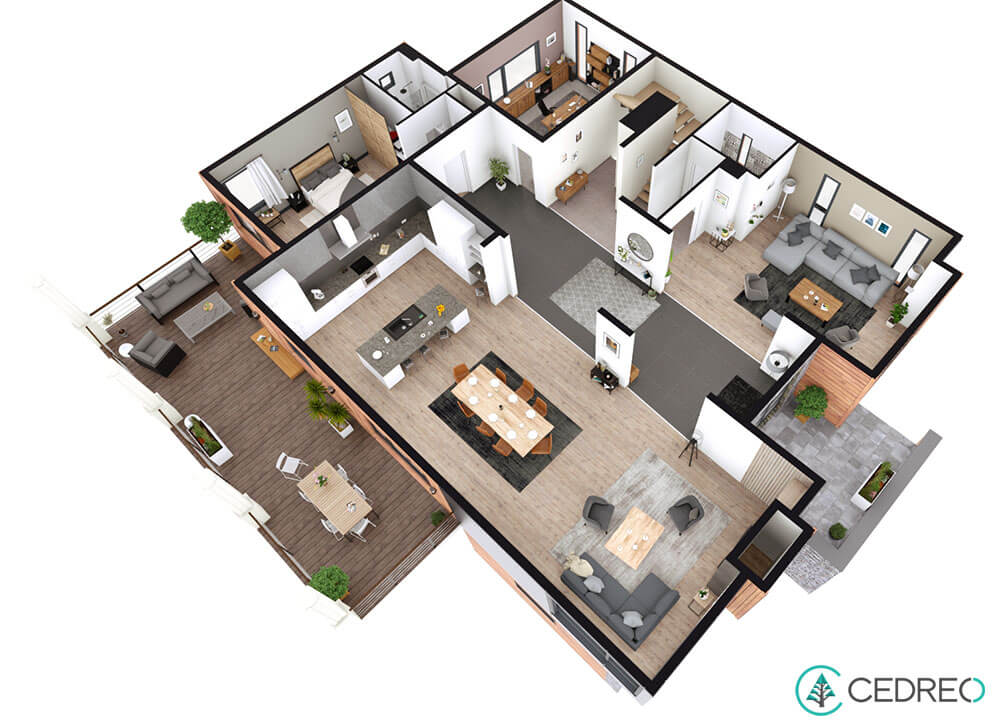
Showing your clients 3D plans will help them understand the size, layout, and flow of the space. This is especially helpful once you add furnishings.
Furniture plan
A furniture plan includes furniture with accurate measurements that show the exact space around each piece. Adding furniture to your 3D plans helps clients visualize the actual shape, color, and texture of each piece in combination with the rest of the decor.
With Cedreo design software, you can quickly switch out furniture pieces based on feedback from your clients.
Material samples
Samples are an important part of design presentations. Try adding them to a mood board so your clients can see, touch, and feel the different materials. Most clients appreciate seeing physical samples ofs tile, paint swatches, furniture fabric, and wood finishes.
Budget
Before even starting a project, you should have gotten a target budget from your clients. If it’s a large project, it’s best to break down the cost per room and/or each aspect of the design. You can also show the different costs based on what options they choose.
Renderings
Realistic 3D renderings are becoming more and more important in modern interior design presentations. These show a 3D view of your project complete with details like interior lighting, sunlight, shadows, and textures.
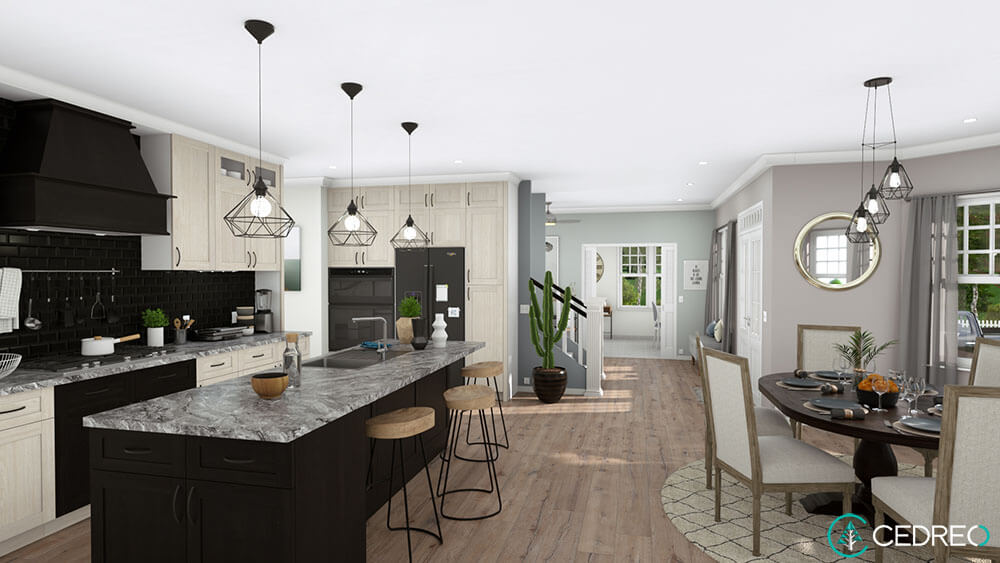
Although they used to be expensive and complicated to create, with Cedreo, you can get photorealistic renderings of your design with just one click.
3 Types of Interior Design Presentations
Depending on what stage of the project you’re in, presentations can take on a variety of forms. Here are some of the most common types of project presentations:
Mood Boards
Mood boards are a collage of images, samples, and plans that show certain design ideas for your client’s project. They’re a great place to start, as they give you an easy way to present the style and “flow” of your ideas.
You can create a physical mood board with a simple foam board and samples, clippings, or images of ideas you’d like to pursue. Alternatively, you can use basic graphic design software to make a digital mood board.
Although you might be tempted to fill the mood board with every option available, it’s best to keep it simple and uncluttered. If needed, you can create several complete mood boards and let your clients choose which they like best.
This type of presentation is an important step that helps you determine your client’s preferences before moving on to sketching the design in detail.
Sketches
Hand-drawn sketches used to be the cornerstone of interior design presentations. However, they are quickly being replaced by more advanced 3D renderings (see the next section).
If you’re able to create professional sketches to showcase specific details of the project, that can be a nice way to impress your clients with your skills and attention to detail. Just keep in mind that a poorly drawn sketch can actually lead to clients feeling more confused than enlightened. That’s why most modern designers use a digital tool like Cedreo to create realistic 3D renderings.
3D Renderings
Photorealistic 3D rendering presentations are how you really seal the deal. Presentations like these help you stand out as a design professional.
They’re a big step towards making clients happy, because you can show them exactly what the finished project will look like. This gives your clients clear expectations and saves you both from unnecessary frustration.
To create high quality renderings you need a program like Cedreo 3D rendering software. Fortunately, Cedreo is easy to use. That means even with no previous experience you can quickly create top-quality renderings.
Benefits
Of all the types of interior design presentations, 3D renderings are the most powerful, because they:
- Show your client exactly how the end project will look
- Lead to faster design decisions
- Are easy to create and present thanks to Cedreo interior design software
Learn more about how to use Cedreo to create interior design renderings.
6 Steps to Create a Professional Interior Design Presentation
Whether you’re new to the design business or you’re a design pro looking to expand your portfolio, you can create a professional interior design presentation in just six steps.
Pro Advice! These steps are easiest with an interior design tool like Cedreo.
1. Sketch your initial design concept
Start by putting some of your initial design concepts down on paper. Draw a basic layout of the space and make note of its dimensions (this will help you in step 2). Sketch out ideas you might have for each area. Then add any other comments that you should keep in mind while creating the rest of your presentation.
2. Draw a 3D floor plan
The next part of the design process is to create the floor plan. A floor plan is essentially the container for all your creative ideas, so this is an important step.
Most design programs make you follow extra steps in order to produce 3D home plans. But with Cedreo, as you draw your layout in 2D, you instantly see the 3D view of the plan. This gives you immediate design feedback that comes in handy as you start to decorate the space.
3. Choose a design atmosphere
At this point, you’ve already spoken with your client to determine their tastes and styles. Before you start furnishing a space, it’s important to have this clearly in mind.
You can select a pre-made design atmosphere that lets you “set the mood” for a particular design. Choose from visual styles like contemporary, modern, or charming. Then, instead of having to sift through thousands of pieces of furniture, decor, and materials, you’ll only see the ones that fall under your selected style.
4. Furnish and decorate each room
Whether you’re going with a specific design atmosphere or want the flexibility to choose each piece yourself, Cedreo has what you need. Cedreo’s extensive design library gives you 7,000+ pieces of furniture and decorations to choose from. That means you have the flexibility to find the right combination of pieces to fit your client’s tastes.
And if you’re running short on time, Cedreo also gives you pre-made product packs for different rooms types. Choose one of these and you can decorate a room with the click of a button.
5. Customize surfacing and materials
Now it’s time to fine-tune the details. If you already presented your clients with a mood board, you probably have an idea of what textures, colors, and materials they like. Customize your 3D plans with those materials.
Use Cedreo, and you’ll be able to choose from thousands of different surface materials like fabrics, wood, tile, paint, and more. Then just drag-and-drop the materials to virtually any surface of the home. This gives you more power to customize every aspect of the space from flooring to furniture.
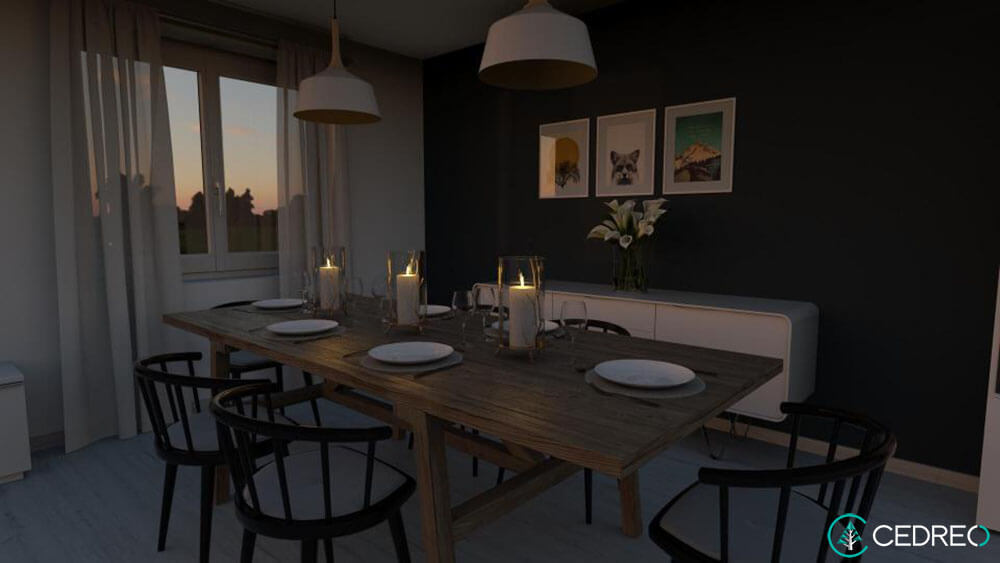
6. Adjust light settings
Now that you’ve got all the details of your design concept in place, it’s time to prepare for the 3D renderings. An important part of that is controlling the lighting. Showing a space with an accurate mix of both artificial and natural light is essential for providing clients with a realistic visual of their space. But doing something like this in a normal CAD program is highly technical and difficult.
If you’re using Cedreo for this step, you can let the software manage the interior lighting and sun orientation automatically. And if you want to control the lighting manually, it takes just a few seconds. Once the lighting and point of view are set, submit your design for rendering and in just 5 minutes, it’ll be ready for your client.
Share and collect feedback
Once you’ve got your renderings, it’s time to share them with your team and clients. Just download the 2D plans, 3D plans, and 3D renderings in popular image formats. These are easy to send to your clients or even add to a digital mood board. Choose the Enterprise Plan with Cedreo for streamlined collaboration, and you can share designs with your team inside the platform.
Once you receive feedback, make any final adjustments to the design. Since Cedreo is cloud-based, anywhere you have a laptop and internet connection you can quickly update the plans online and download the latest version for your clients.
Ready to Create Better Interior Design Presentations?
Ready to take your interior design presentation to the next level? There’s no better place to start than with Cedreo home design software. It’s engineered to save designers like you loads of time. Make your clients happy and close more deals. Start using Cedreo today!