Knowing what to prepare and communicate at each phase of construction is what separates organized builders from the ones who spend their days reacting.
Every builder knows the construction phases on paper.
Design, permits, foundation, framing, rough-ins, finishes.
You could recite them in your sleep.
But here’s the part that actually costs you money: the handoffs between those stages.
That’s where the “I thought that was included” conversation starts.
That’s where a client decides the kitchen island should move after the plumbing is already roughed in.
One change order at the wrong moment can wipe out your margin and blow up a subcontractor schedule you spent weeks lining up.
Most construction projects don’t fall apart because someone forgot how to frame a wall.
They fall apart at the seams between phases.
This guide walks through every phase of residential construction projects, but with a sharper goal than most.
We’ll show contractors and builders how to manage client expectations and lock in scope early, so the back half of the construction process runs clean.
Key Takeaways
- The construction process runs through six core phases, and the most expensive mistakes happen at the handoffs between them, not inside any single stage.
- Roughly 90% of your client communication should be front-loaded into the design phase, where a change costs minutes instead of weeks.
- Setting a clear “no changes” milestone protects your schedule, your margin, and your relationship with the client.
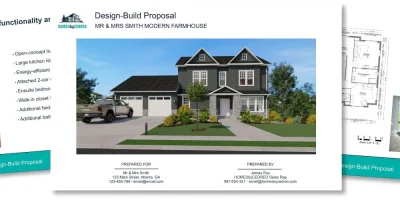
- Cedreo helps builders lock in scope early by turning 2D plans into photorealistic 3D renderings clients actually understand.
Why trust us? Here at Cedreo, we’ve got 20+ years of experience working with housing pros in the home design space. So we know what it takes for contractors and builders to create project designs that help them streamline their projects!
See How You Can Create Complete Projects with Cedreo
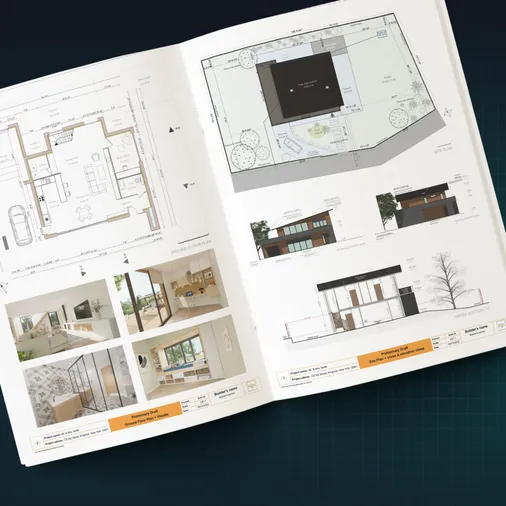
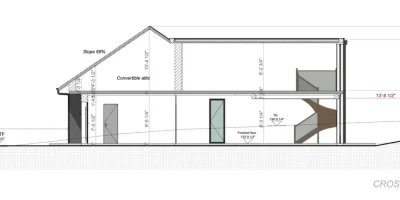
Plans – Get site plans, 2D floor plans, electrical plans, cross sections and elevation views — with all the technical details you need for a comprehensive project overview.
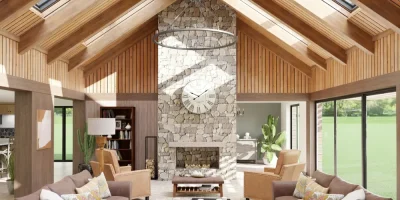
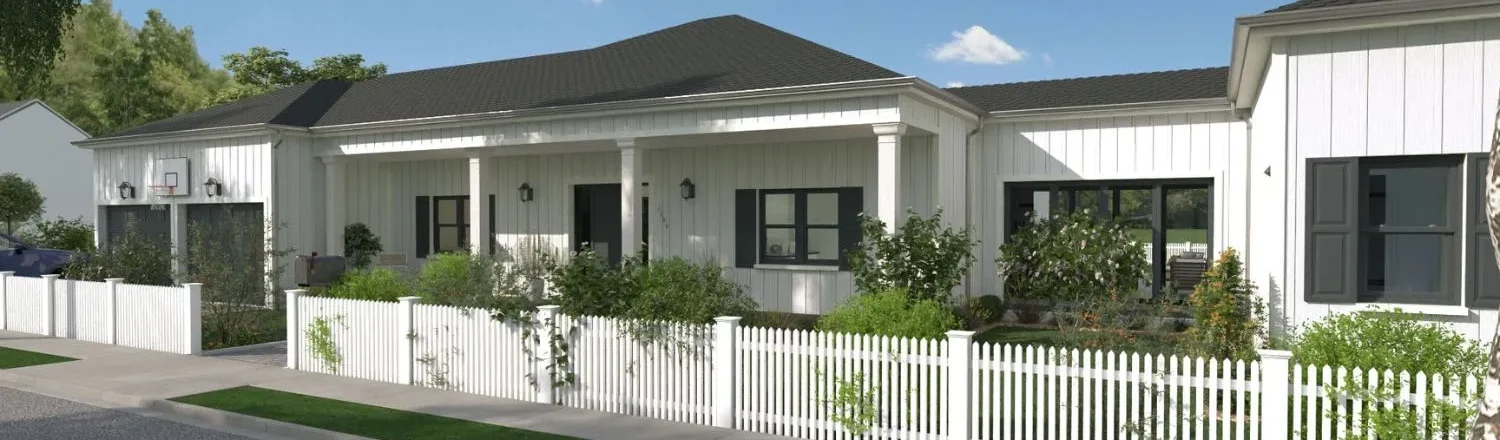
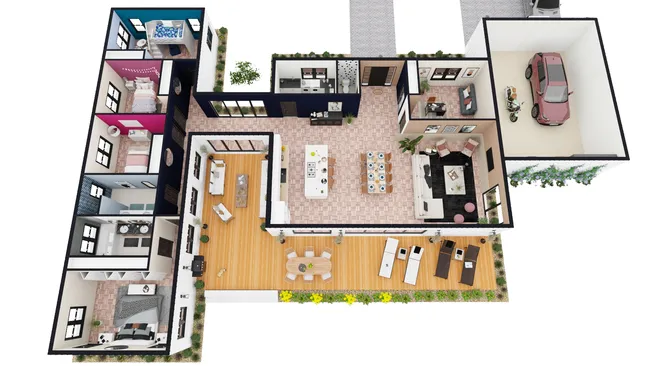
3D Visualizations – Use interior and exterior 3D renderings as well as 3D floor plans to help clients understand the finished project.
Documentation – Manage all your visual documents in one place, so it’s easier to present and sell your projects.
No credit card required, no commitment
Why Construction Phase Management Matters for Builders
Managing the construction phases well is how you control scope, set client expectations, and protect your profit on every job.
A clear phase breakdown does three things at once:
- Sets client expectations: Clients stop expecting the impossible mid-build.
- Scopes subcontractor work: Each construction stage tells your subs what they own and when.
- Prevents disputes: A documented project scope kills the gray area before it starts an argument.
Most construction projects go sideways for a project management reason, not a building one.
And the cost of any change climbs the deeper you are into the construction project life cycle.
A tweak during design costs minutes.
The same change after framing means torn-down work, idle subs, and a blown project timeline.
Late design changes are the single biggest threat to your construction costs and your margin.
That’s why strong construction project management starts with a tight scope of work your project teams agree on before anyone breaks ground.
| When the change happens | What it costs you |
| Design phase | A few minutes of edits in the model |
| After permits | Redrawn plans and a possible re-submittal |
| After framing | Demo, rebuild, and idle crews |
| After rough-ins | Reopened walls, reordered materials, blown schedule |
What Are the Phases of Construction Every Builder Must Manage
Most residential construction projects follow six phases, from design through final handoff.
Here’s a quick, high-level roadmap of the build.
| Phase | What happens | Your job at this stage |
| 1. Design & Pre-Construction | Plans, 3D visuals, material selections, budget lock-in | Set expectations and lock the scope |
| 2. Permitting & Approvals | City review, zoning, HOA sign-off, building permits | Keep clients calm during the wait |
| 3. Site Prep & Foundation | Clearing, grading, proper drainage, footings, slab | Confirm site conditions before pouring |
| 4. Framing | Walls, floors, and roof structure go up | Run a progress walkthrough, not a change session |
| 5. Rough-Ins (MEP) | Mechanical, electrical, and plumbing systems | Close the door on changes before drywall |
| 6. Finishes & Handoff | Paint, trim, fixtures, punch list, final inspections | Set realistic timelines for the last 10% |
It all starts with the design and pre-construction phase…the MOST important step.
Phase 1: Design Phase (The Most Important Step)
Phase 1 is where you win or lose the entire project.
Get it right and Phases 2 through 6 mostly take care of themselves.
Rush it, and you’ll pay for every shortcut with change orders, construction delays, and tense client meetings down the line.
Think of the design phase as your lock-in period.
On most construction projects, Phase 1 quietly decides the outcome.
That’s why one of the key aspects of a smooth build is locking the design before crews arrive.
This is the window where you nail down the design, materials, and budget while changes are still cheap.
It’s also where you confirm the build is feasible.
Run quick feasibility studies and a realistic cost estimate before you commit, so the design matches real construction costs.
Then lay out the budget constraints with the client early.
When they see honest numbers up front, they make informed decisions instead of emotional ones.
The smartest builders we work with treat 3D modeling in construction as the backbone of this stage, because it’s the fastest way to get a client to truly understand what they’re buying.
PRO TIP! Front-load 90% of your communication into Phase 1. Every hour you spend aligning the client on design, materials, and scope before the build starts saves you days of rework once crews are on site, and it keeps Phases 2 through 6 running smoothly.
Here’s more about how you can do that.
Setting Client Expectations Early with 3D Visuals
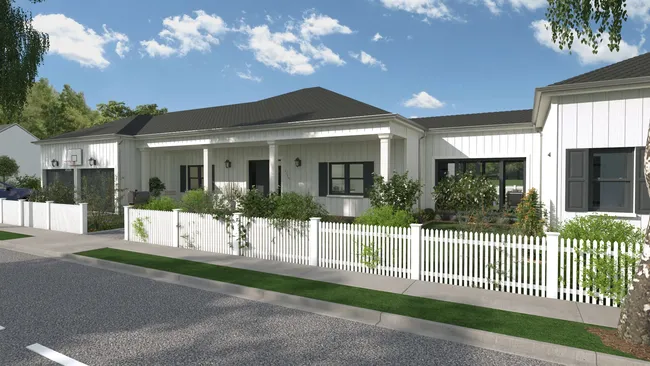
Most homeowners can’t read a 2D blueprint, so the fastest way to set real expectations is to show them a 3D rendering of the finished space.
Here’s something most builders learn the hard way.
Your client smiles and nods at the blueprint.
But they don’t actually understand it.
Most homeowners lack the spatial awareness to translate flat lines into rooms, ceiling heights, and sightlines.
They’re approving something they can’t really picture.
Then the walls go up and you hear it: “I didn’t know it would look like this.”
That happened because you both looked at the same floor plan, but imagined different final results in your heads.
That’s why 3D images are so useful during this construction stage.
A photorealistic 3D rendering works like a visual contract.
When clients see exactly how the space will look, feel, and flow, that excuse disappears.
The builders we work with use pre-construction design software to show clients the 3D design before a single permit gets pulled.
When you show 3D visuals instead of just flat 2D plans, you get emotional buy-in (the client gets excited) while quietly setting hard visual boundaries on the scope of work.
Cedreo advantage Cedreo turns your 2D floor plan into photorealistic 3D renderings in about five minutes, so clients approve the actual design instead of their imagination of it. That single step quietly removes the most common source of change orders.
Locking in Material Choices Before Breaking Ground
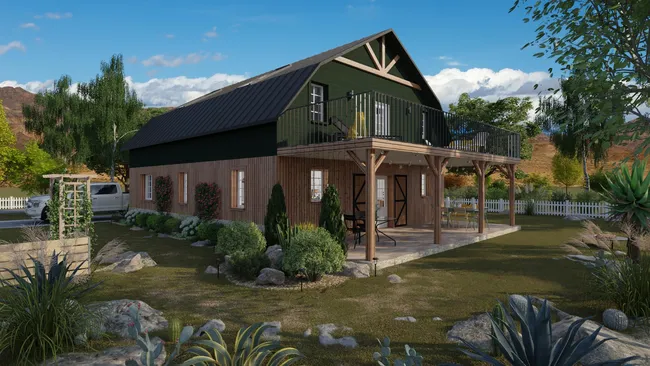
Every major material choice should be finalized and signed off before Phase 2, because swapping materials mid-build is where budgets and schedules fall apart.
Mid-build material swaps are schedule killers.
A client who changes their mind on flooring after the order is placed triggers supply chain delays, restocking fees, and idle crews.
Indecision in Phase 1 is cheap.
Indecision in Phase 4 is brutal.
So make it a rule: every major selection gets finalized and signed off before you move to permitting.
That means cabinets, flooring, windows, plumbing fixtures, and exterior finishes.
Put it in writing and tie it to the exact design the client approved.
And here’s the math that wins the argument.
Swapping a material in a 3D model during the design phase takes about five minutes.
Swapping it on the jobsite can take five weeks.
That gap alone is the case for getting every finish decided while it still lives in software.
Phases 2 to 6: Building Permits, Framing, Rough-Ins, and Finishes
Once Phase 1 is locked, the rest of the build is less about construction know-how and more about client and crew management.
You already know how to frame a house.
The skill that protects your margin through the construction execution phase is guiding the client through stages where they feel anxious, impatient, or tempted to tweak things.
This is where project execution lives or dies on communication, not craftsmanship.
Manage these stages well and the entire project stays on track.
Here’s how to handle each one.
Managing the “Quiet” Parts of the Construction Process (Permits & Approvals)
Permitting is the waiting game.
From the client’s seat, it looks like you’ve gone dark.
No trucks, no noise, no progress.
That silence breeds doubt, and doubt breeds phone calls.
So get ahead of it.
Building departments treat construction projects differently by jurisdiction, so know your local timeline.
Tell clients up front that building permits and approvals can take weeks, and that “quiet” is normal, not a red flag.
Send a short status note even when there’s nothing new to report.
“Still in review, here’s where we stand” beats radio silence every time.
One more payoff from a strong Phase 1: a complete, accurate permit package that meets local building codes and regulatory requirements moves through review faster, which shrinks this dead zone.
A package that satisfies those regulatory requirements the first time spares you a painful round of revisions.
Once the city signs off and final approvals come through, you’re cleared to break ground.
The Framing Walkthrough: Show Progress, Not Options
Once framing is up, schedule a walkthrough to show progress and make clear it’s a tour of the work, not an invitation to make changes.
Framing is the first time the project feels real to the client.
Walls define rooms. Doorways frame views. It’s exciting for the client.
The purpose of this walkthrough is simple: show progress and build confidence.
Walk them through the space and point out how the design they approved is taking shape.
But set the frame before you go in.
This is a progress tour, not a design session to “see if they like it”.
PRO TIP! Before the framing walkthrough, remind the client that structural changes at this stage mean reopening approved plans and re-pulling permits.
The “No Changes” Milestone Every Project Needs
Set a hard deadline, typically once rough-ins are done and drywall is about to go up, after which no more major change orders are accepted.
Every project needs a point of no return.
Define it early and put it in the contract.
It’s the boundary that keeps construction projects profitable.
The natural line is the end of rough-ins, right before drywall.
Once the mechanical runs, electrical systems, and plumbing systems are buried in the walls, every change means cutting back open what you just closed.
Tell the client this on day one, not the day you have to enforce it.
“After rough-ins, the design is final” is a fair, clear boundary that protects everyone, including the client’s budget.
Finish Work Patience: Why the Last 10% Feels the Longest
The final phase of paint, trim, fixtures, and the punch list often feels slower than the entire build before it, so set that expectation before clients get antsy.
Finish work is where timelines feel like they stall.
The house looks almost done, so clients expect the keys any day.
But the last 10% (paint, trim, hardware, punch list, and final inspections) is detail-heavy and slow by nature.
So set this expectation early.
Tell clients the finishing stage takes longer than it looks, and explain why.
Each punch-list item is small, but there are dozens of them, and final inspections run on the city’s clock, not yours.
A client who expects a slow finish stays calm all the way to project completion.
A client who expects instant keys starts calling.
Close-Out and Handoff: Turning a Build Into a Referral
Close-out turns a finished build into a completed project the client is happy to sign for.
Project closeout is the bridge between active building and the post construction phase.
Before you hand over the keys, work through the essentials:
- Walk the punch list one last time and clear every open item.
- Schedule and pass the final inspections, then collect the final approvals from the city.
- Hand over warranties, manuals, and a few proactive maintenance tips for the homeowner.
- Run a short post project evaluation with your crew to capture lessons.
A smooth handoff at project completion is the clearest sign of project success.
Client satisfaction here drives better project outcomes and referrals on every one of your construction projects.
Preventing Delays: Why Pre-Construction Planning Dictates Build Speed
The speed of your build is mostly decided before you break ground, because thorough construction planning removes the guesswork that causes mid-build delays.
Most builders blame the weather or the supply chain.
Those play a part, but the delays you can actually control trace back to Phase 1.
Across the project life cycle, the cheapest place to solve a problem is always the design phase.
The Domino Effect of a Solid Phase 1
A well-run design phase sets off a chain reaction in your favor across the whole construction project life cycle.
- Faster permitting: Complete, accurate plans clear review with fewer rejections.
- Zero guesswork for subs: Crews show up knowing exactly what to build, so rough-ins go smoothly.
- No torn-down drywall: A locked project scope means nothing gets reopened after the fact.
In our experience working with housing pros, most construction delays trace back to a decision that should have been made in Phase 1 and wasn’t.
A thorough pre-construction process is the cheapest insurance you can buy against a slow, chaotic build.
Protecting the Builder-Client Relationship
Clear phases don’t just protect your schedule, they protect the relationship.
You’ve seen how it goes on a messy job.
By the finish line, the builder and client are basically adversaries, arguing over who said what.
Locked-in designs and defined construction project phases keep everyone on the same side of the table.
When it’s documented that the client approved the design, the scope, and the timeline up front, there’s nothing left to fight about later.
And builders who keep clients happy through closeout almost always win the referral too, which is how you grow a construction business without pouring more money into ads.
Design Better So Construction Phases Go Smoother
The construction phases haven’t changed in decades.
What separates builders who profit from those who scramble is how they manage the handoffs between stages on their construction projects.
Front-load communication, lock in scope early, set a clear no-changes line, and give clients visuals they actually understand.
With construction design software like Cedreo, you can:
- Turn 2D floor plans into photorealistic 3D renderings in minutes
- Lock in materials and finishes clients sign off on before the build
- Present a clear, professional design that sets expectations from day one
Sign up for a free account today!
Construction Project Phases FAQs
What are the phases of residential construction?
The residential construction process follows six stages of construction: design and pre-construction, permitting, site prep and foundation, framing, rough-ins, and finishes with handoff.
Builders and other construction professionals lean on Cedreo in the design phase to lock the plan before the later phases of construction begin.
How long does each construction phase take?
Timelines vary with project size, but permitting can run weeks to months while site prep handles the site conditions and framing moves building construction into active construction on the construction site.
A design locked early in software like Cedreo helps keep the whole construction project life cycle predictable from start to finish.
What is the most important phase of construction?
The design and pre-construction phase matters most, because its decisions drive cost, project scope, project viability, and other key aspects of the project lifecycle.
Clearly documented client sign-off on an easy-to-understand 3D design helps prevent most change orders and protects project success.
How do builders manage multiple phases at once?
On many construction projects the phases overlap, so builders and their project managers use construction project management tools to track progress and keep all the parties aligned across every set of construction project phases.
How do I keep clients from making changes during the framing phase?
Getting client feedback from 3D project designs and documenting their approval is an important step that helps manage expectations and reduce change orders later on.
You can also set a clear no-changes milestone in the contract and make it clear how change orders are handled and billed.
What are the 5 phases of construction project management?
Classic construction project management splits a build into initiation, project planning, project execution, monitoring, and closeout, guided by a strategic plan and risk mitigation strategies.
Cedreo supports the earliest stage, where strong project planning and a clear design shape the whole project lifecycle.